In September 2023, I took a nasty fall on the final stage of Trans Madeira landing straight on my head. I got a concussion and destroyed my helmet. The helmet did its job and cracked on impact, dissipating some of the energy. Luckily I bounced back after a couple weeks of concussion protocol. While it was a bummer to end the event like that, I did save myself the hassle of traveling back with a bulky full-face helmet!.
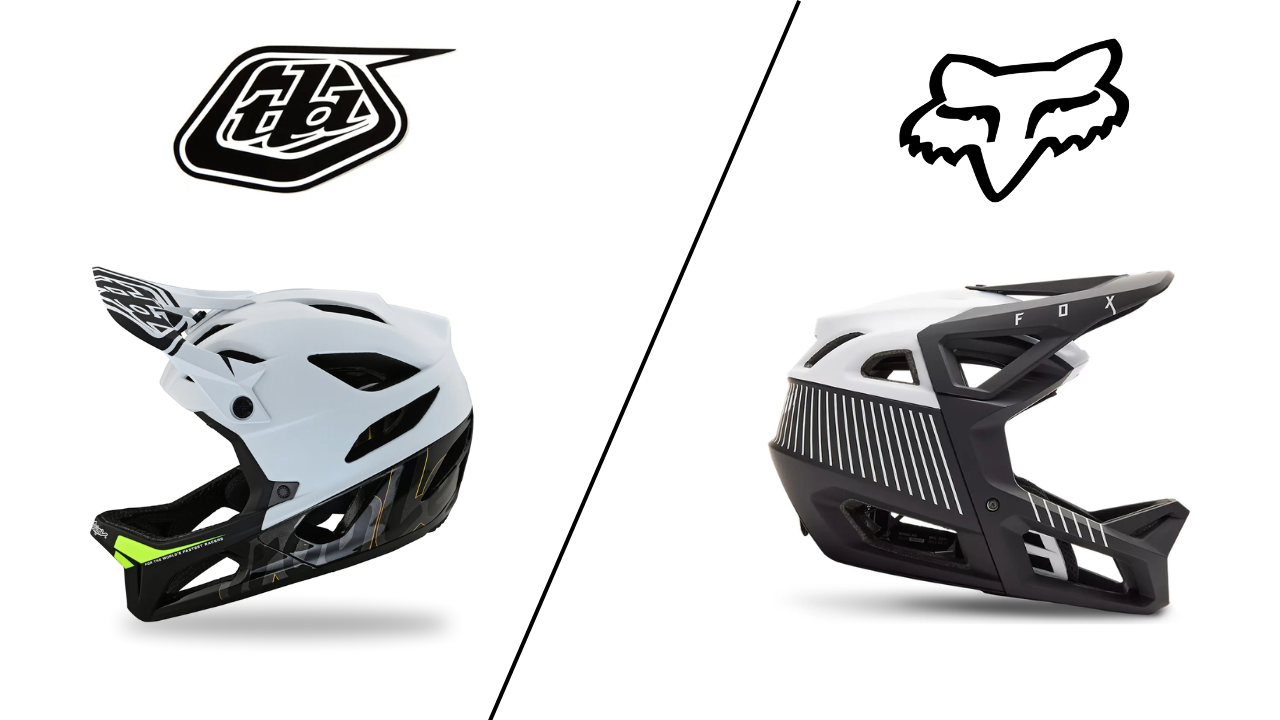
When I returned home, I was in the market for a new full-face helmet. I really loved my Troy Lee Designs Stage but was also curious about trying on some of the popular models I saw riders wearing during Trans Madeira. I was spending a few months in SLC at the time, so I headed over to the Backcountry.com warehouse to try a few helmets on. I tried the POC Otocon, Smith Mainline, Fox Proframe, and Fox Proframe RS. After trying on all of those, the Fox Proframe RS stood out the most.
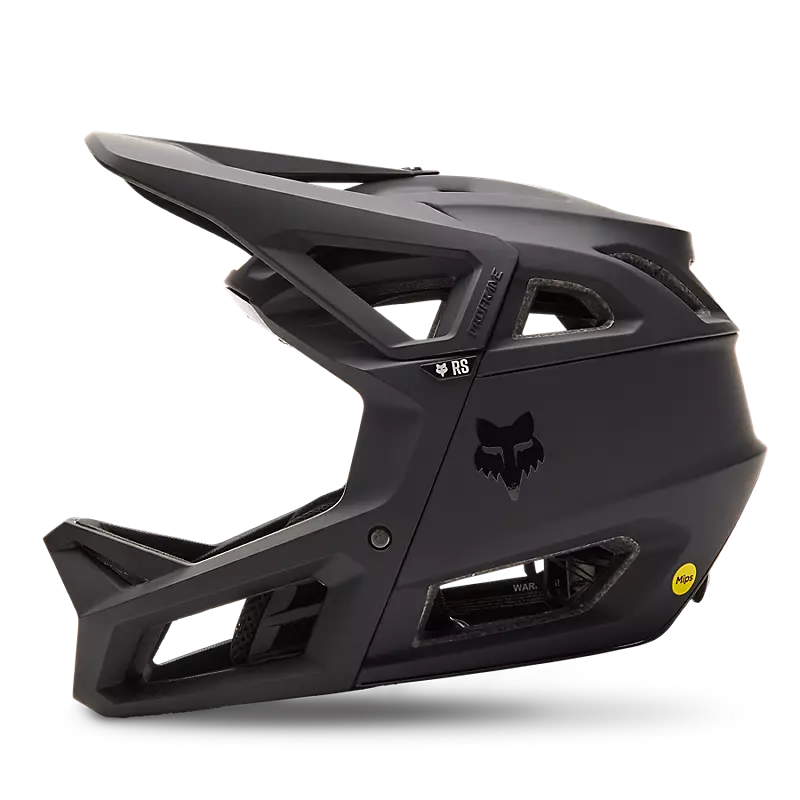
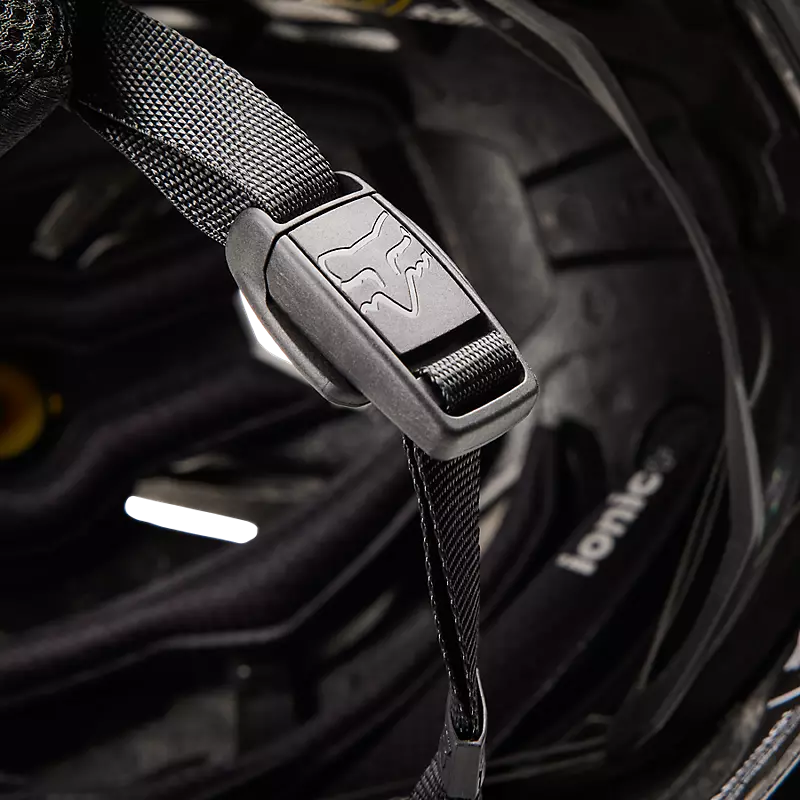
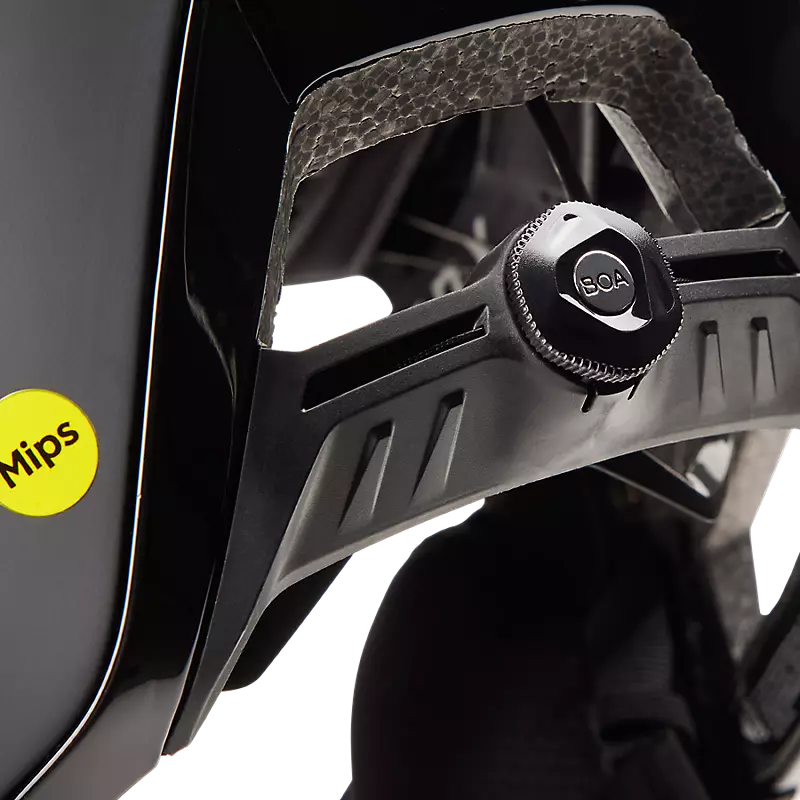
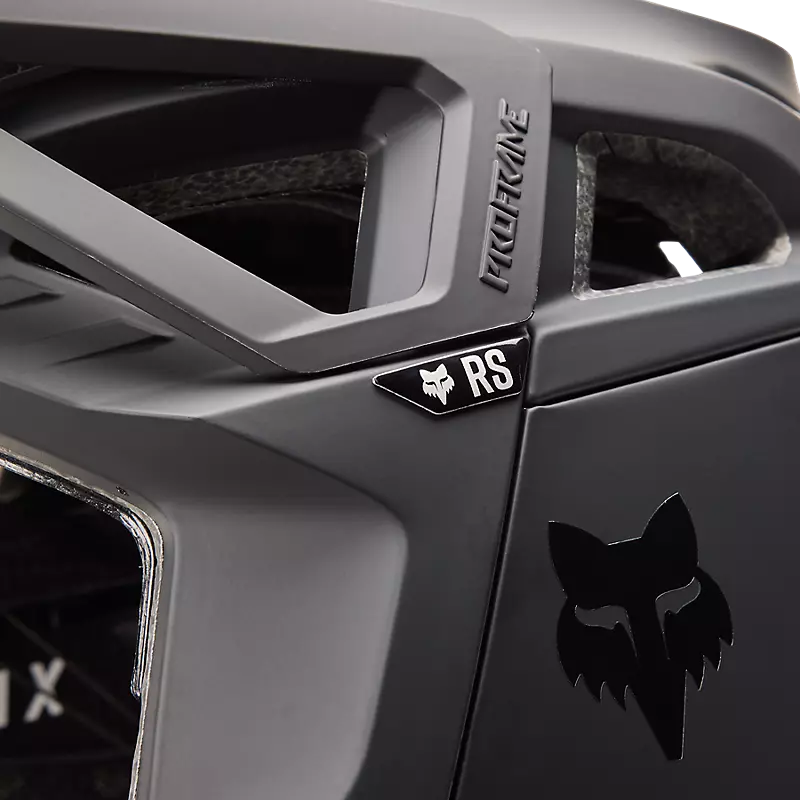
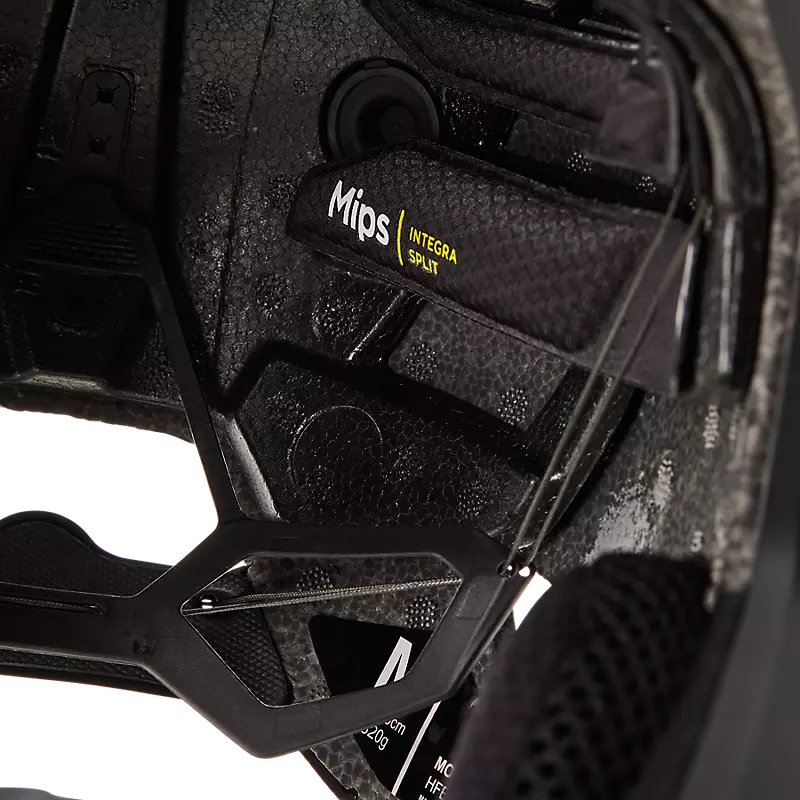
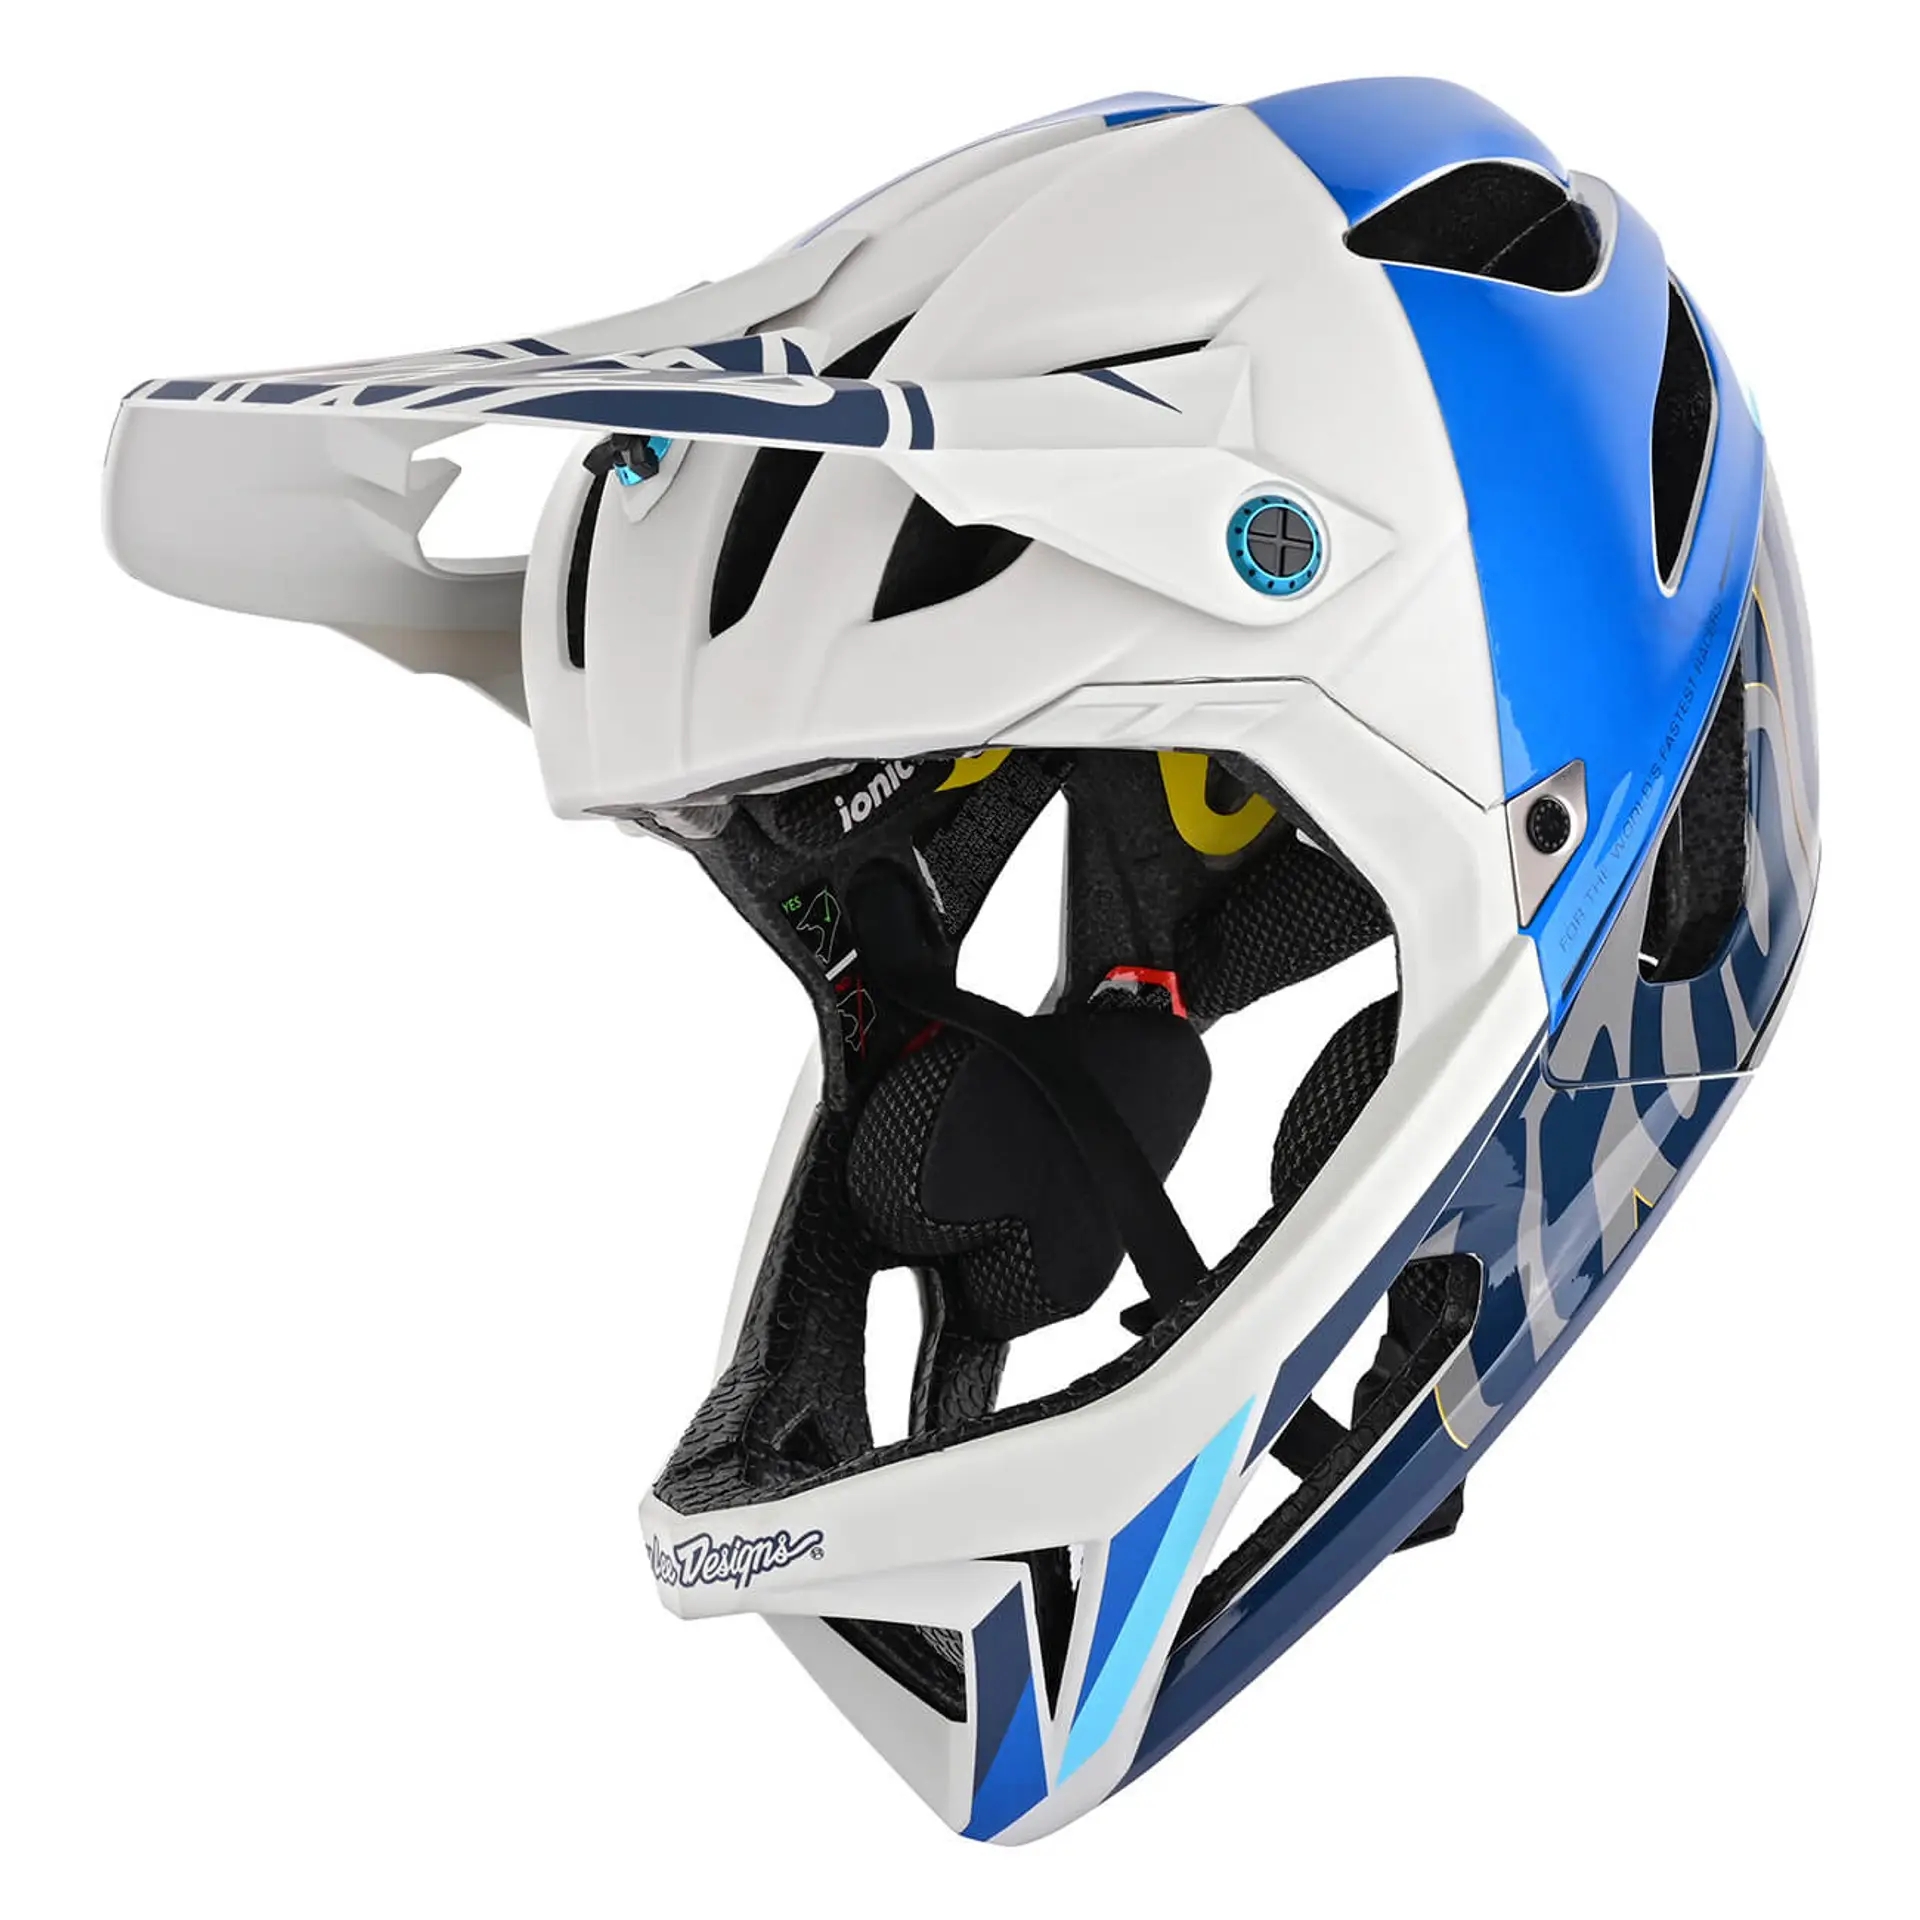
Fox Proframe RS
The Proframe RS feels light and airy, similar to the TLD Stage. It has MIPS and a magnetic chin strap, which are a requirement for me. I can’t be bothered by a D ring at this point in my life! Another aspect I like about the RS is the BOA System. It gives the helmet a really secure fit. At the same time, I felt that the plastic strap of the boa would irritate my scalp since I have a shaved head. If it weren’t for that, I would have opted for Proframe RS over the TLD Stage.
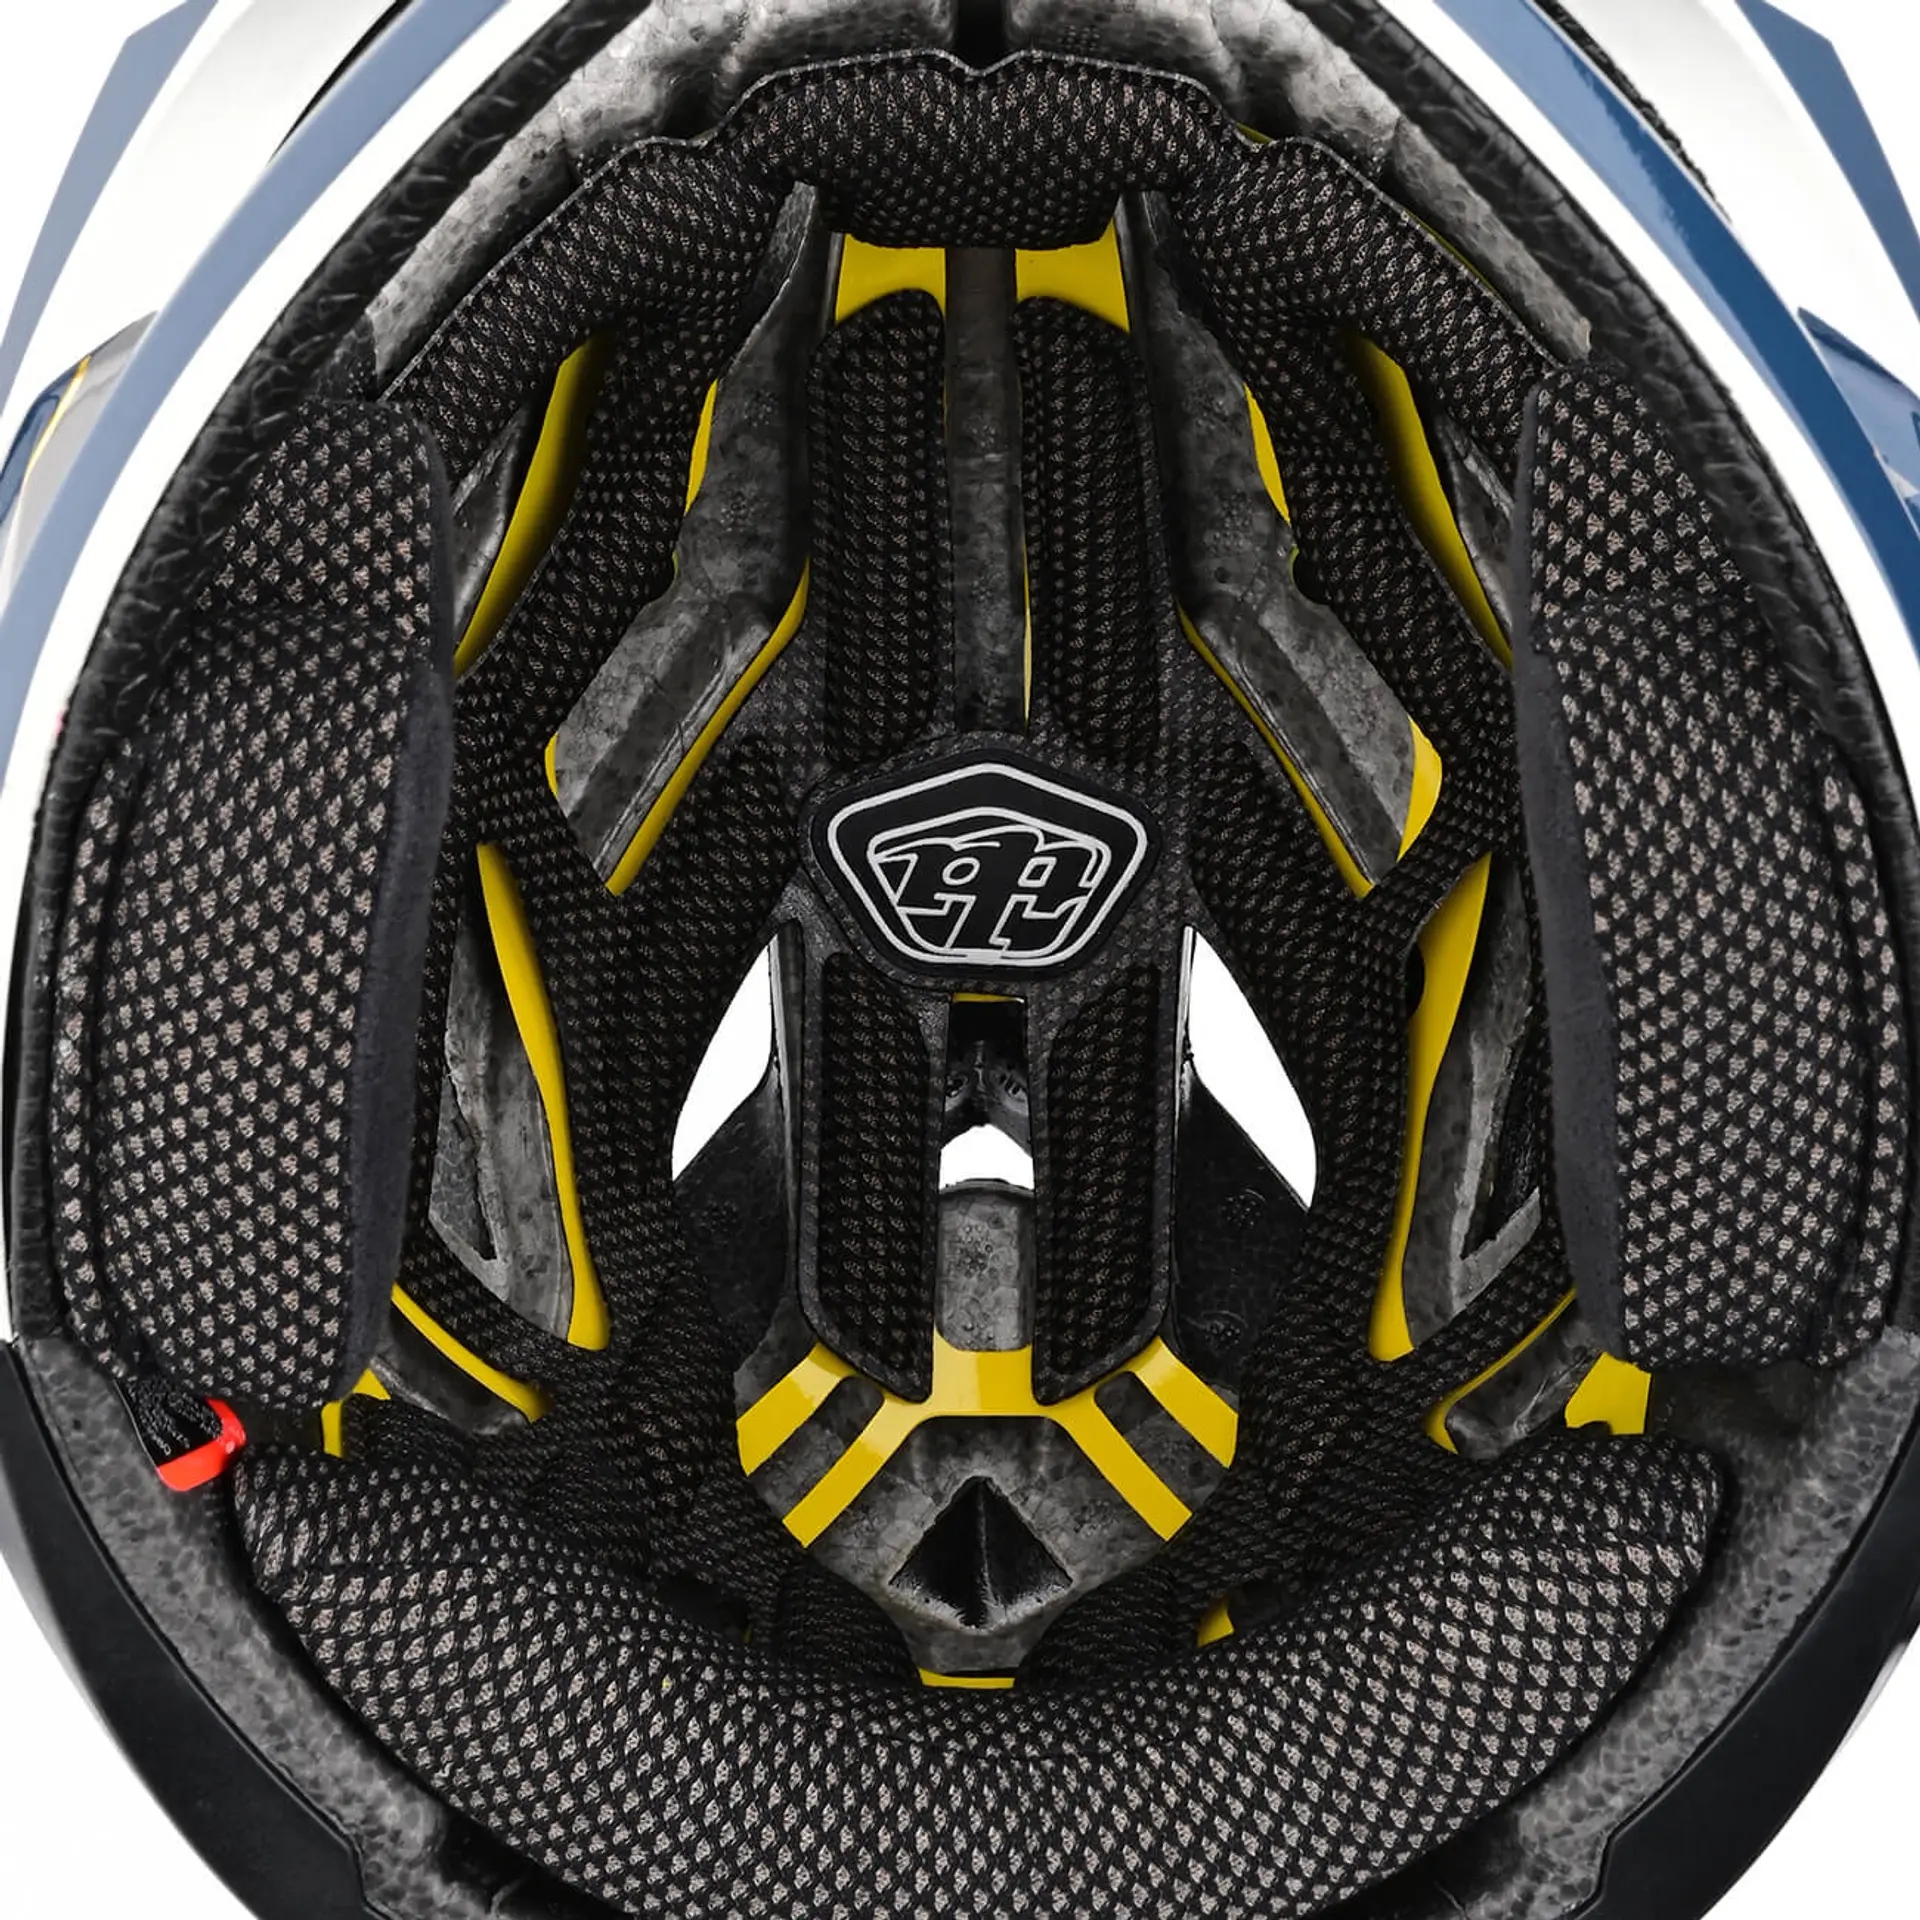
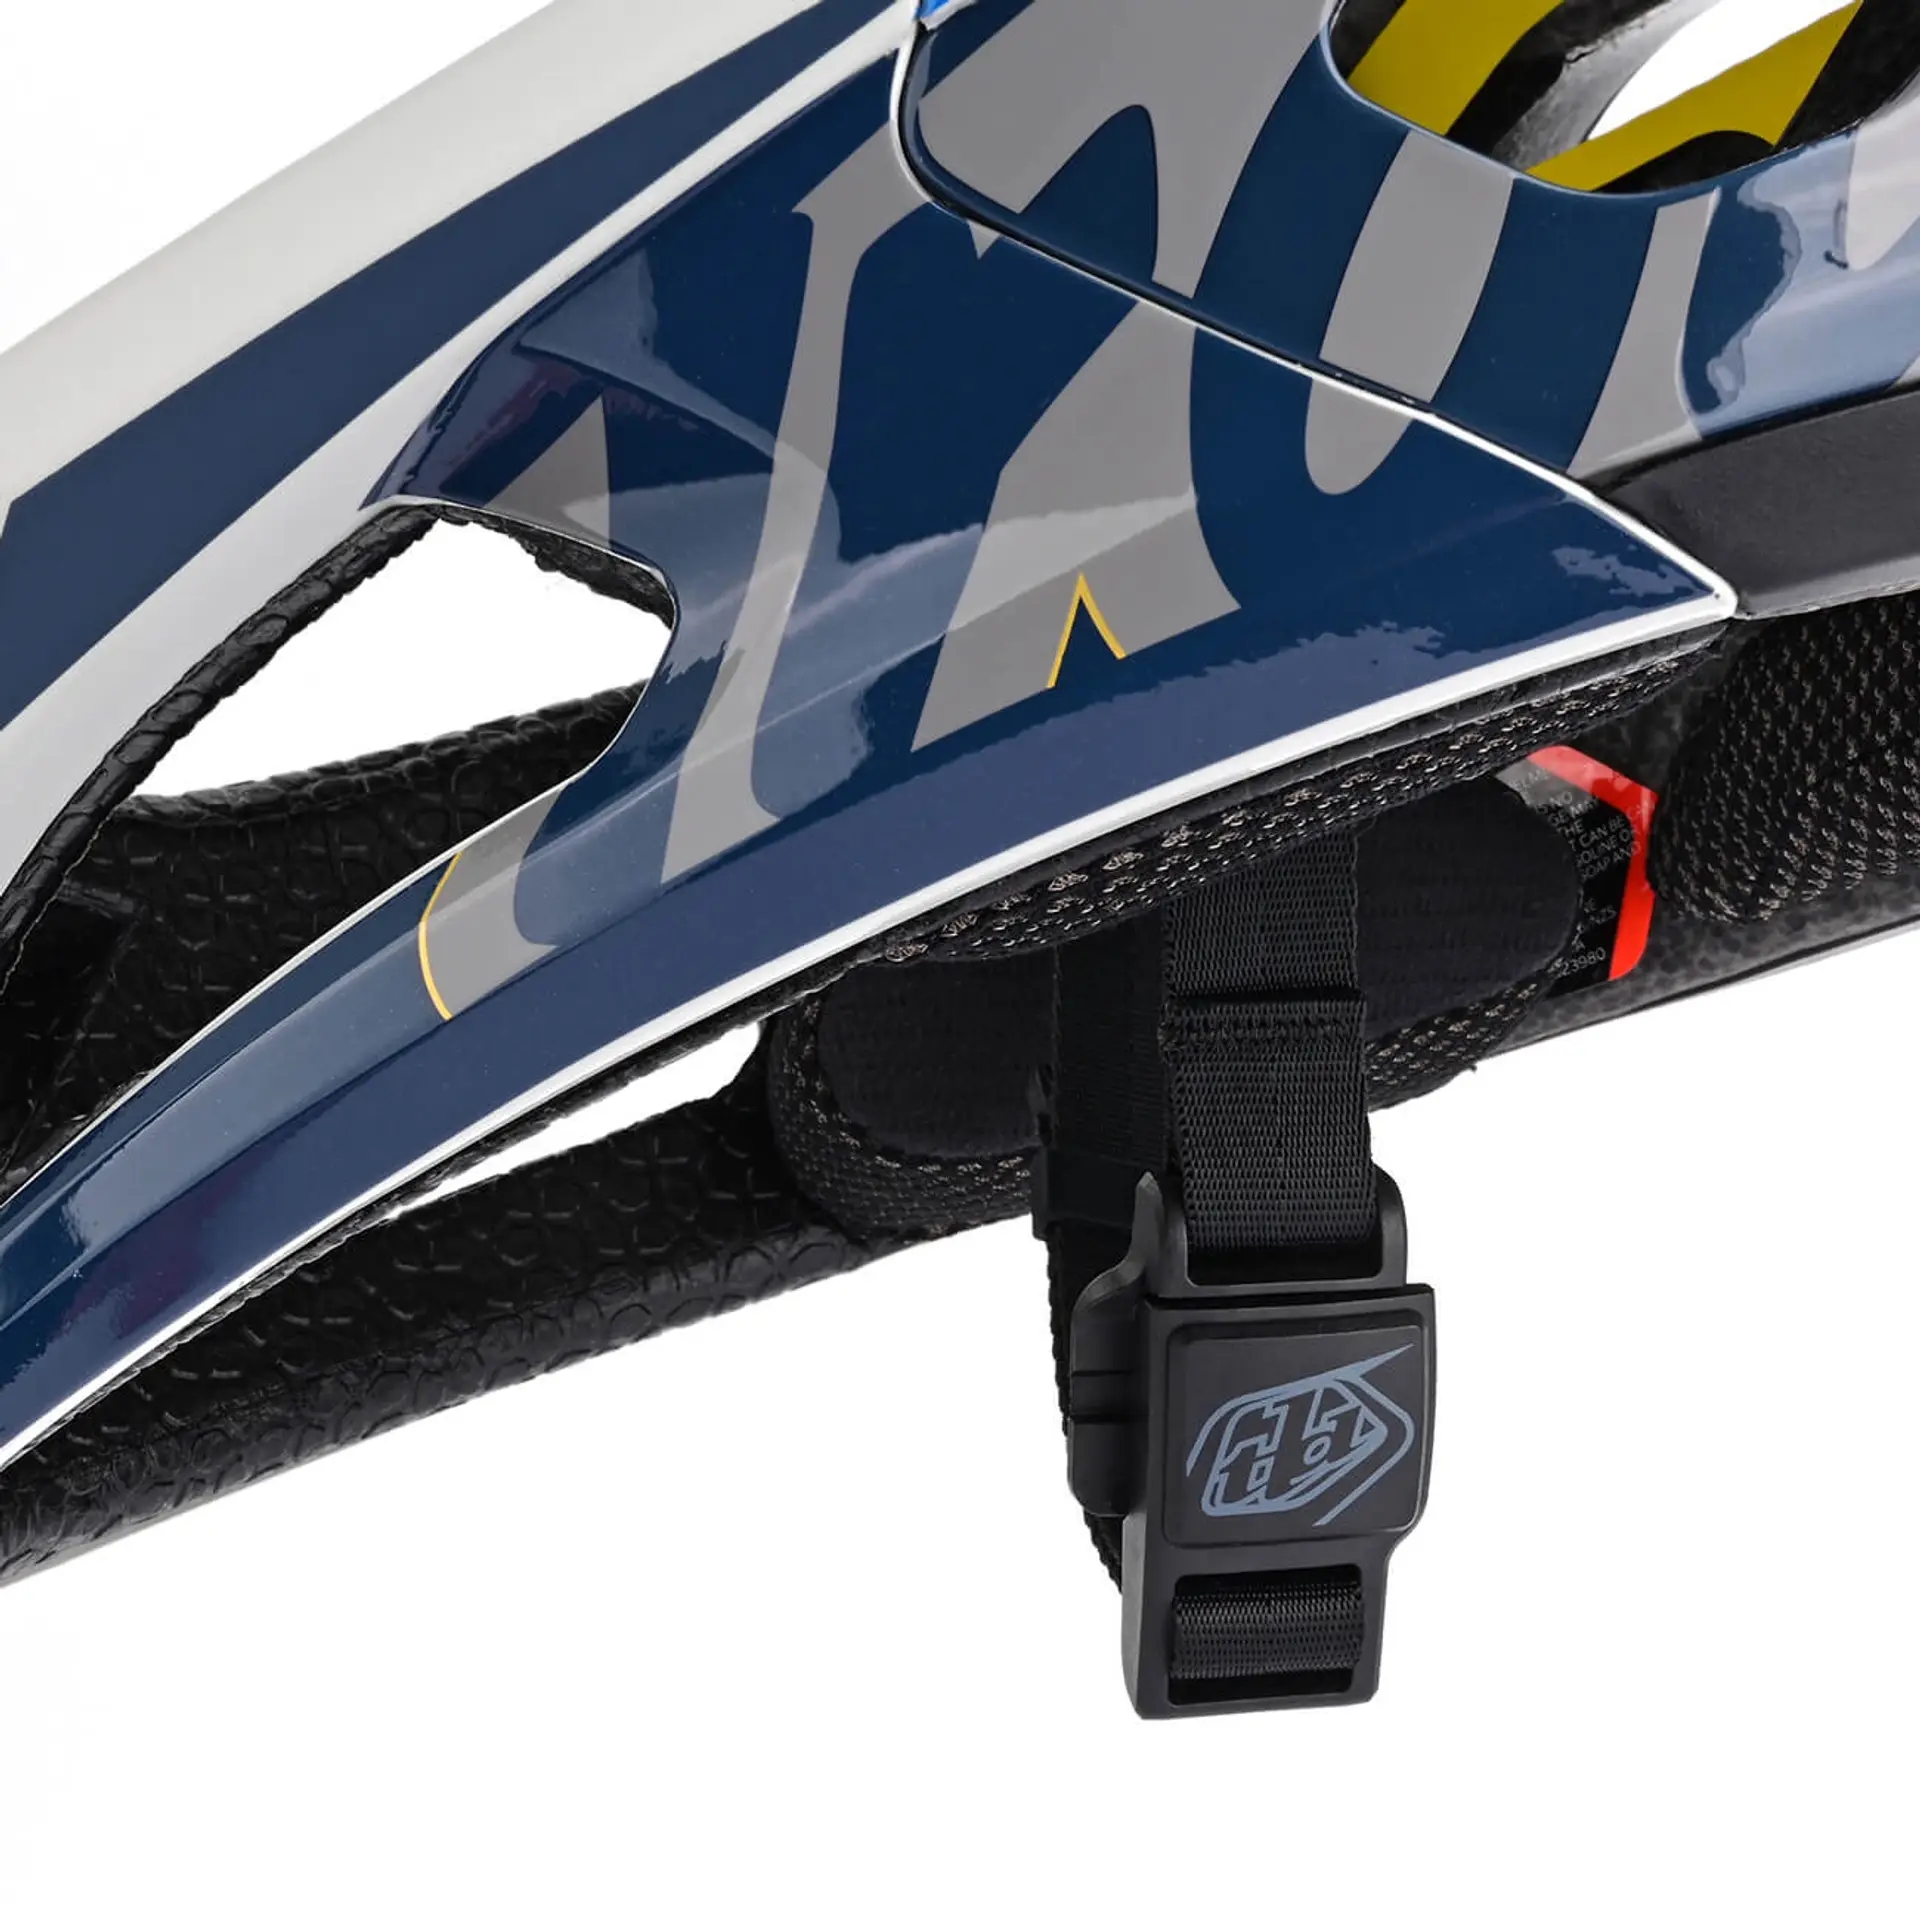
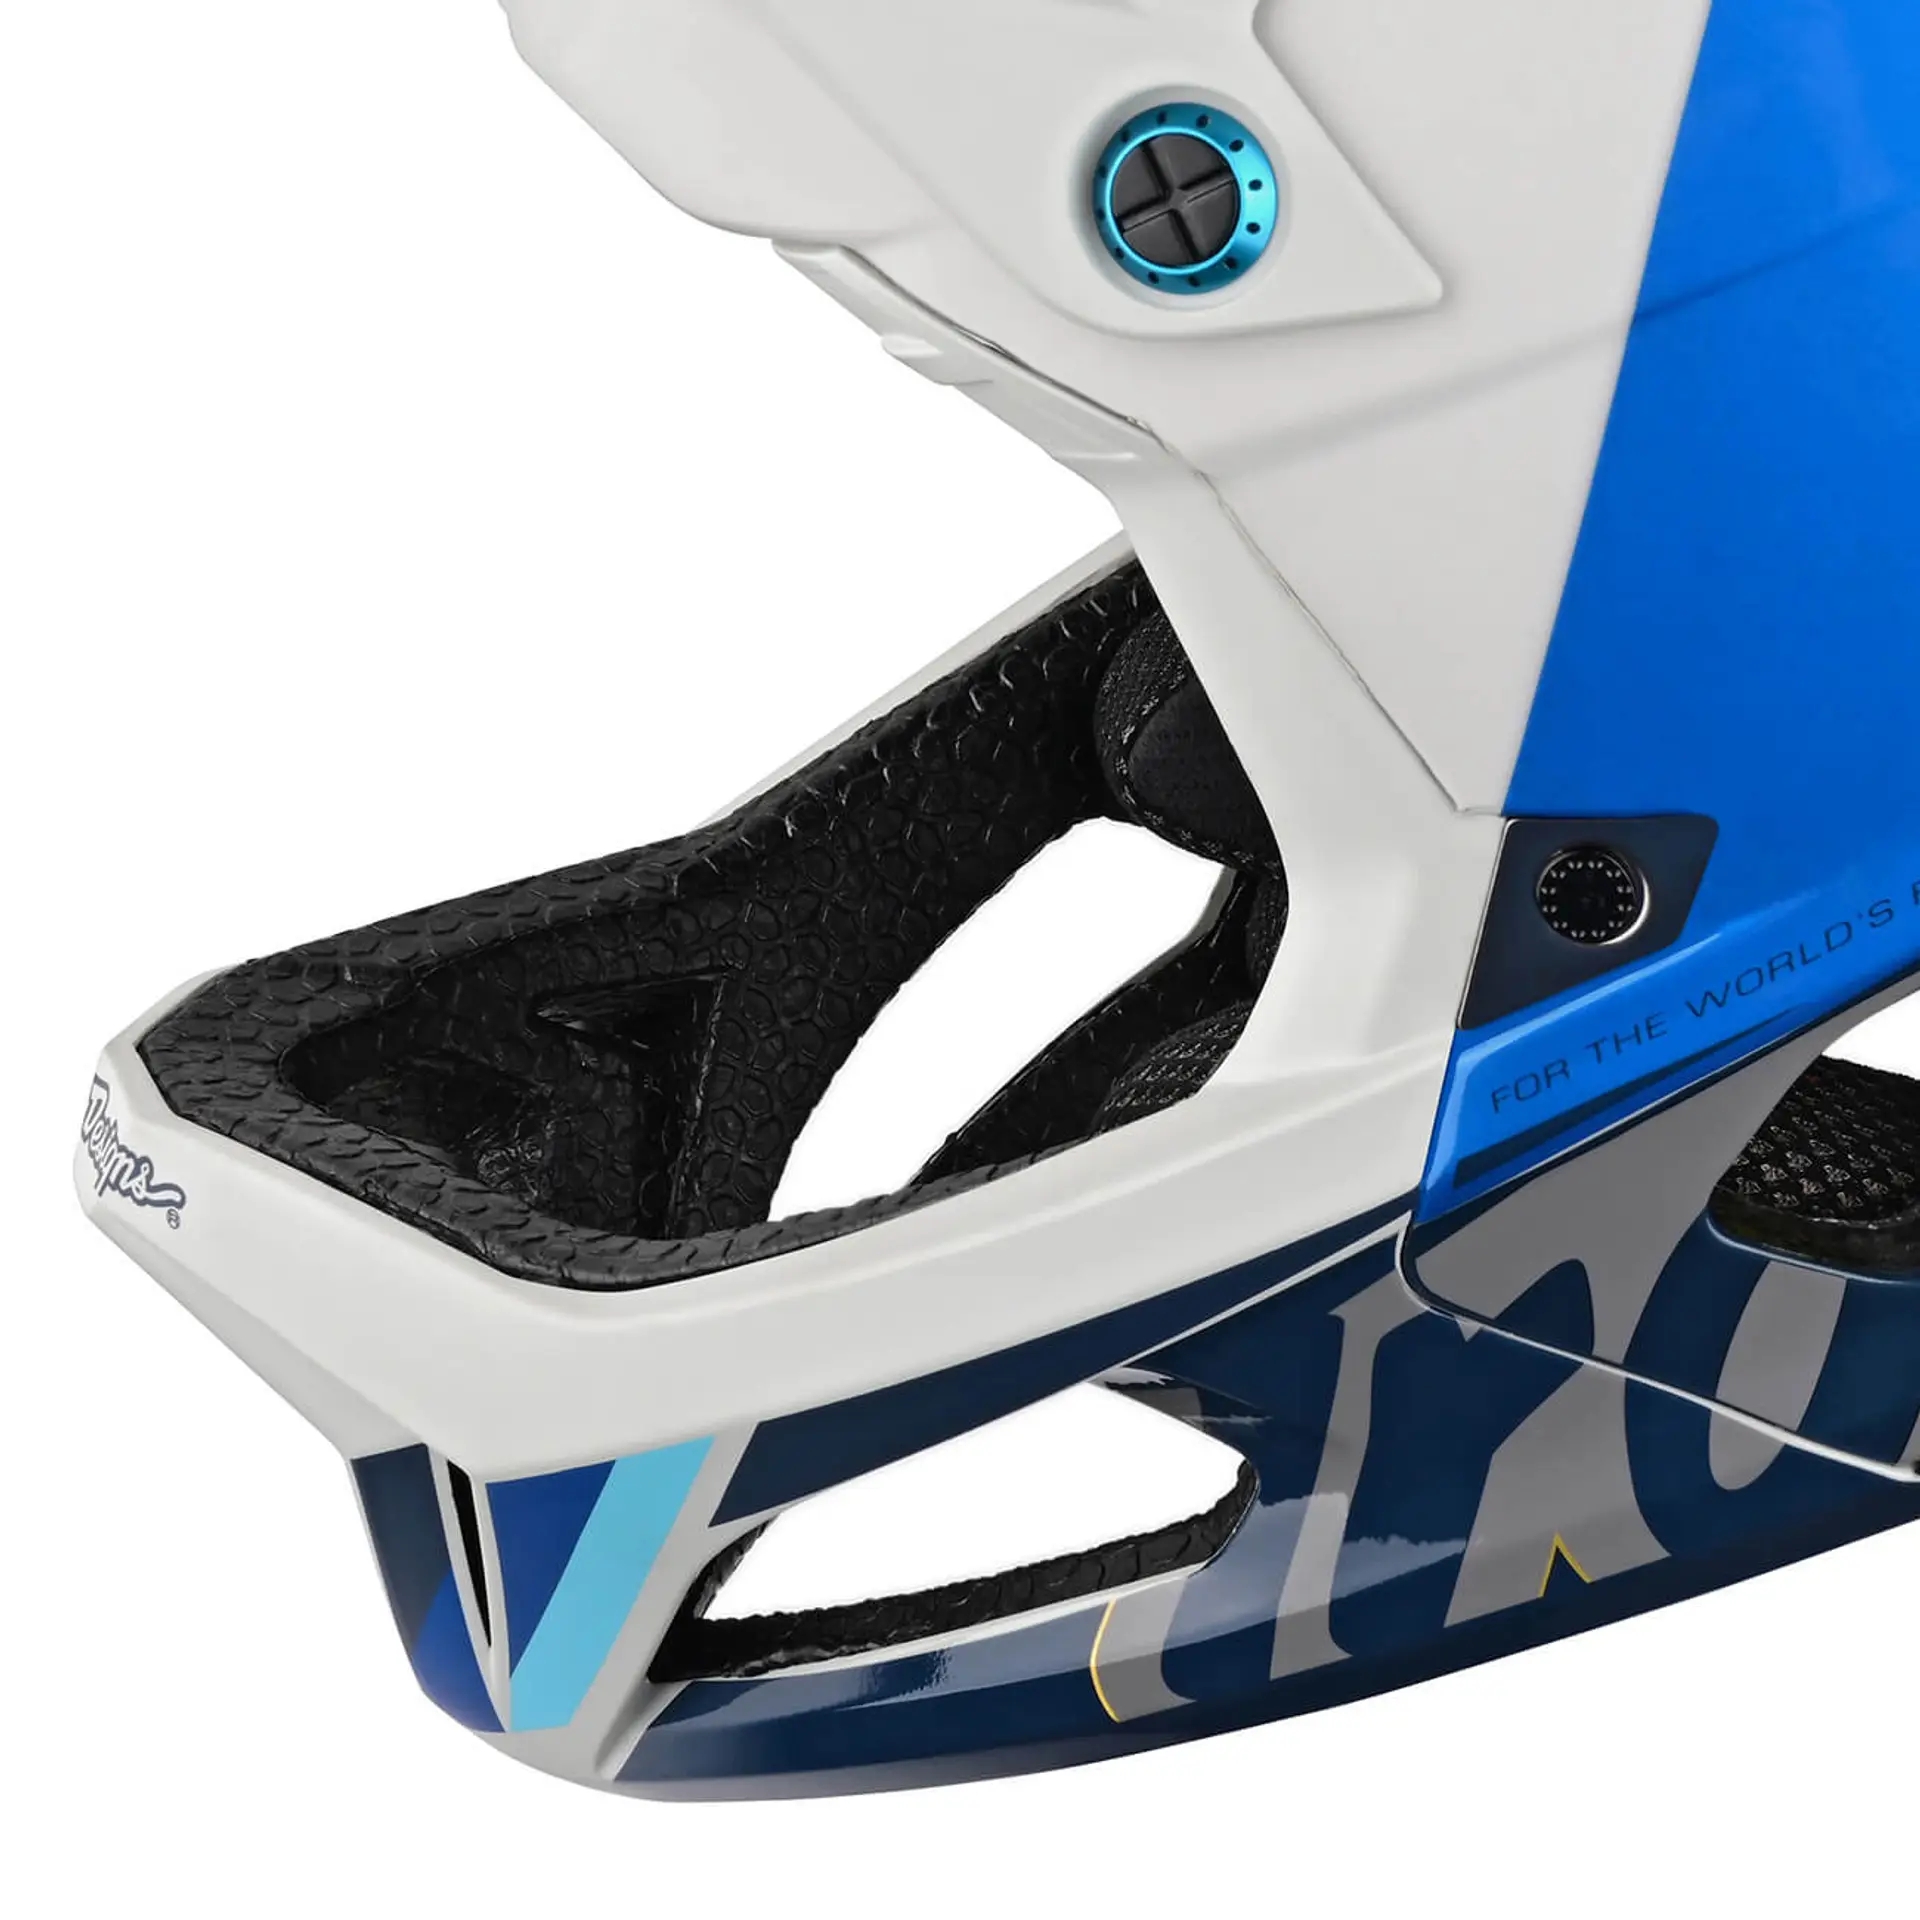
Troy Lee Designs Stage
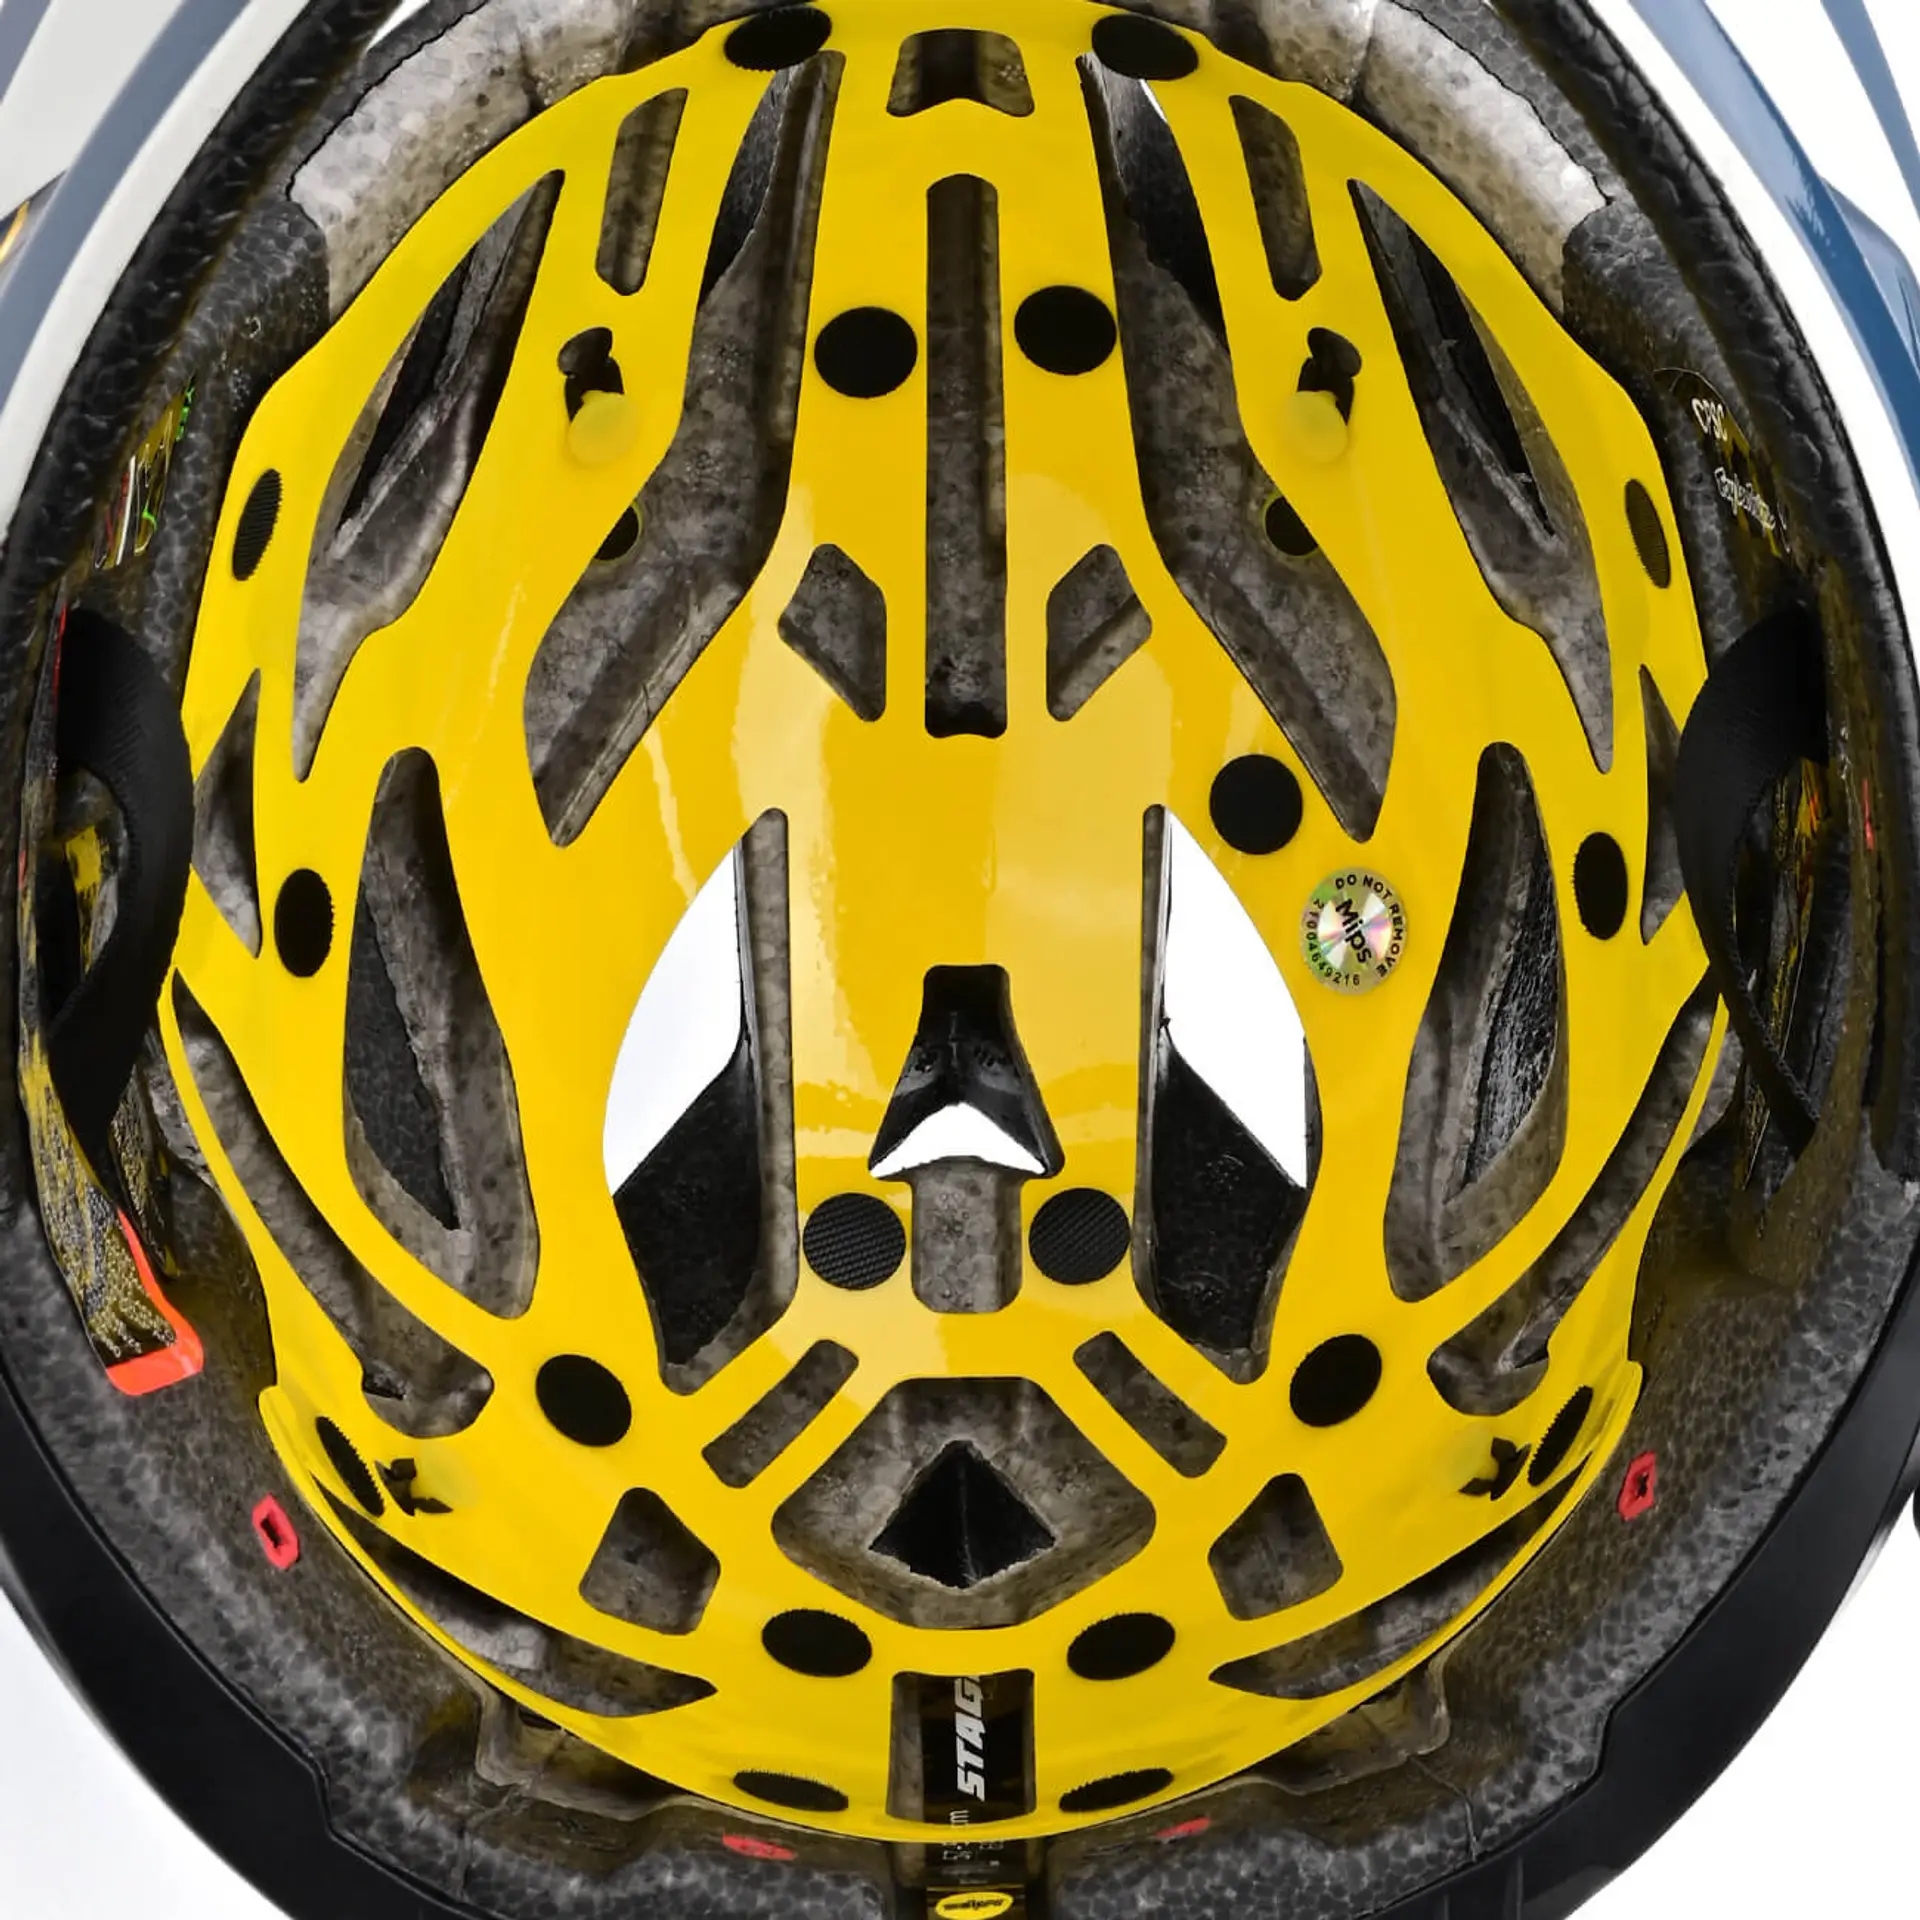
The TLD Stage is a fantastic lightweight full-face helmet. As mentioned earlier, I love the MIPS and magnetic chin strap. On top of that, it has great visibility compared to other helmets. It comes with multiple pad sizes so you can really lock in the fit. In the end, I ordered another TLD Stage to replace my old one. A different color this time, though. FYI, you can get a 30% discount on a crash replacement within a year of purchase. More info on that here!
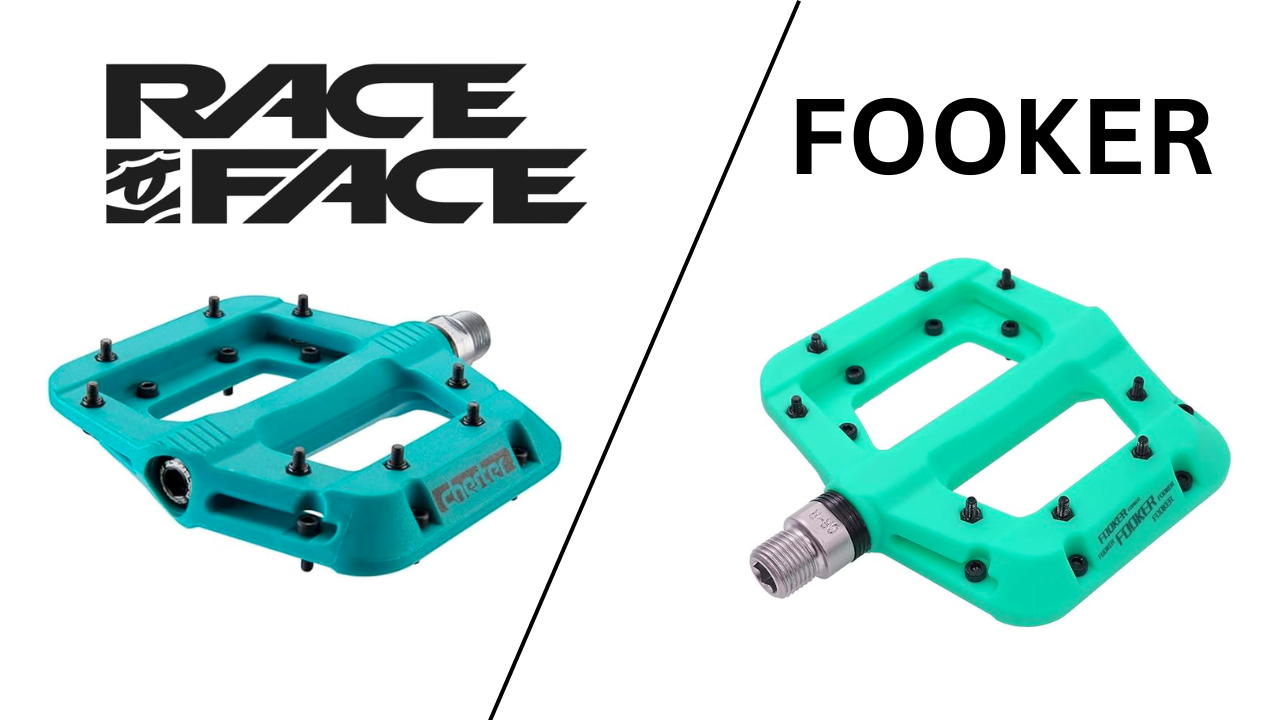
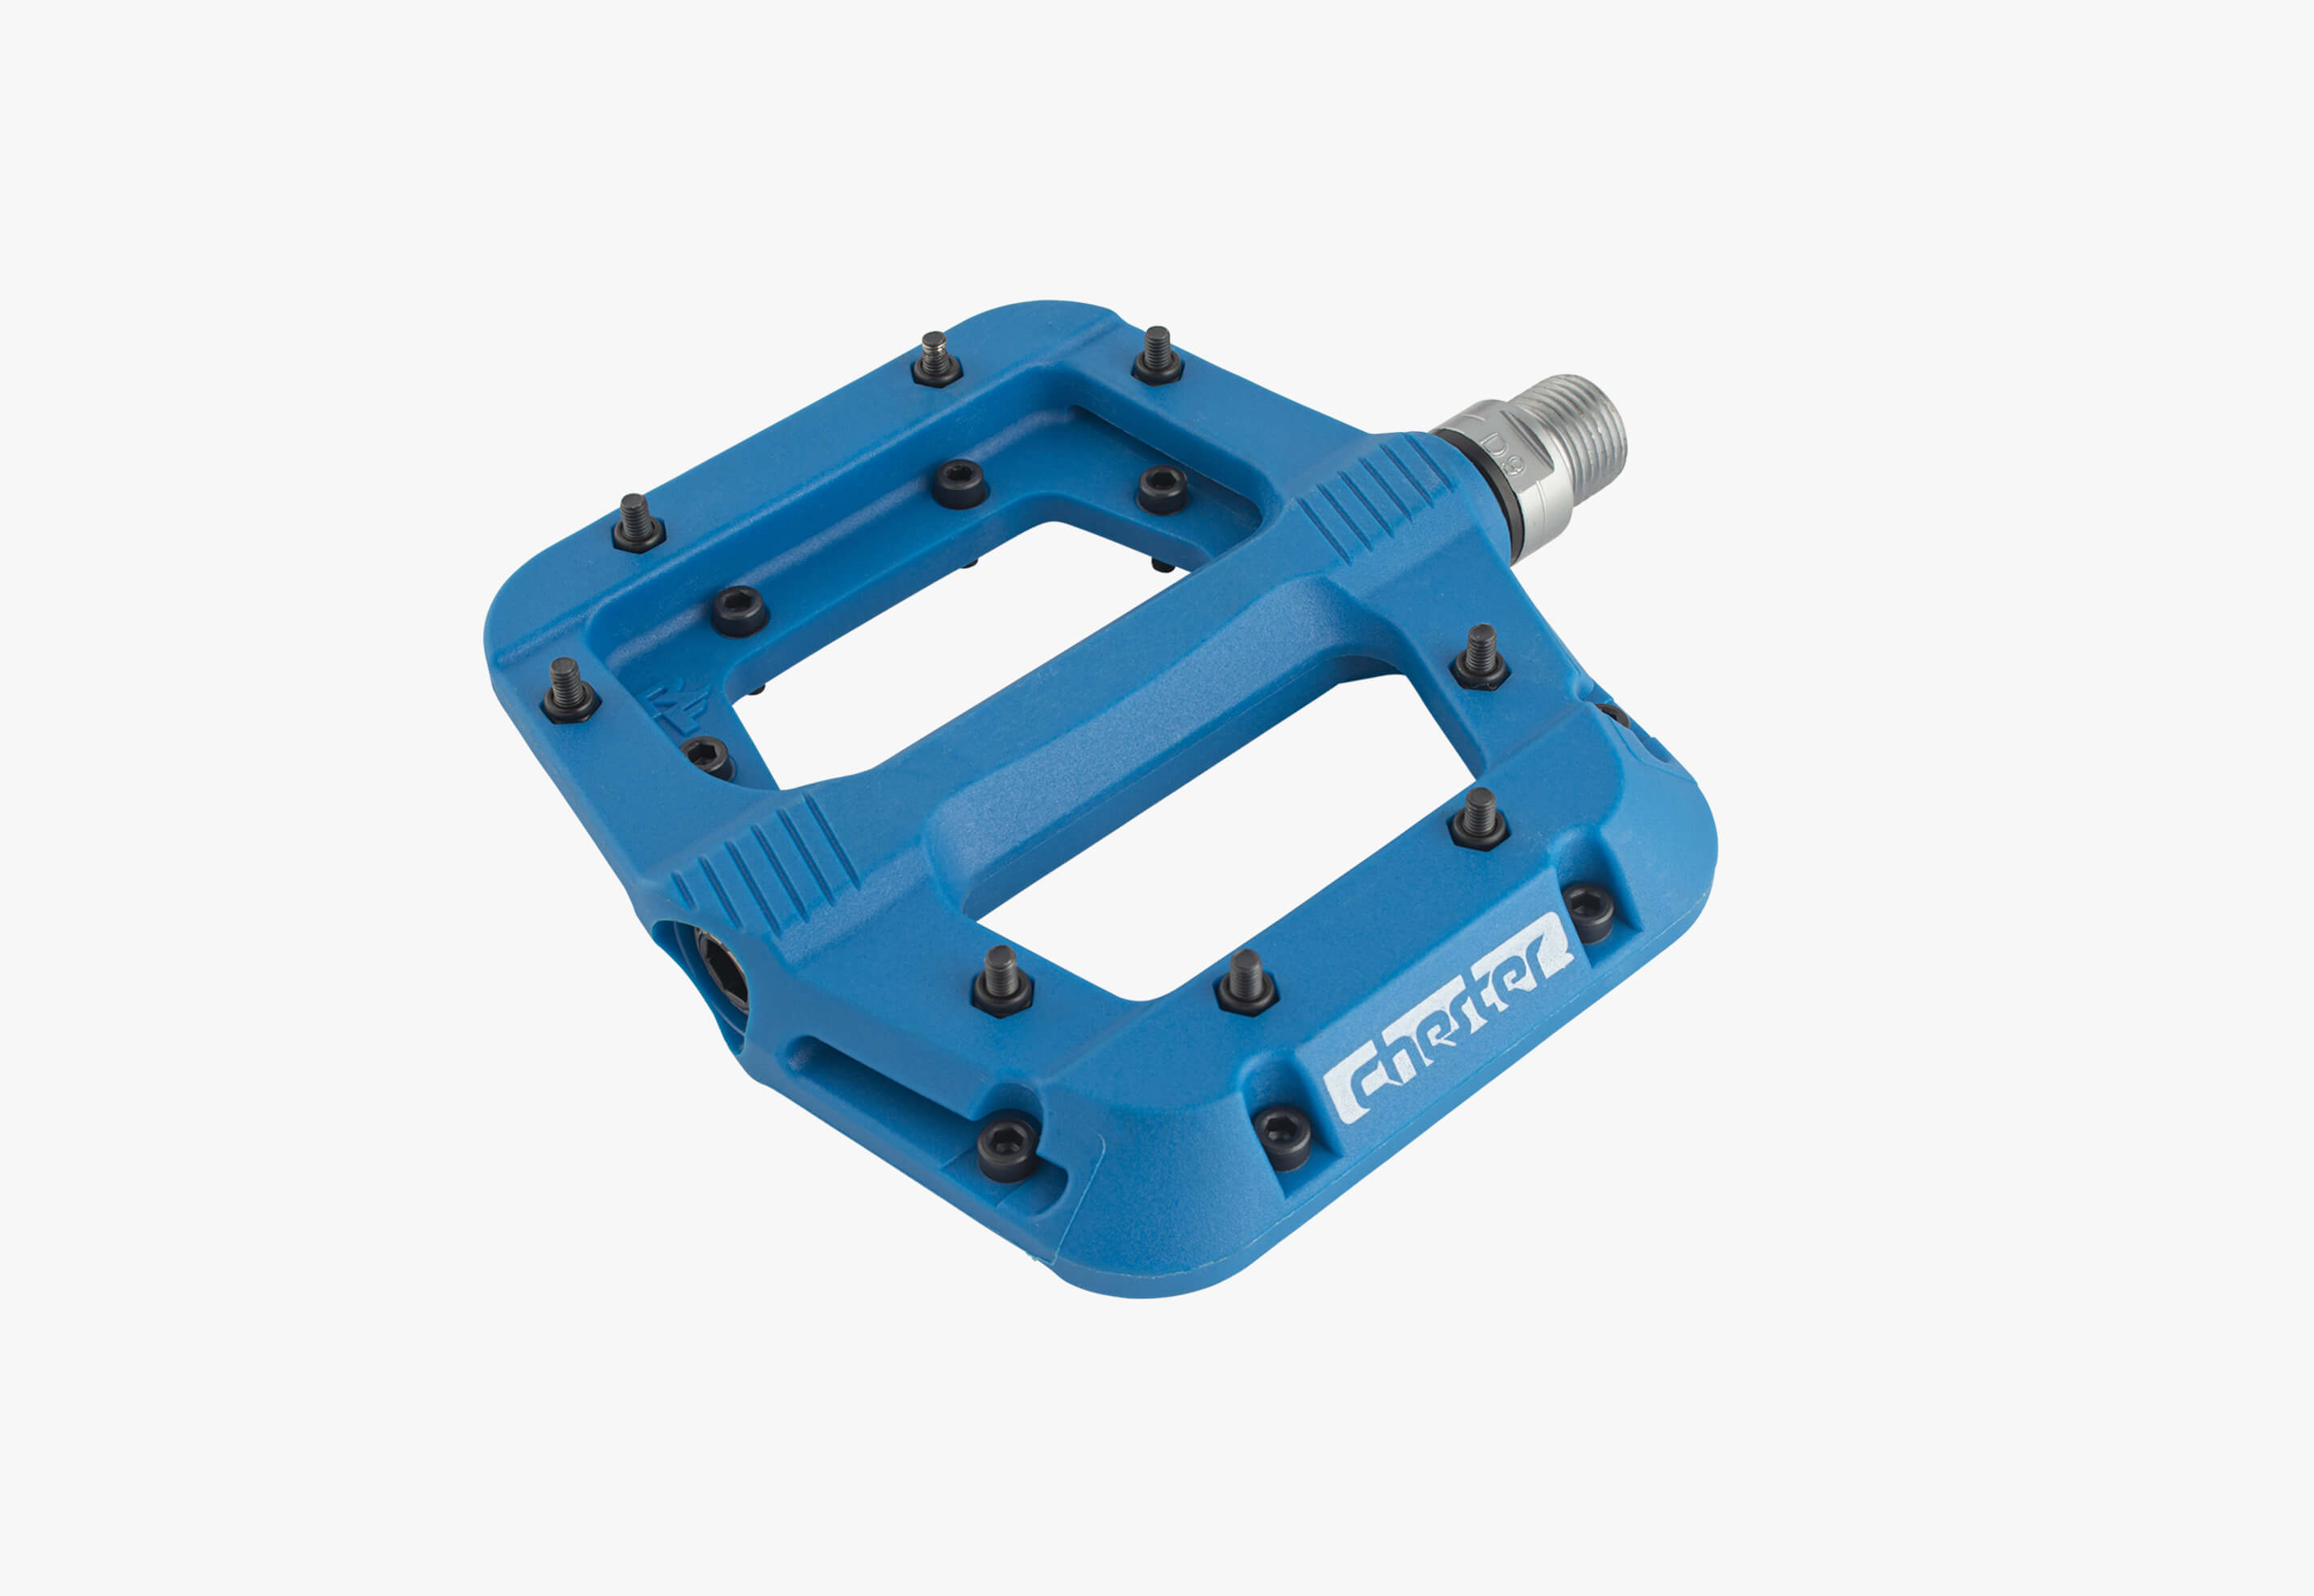
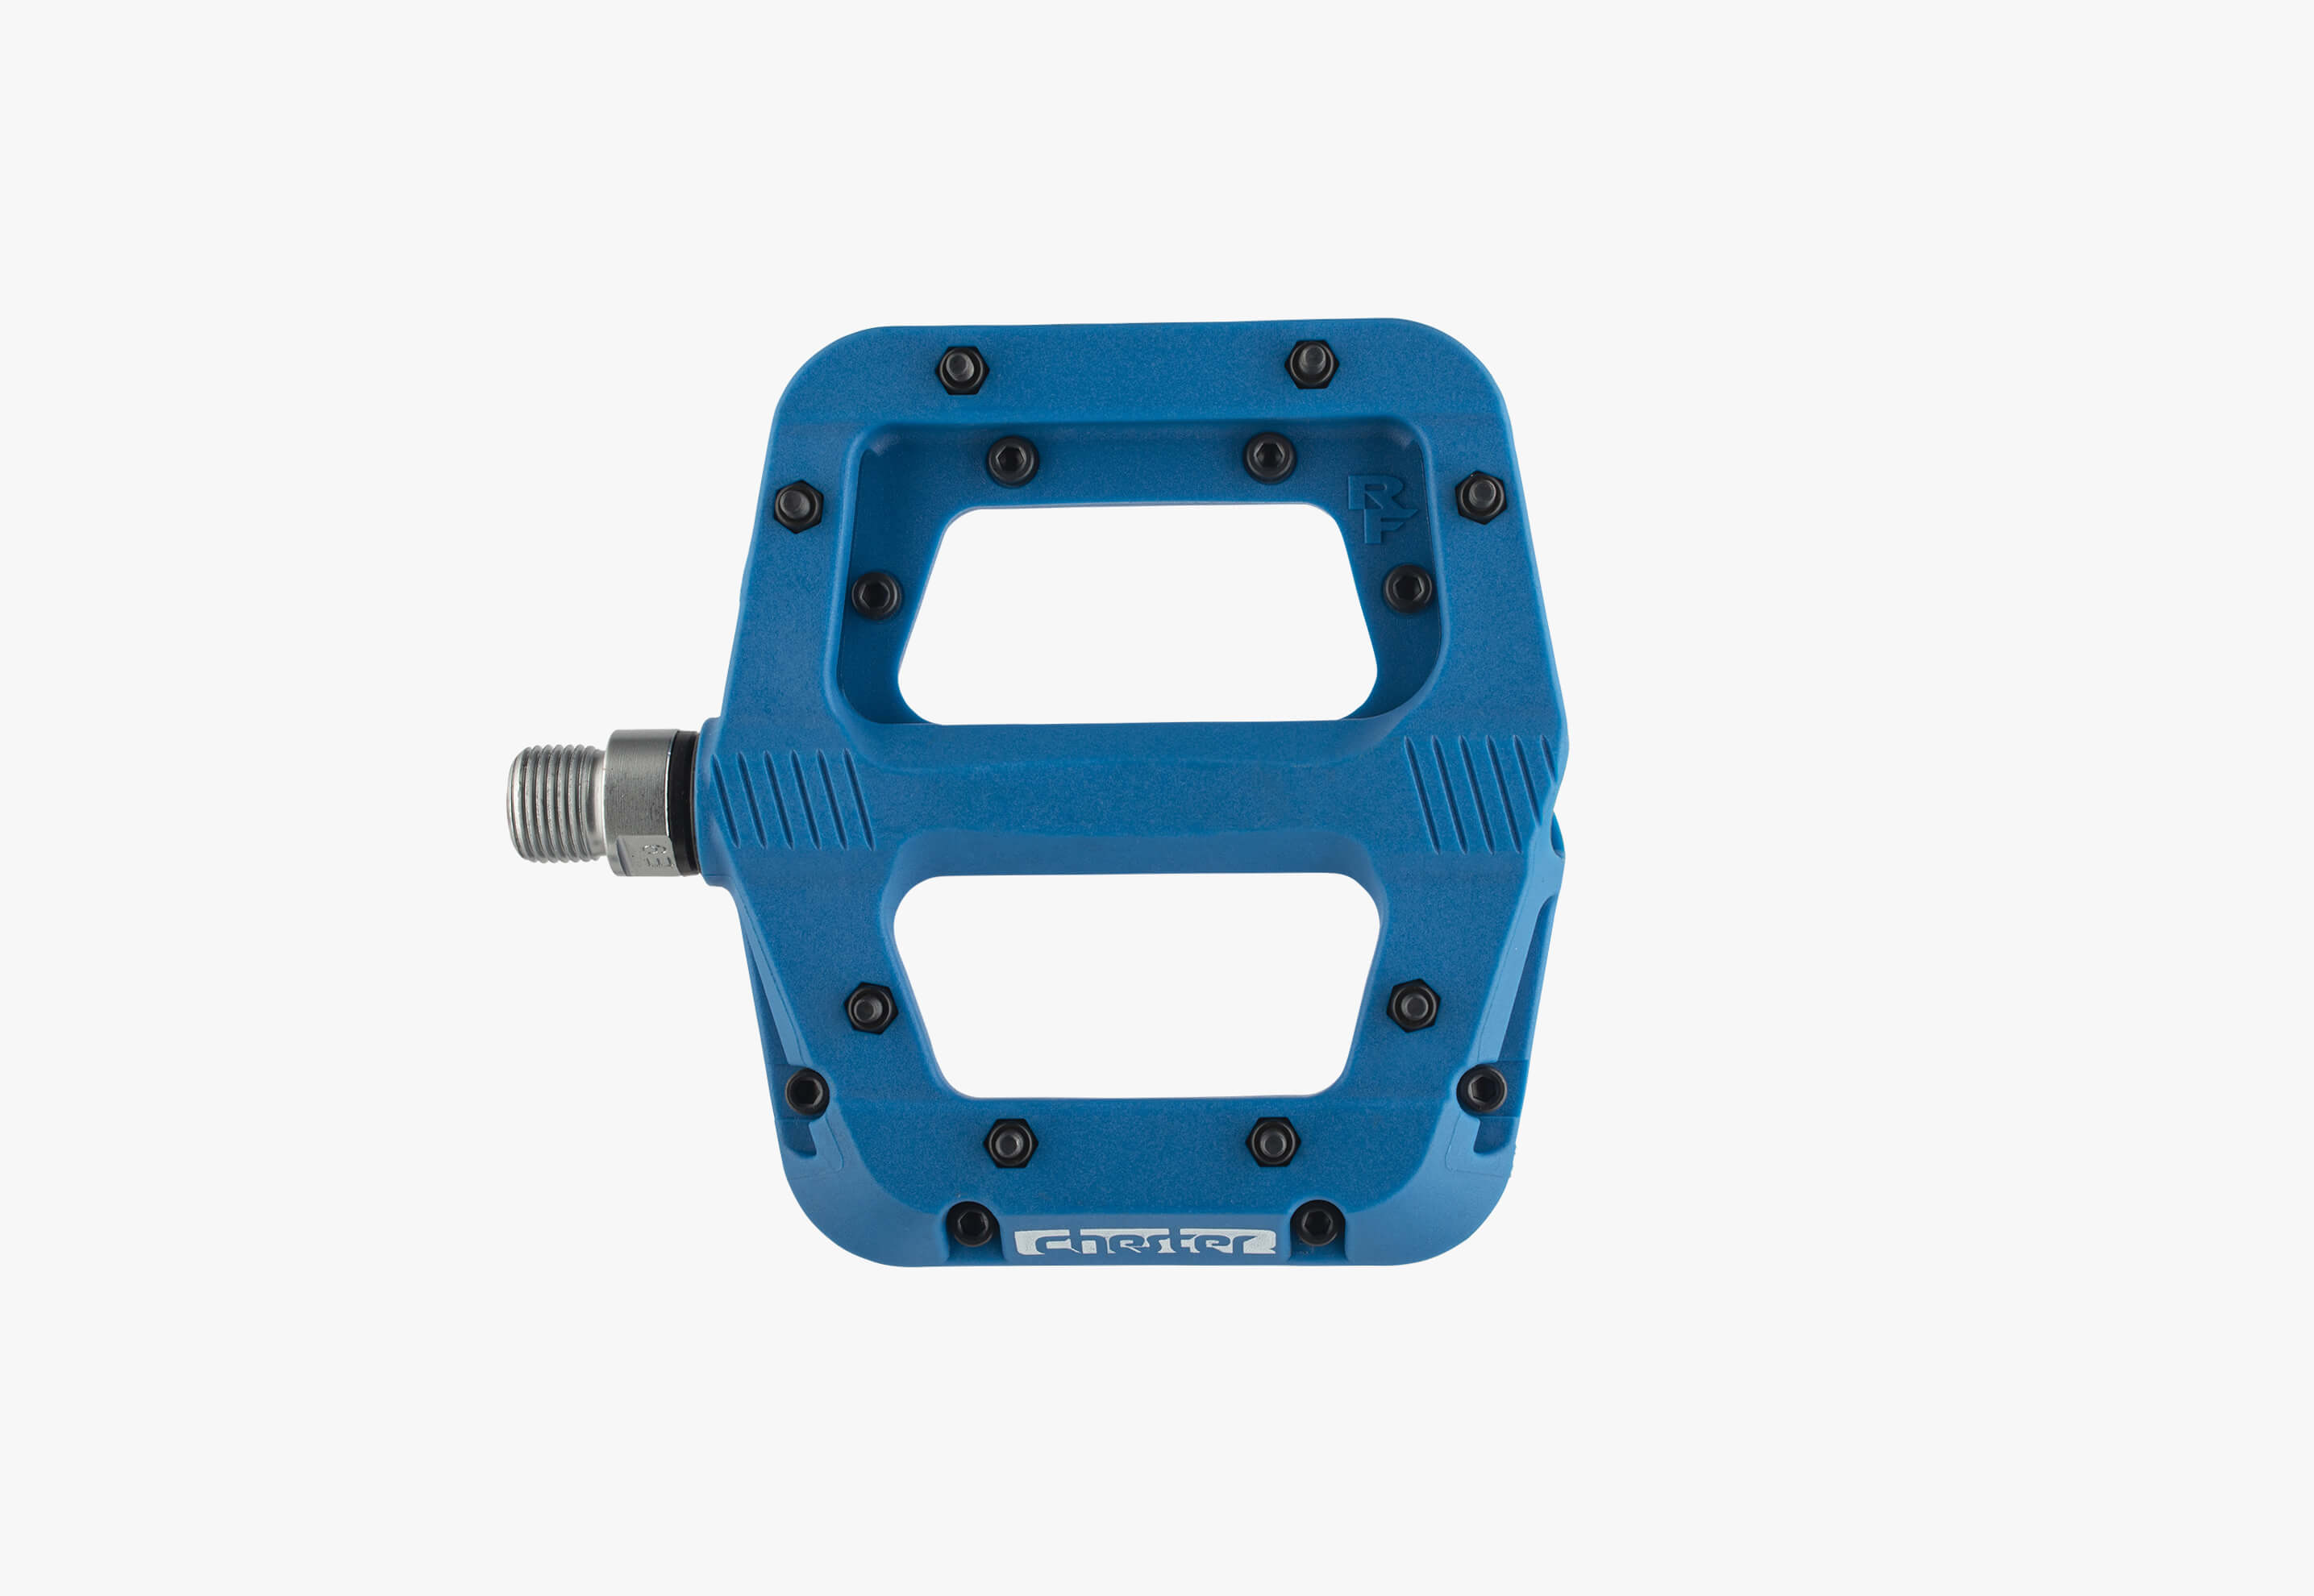
When it comes to an entry-level flat pedal, the Race Face Chester would be at the top of most lists. The durable nylon body makes for a lightweight pedal that glides over rocks easily. The 16 pins (8 per side of the pedal) made from machine screws do a great job of locking onto your shoe. The Chester’s come in a variety of colors too, which makes them a fun way to add some bling to your bike. Lastly, they come in at a great price point. While it may come as a surprise that your new bike doesn’t come with pedals, $39 is about as cheap as it gets. Unless of course, you look at Amazon.
Fooker Pedals
Enter the Fooker. This blatant rip-off of the Race Face Chester is exactly that. Coming in at nearly half the price as the Chester, the Fooker has pretty much the same exact specs in terms of weight, size, number of pins, etc. The only difference is the number of bearings on the spindle. The Fooker has 3 bearings while the Chester has 1. I am not an engineer, but it seems like more bearings would be better? Let us know in the comments if you think otherwise.
Weight
Pins
Size
Bearings
Race Face Chester
360 grams
8 per side
110x101mm
1
Fooker Pedal
358 grams
8 per side
109×100 mm
3
Here’s The Rub
So here comes the question. Can you feel good about buying a pair of Fooker pedals knowing they ripped off the design from Race Face? When the cost savings are significant, it makes for a tough decision. I feel conflicted about it myself. Surely the overall quality of the Race Face would shine through over time and justify the higher price tag, right? You would hope so.
Is One Better Than The Other?
Seth from Berk Peak tried to tackle this question by conducting his own research. He tested the Race Face Chester and Fooker for one year straight, riding with a Fooker on one side and the Chester on the other. In the end, the Fooker performed just as well. When Seth pulled apart the pedal to examine the spindle and bearings and compared, the Fooker let in a little more grit and grime. Seth attributed this to a better-designed seal on the Chester. Overall though, they held up about the same.
Our Thoughts
There is no denying that the Fooker is a solid pedal. You could even say that it’s the exact same as the Chester. Therein lies the problem, at least for me. To blatantly steal a design from a company and undermine them the way that Fooker did, I think is wrong. We have seen Race Face slash prices on the Chester, and they are now going for $39. I think it is safe to say that the competition from Fooker played a big part in this. You won’t see any of my bikes with a pair of Fooker’s. What do you all think?
This was one of the more popular mountain bike related questions asked on the internet in 2023, according to Google Trends. Hiking boots do actually make a pretty decent pair of mountain biking shoes. They have a stiff sole, tacky rubber, and decent protection. All good things to have in a mountain bike shoe! If you have a nice pair of hiking boots, though, we wouldn’t recommend using them for mountain biking more than a handful of times. Here is why!
Ruin Your Soles
The main reason we wouldn’t recommend using your hiking boots for mountain biking is that it’s going to ruin them. I’m assuming you’re reading this if you have a pair of flat pedals, and since most flat pedals have sharp pins that provide grip, it’s safe to say that this would apply to you. (Curious about our favorite flat pedals for 2023?)These pins are going to dig into the soles of your nice hiking boots and make them wear out way faster than normal. Maybe you have an old pair of hiking boots that you don’t care about? They will work fine!
Hot Sweaty Feet
If you have a lightweight pair of hiking boots, you can disregard this reason but if you have a pair of nice sturdy, hiking boots, keep reading. Hiking boots are typically built to be sturdy, reliable, waterproof, and able to take a beating. This is great for hiking, but not ideal for mountain biking. Well, hot feet are not ideal in most situations but mountain biking tends to involve a lot more cardio which means you’ll feel a lot hotter than you would hiking.
Uneven Lugs
Lastly, hiking boots might not make great contact with your pedals, because the lugs aren’t totally flat or evenly spread. This could make for an unstable feeling when standing on the pedals. Of course, this would depend on your hiking boots, so we’re just speaking generally here.
Our Take
So, what’s our take? Yes, you can wear hiking boots when you go mountain biking. They have many similar characteristics like a stiff grippy rubber sole and great protection. If you have an old pair you don’t care about, go for it! Long term, though, we recommend getting a dedicated mountain bike shoe because your hiking boots will get trashed eventually!
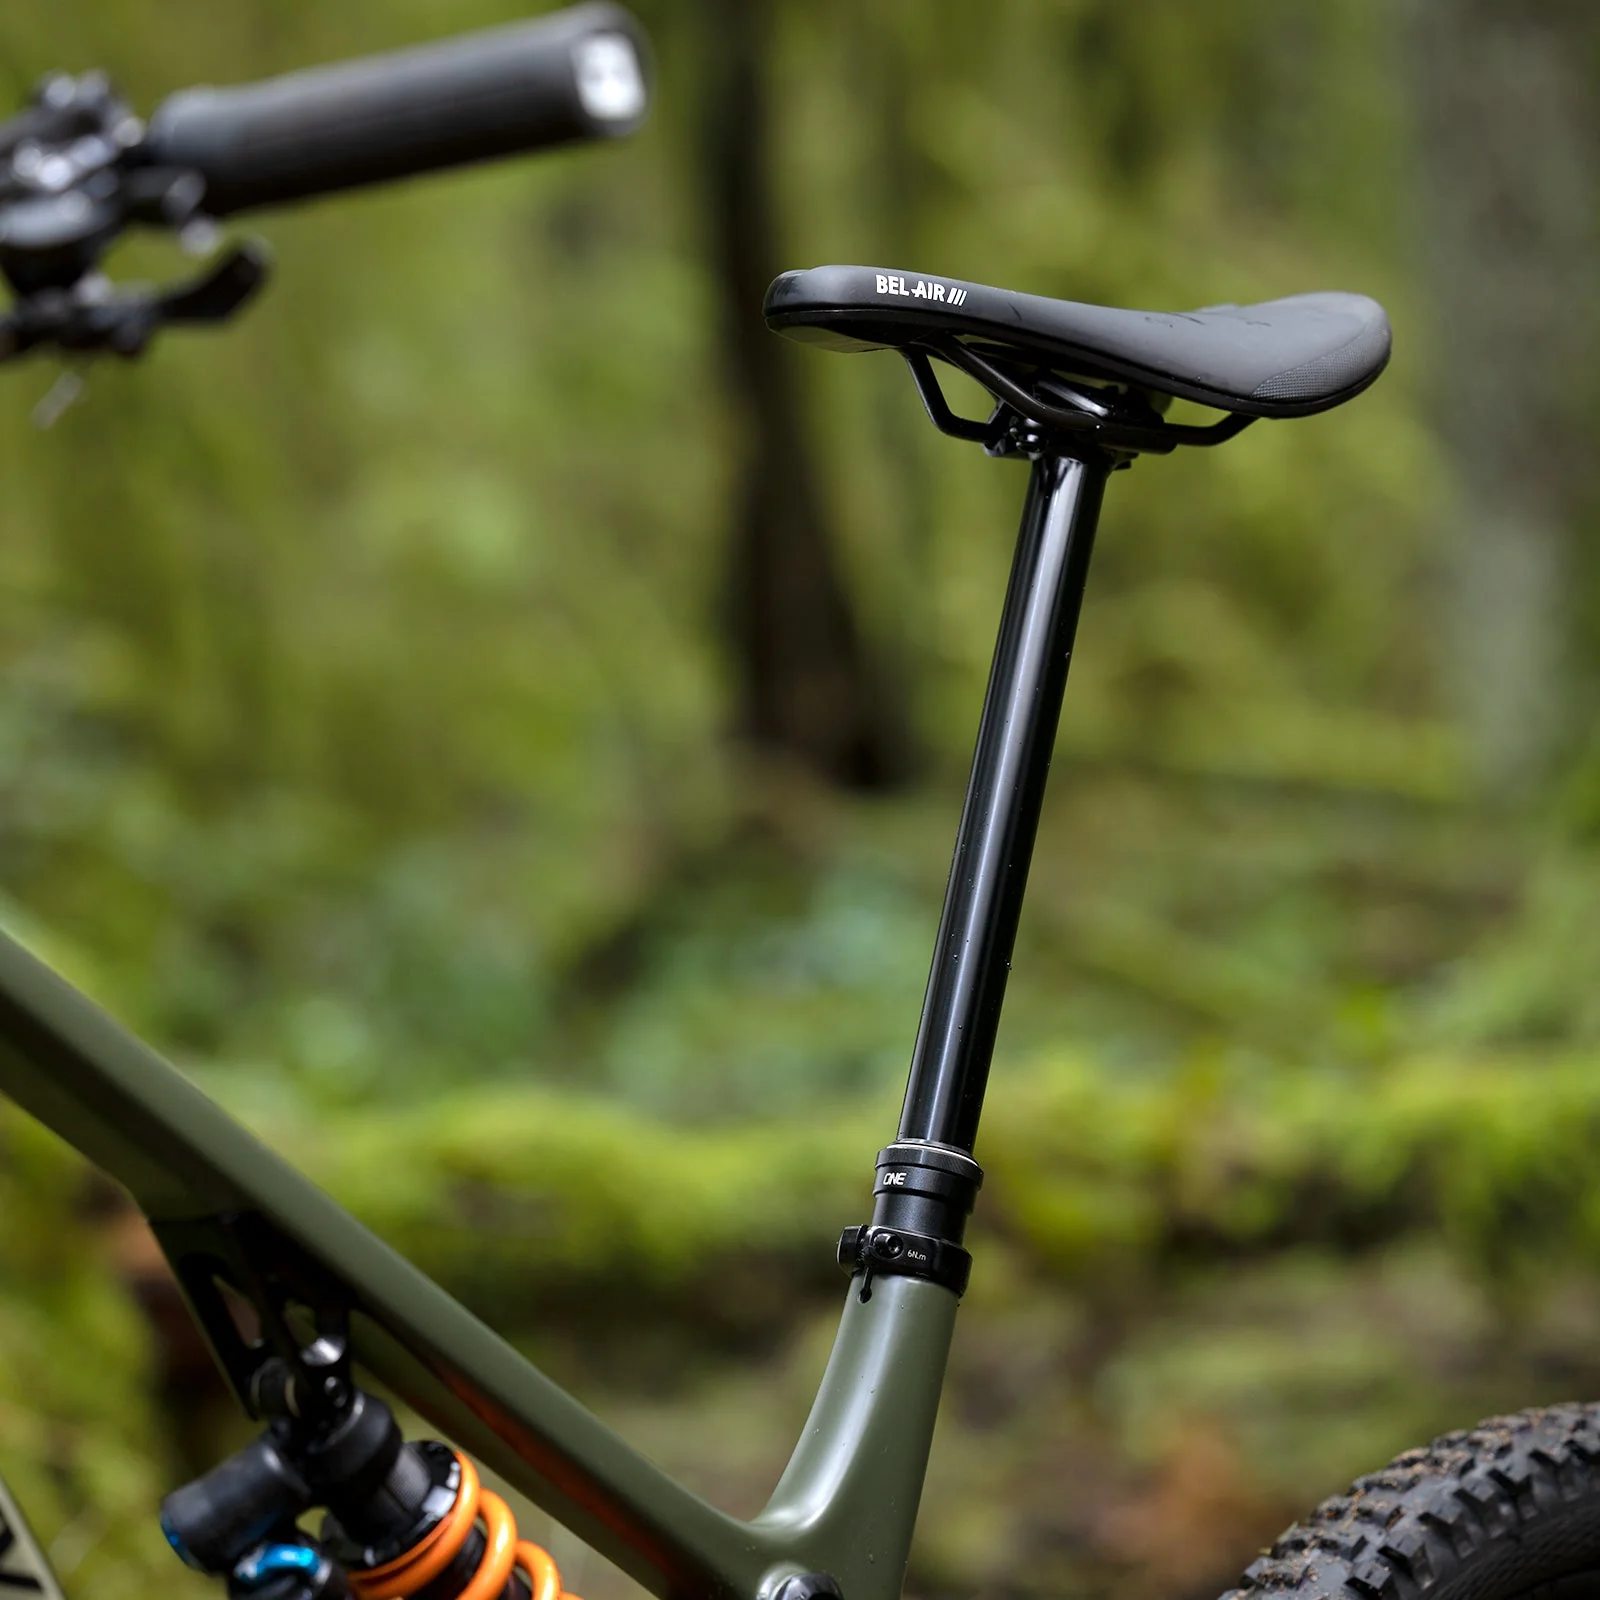
Dropper posts made their first debut in the 80’s with the invention of the Hite Rite followed by several iterations in the 90’s and early 2000’s. It wasn’t until 2010 that RockShox changed the game with the release of the Reverb. Ask any mountain biker today, and they will tell you that a dropper post is essential. It completely changes the experience of riding a mountain bike. Among the numerous dropper posts available today, the OneUp Dropper Post V2, not the Reverb, stands out as the best on the market. Here’s why:
Price Point
The OneUp Dropper Post V2 comes in at a great price point of $267, making it one of the most affordable high-performance dropper posts available. Here is a comparison chart of the other top posts on the market today. Price listed as MSRP, without a remote.
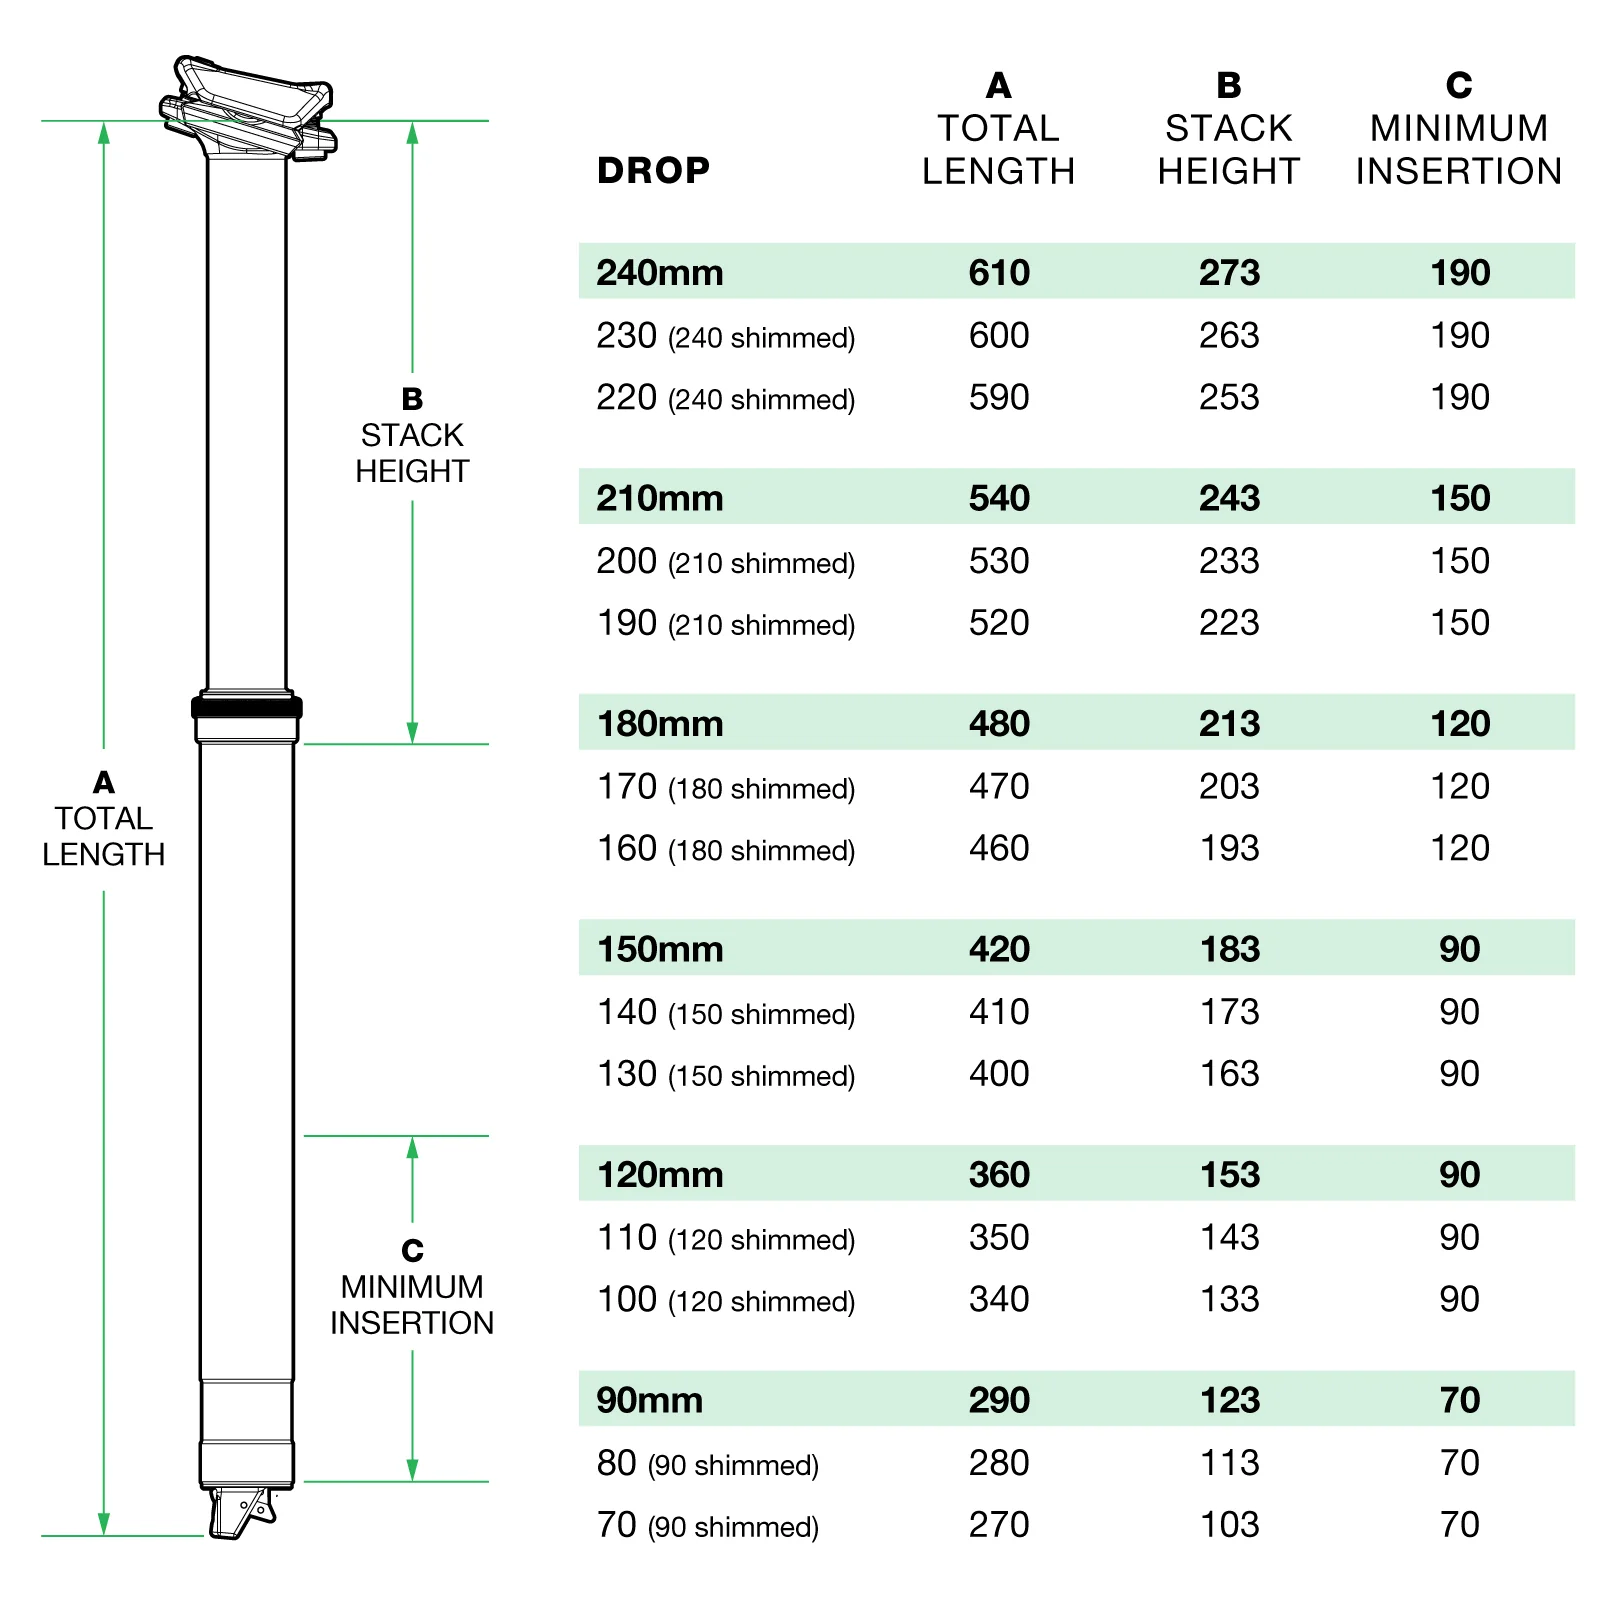
With dropper travel ranging from 90mm to 240mm, the OneUp Dropper Post V2 caters to a wide spectrum of riders and frame sizes. This means you can find the longest post available for your bike, especially for riders on the tallest end of the spectrum. No other dropper post on the market has 240mm of travel! Curious about which post will fit best on your bike? Check out this calculator.
The OneUp Dropper Post V2 holds the title of having the lowest stack height of any dropper post on the market. This translates into more drop, allowing riders to lower their saddles further and achieve a lower center of gravity. This enhanced maneuverability and control are invaluable for tackling steep descents and technical terrain, enabling riders to conquer challenges with confidence.
No Need To Bleed
Unlike hydraulic dropper posts, which require periodic bleeding to maintain smooth operation, the OneUp Dropper Post V2 utilizes a cable-actuated design that eliminates the need for bleeding. This feature offers riders greater convenience and reduces maintenance costs, saving time and money.
The OneUp Dropper Post V2 offers the ability to be shimmed in 10mm increments, providing riders with the flexibility to fine-tune the post’s insertion depth and maximize the drop for their specific frame geometry. This customization ensures that every rider can extract the maximum performance from their dropper post, unlocking the full potential of their bikes.
The OneUp Dropper Post V2 is the undisputed leader in the realm of dropper posts. Its unbeatable price point, unmatched size range, low stack height, lightweight construction, elimination of bleeding, and versatile shimming options make it the best choice for anyone looking to add or upgrade their dropper post.
Getting a gift for the mountain biker in your life can be challenging. Most riders are particular about the type of equipment they use. It’s often a moving target! Luckily we have you covered with some gifts that are universally loved by most mountain bikers and don’t require technical knowledge on your part. Read on!
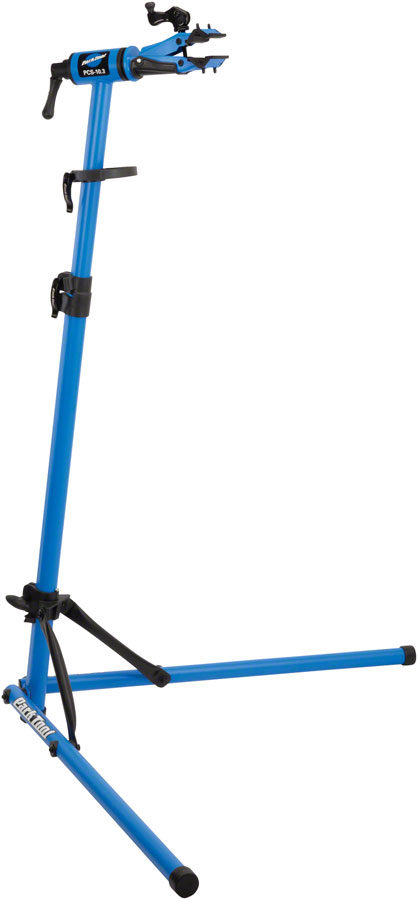
Bike Work Stand: A good bike work stand is essential for any mountain biker who wants to be able to maintain their bike. A work stand makes it easy to clean, lube, and repair your bike, and it can save you a lot of money in the long run. Make sure they don’t already have a stand and that they have enough room to use it! One of our favorites is the Park Tool PCS-10.3 Deluxe Home Mechanic Repair Stand for its durability, ability to fold up, and sturdiness.
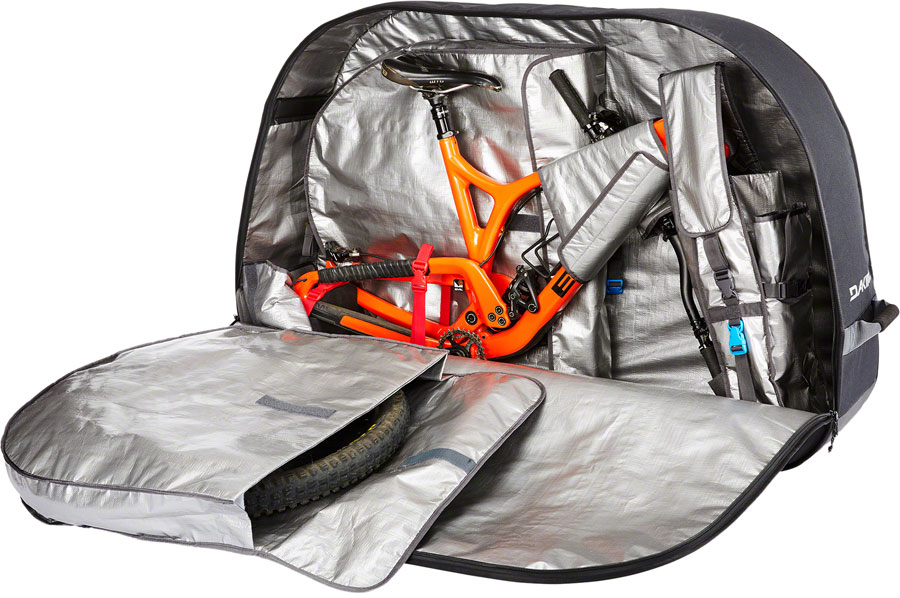
Bike Travel Bag: If the mountain biker in your life travels to race or ride, a good bike travel bag is a must-have. A travel bag will protect your bike from damage while you’re on the road, and it will make it easy to transport your bike to and from the airport. Our pick is the DAKINE Bike Roller Bag for its protection, lightweight, and price point.
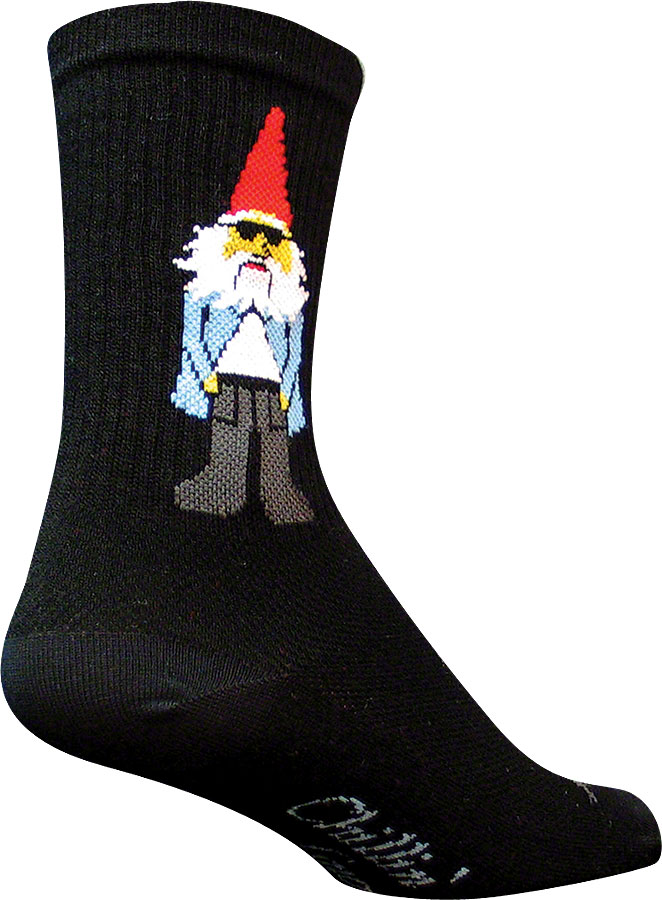
Bike Socks: Bike socks are a small but essential piece of gear for any mountain biker. Bike socks are designed to wick away moisture and keep your feet dry and comfortable, even in hot or cold weather. More importantly, though, they add an element of style and personality to any mountain bike outfit. Brands like DeFeet or SockGuy have hundreds of cool and funny designs like UFOs, pizza slices, and garden gnomes.
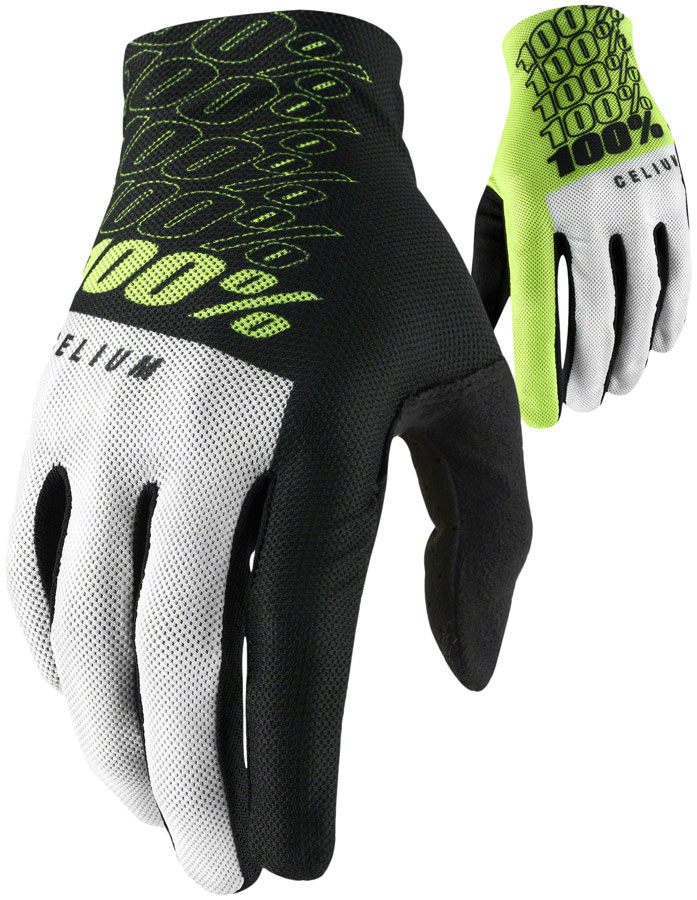
Bike Gloves: Bike gloves are another essential piece of gear for any mountain biker. Bike gloves protect your hands from the elements, and they can also help to improve your grip on the handlebars. We really like the 100% Celium Gloves for their ultralight breathable fabric and slip-on design.
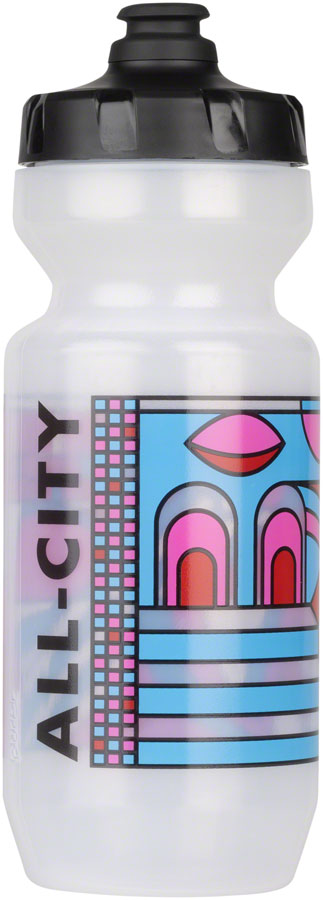
Purist Water Bottle: Water bottles come and go and you really can’t have enough of them. They come in all shapes and sizes but keeping it simple is usually the best option. We are big fans of Purist water bottles because they don’t taste like plastic.
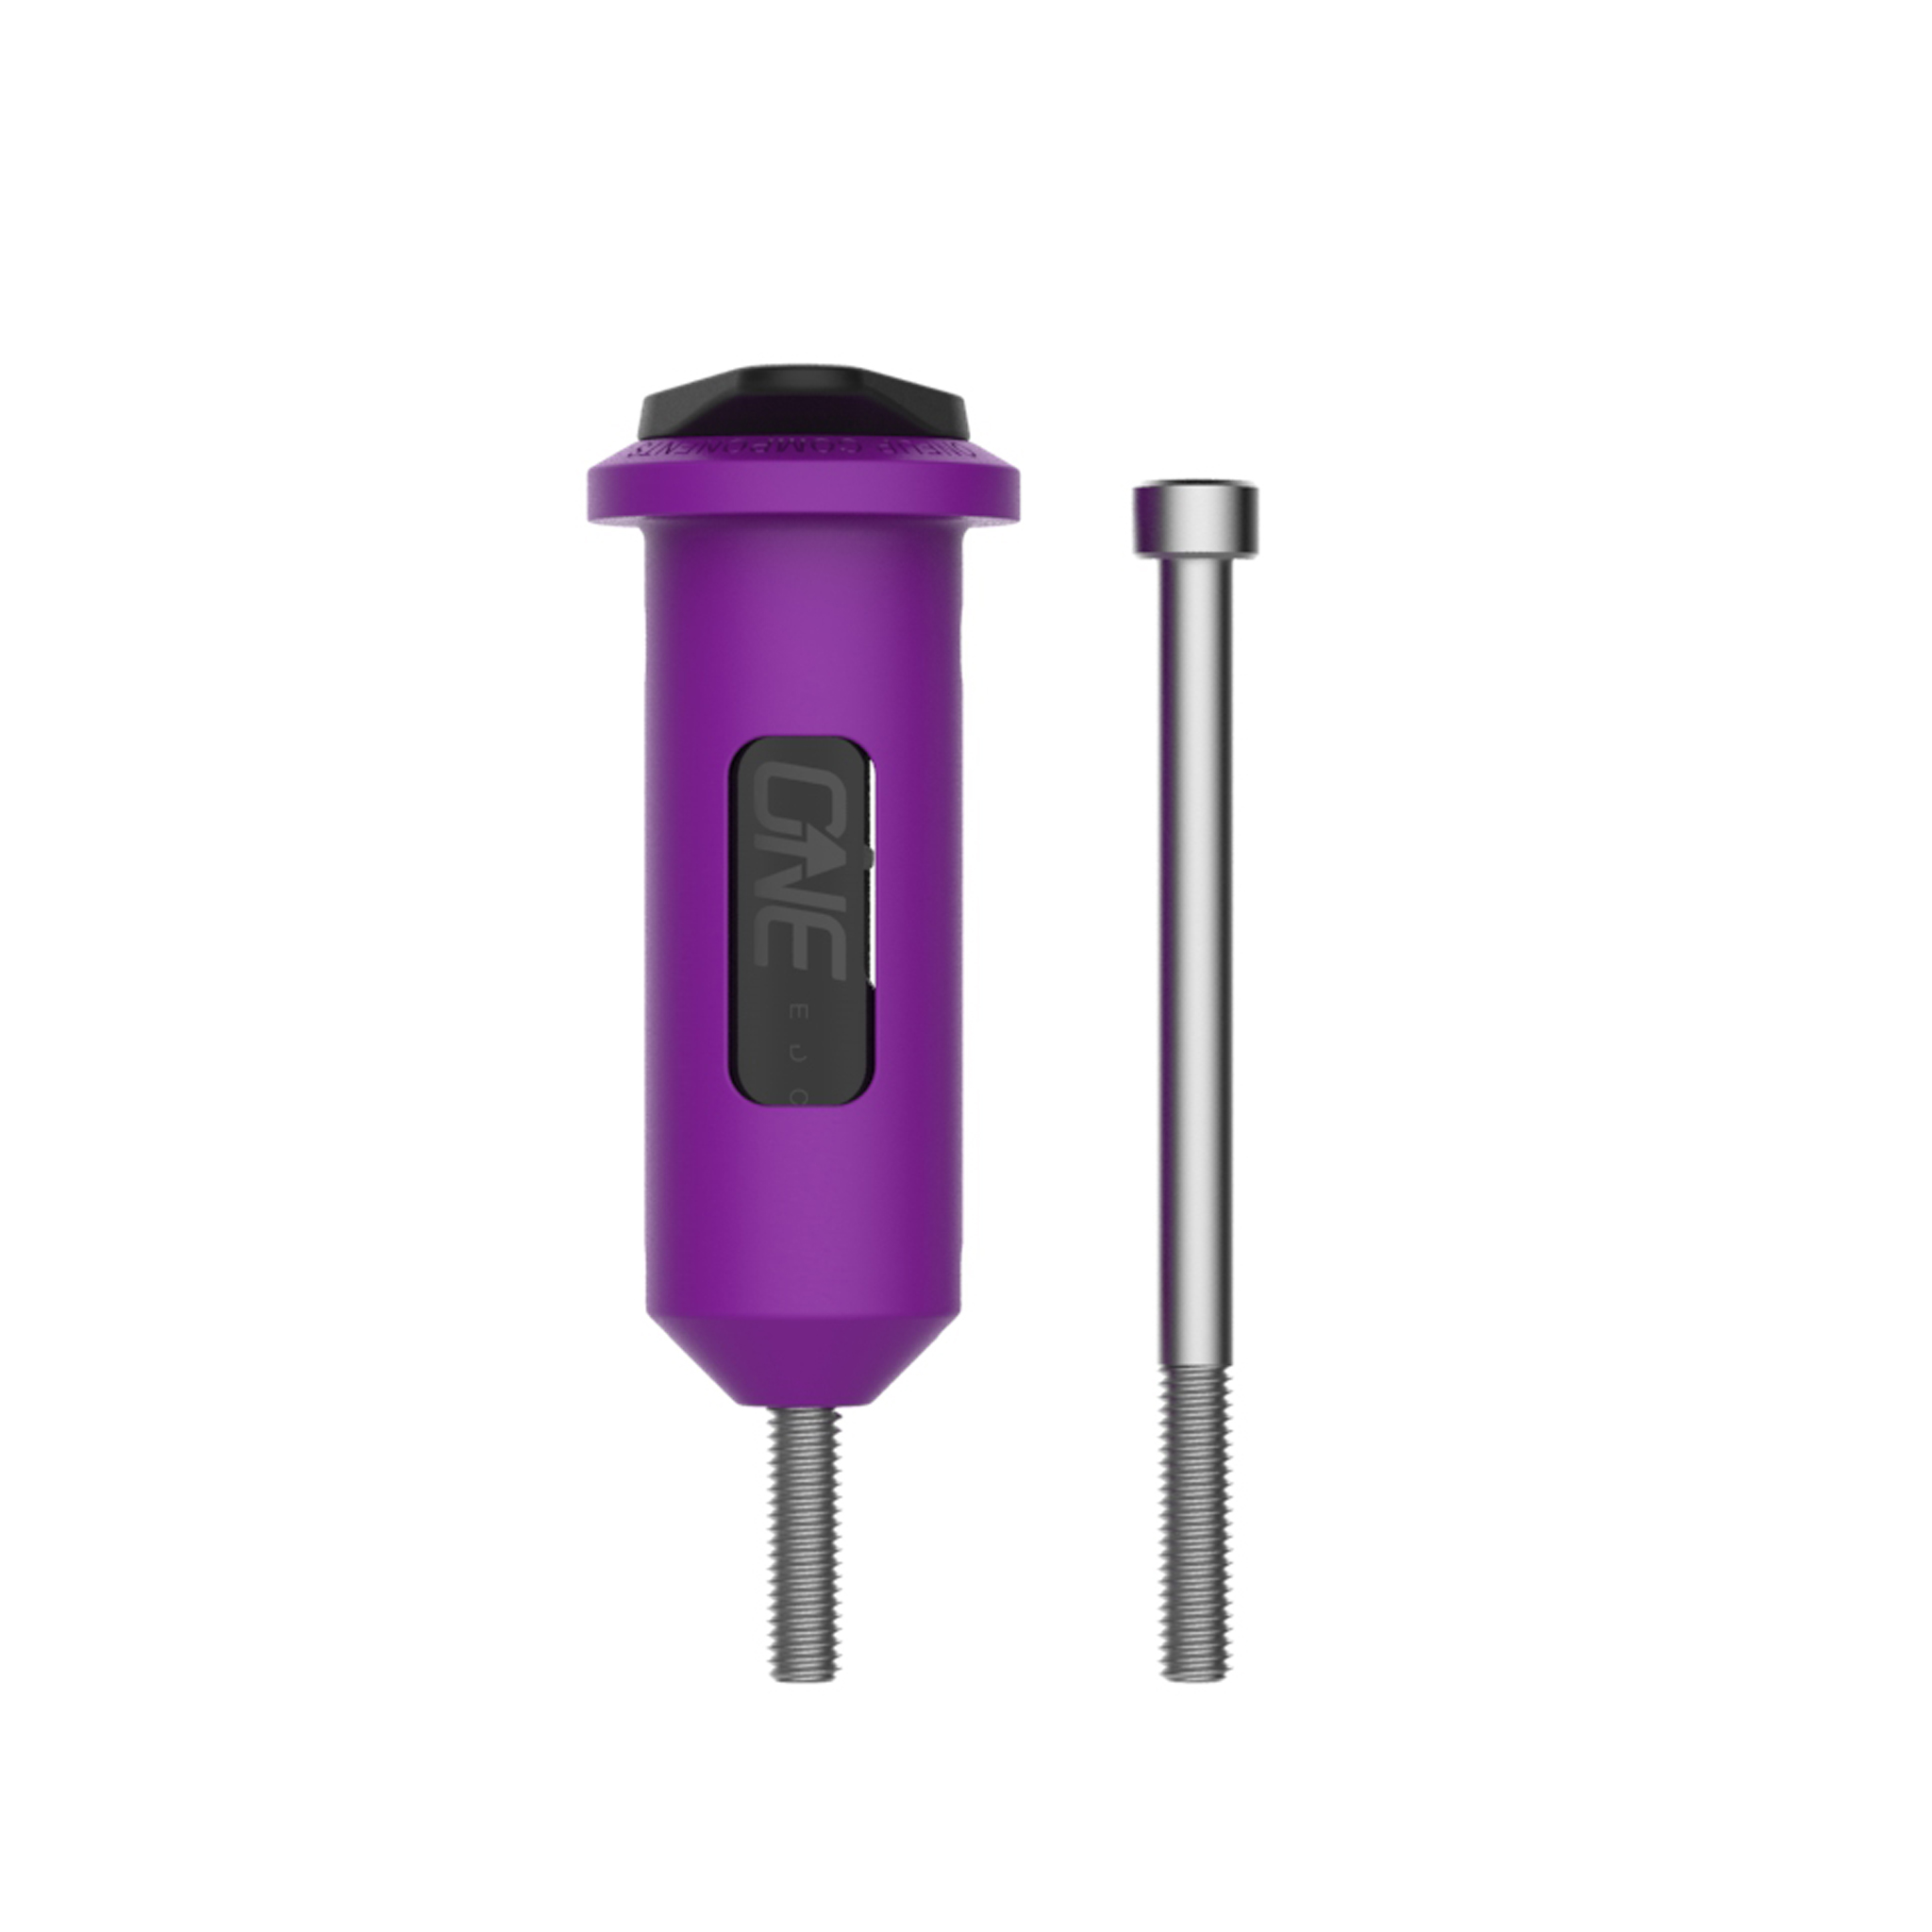
OneUp EDC Lite Tool: This nifty little tool fits right into a bike’s steer tube. It will require installation on their part (or at a bike shop), so this gift is better for someone who knows how to work on their bike. At less than $50, it doesn’t break the bank and they will be so excited to have it.
Tire PSI Gauge: It may sound silly but most mountain bikers fill up their tires to a precise PSI. Doing this with a floor pump is hard because you can’t see exactly what the pressure reads. This is where a PSI gauge comes in handy. There are electronic and analog gauges out there, and both work fine. This is a great gift that will get a ton of use.
Roll Recovery R8: The Roll Recovery is a deep-tissue massage device that will help keep the mountain biker in your life loose and limber. The company is headquartered just up the road in Boulder!
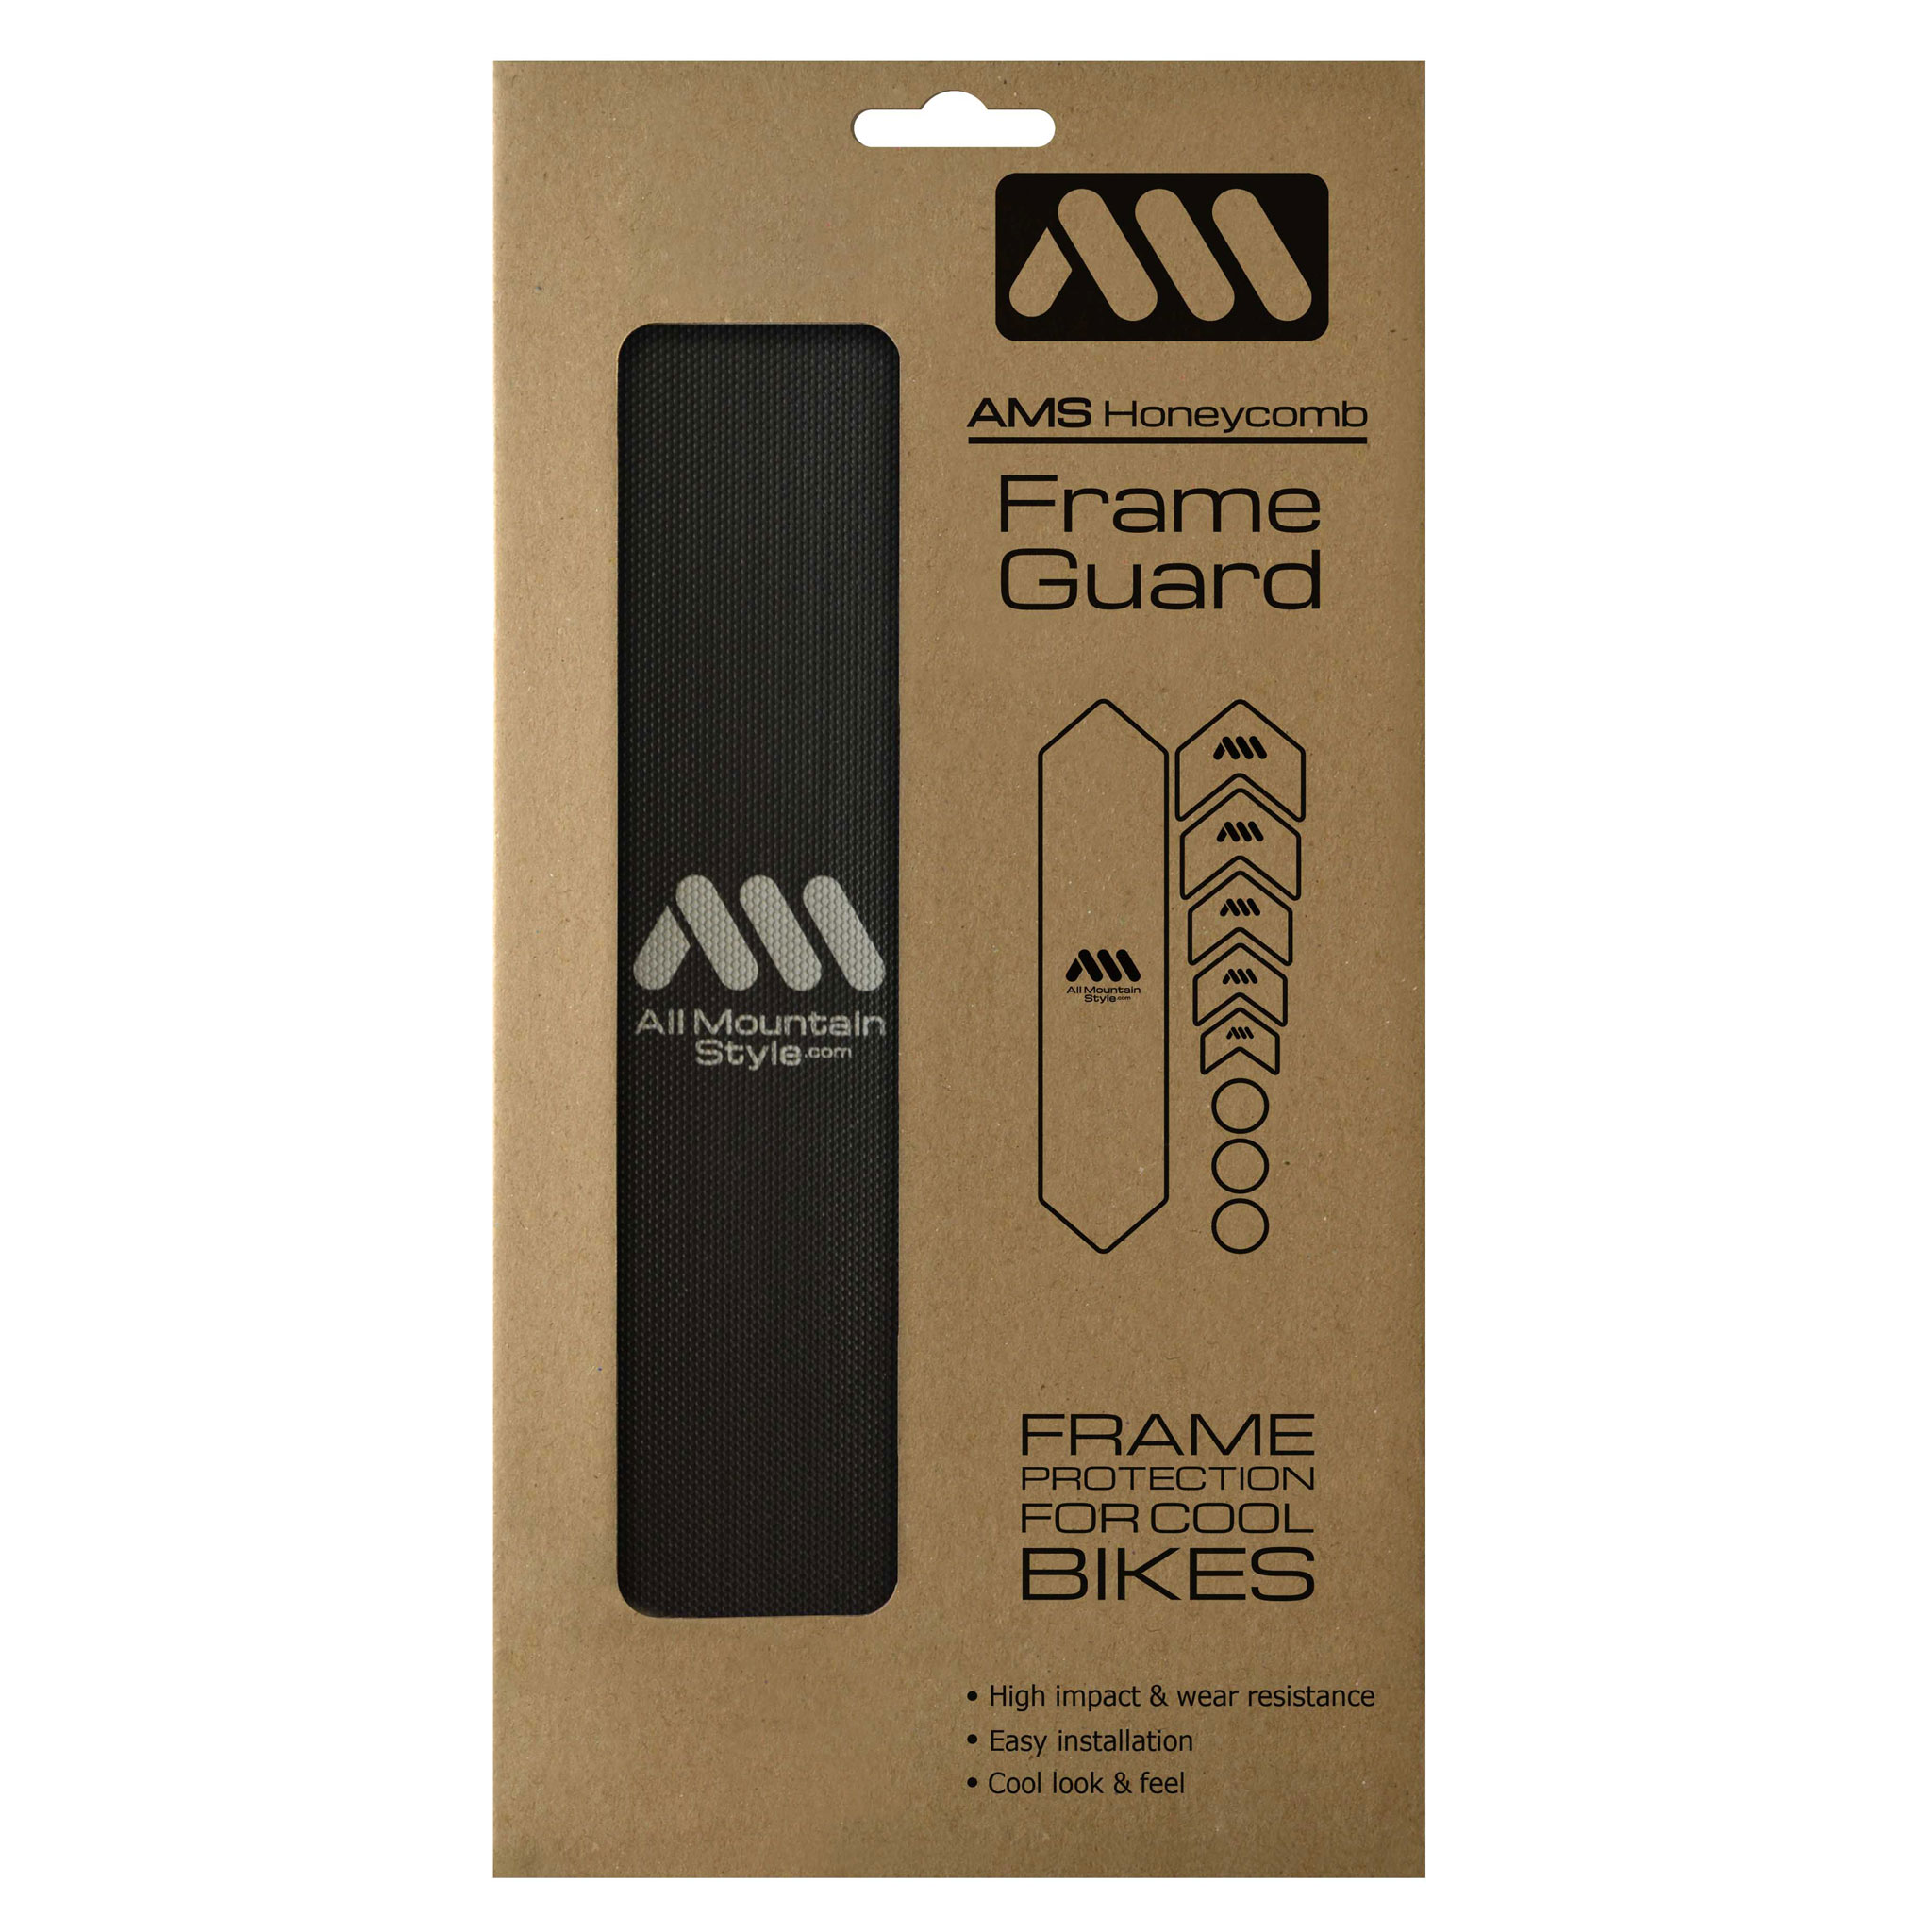
All Mountain Style Frame Guard: You would be shocked to know just how much money they spent on their mountain bike. It’s probably best not to ask either. Frame protection is one way to protect their “investment”.
When I started writing this post, I was surprised at how challenging it was to find beginner trails in Colorado. Thanks to the power of Trailforks, finding the top trails anywhere in the world is easier than ever. This can lead beginner riders astray real quick! Many of the trails I found were primarily used to access to other terrain or sandwiched between advanced trails making them not realistic for a true beginner ride. Take for example Whippletree in Whiteranch, one of the top-rated beginner trails in Colorado. For anyone who has ridden White Ranch, you know that the only way to get to Whippletree is a slog up Belcher Hill or a descent down Longhorn which are about as far as you can get from beginner-friendly.
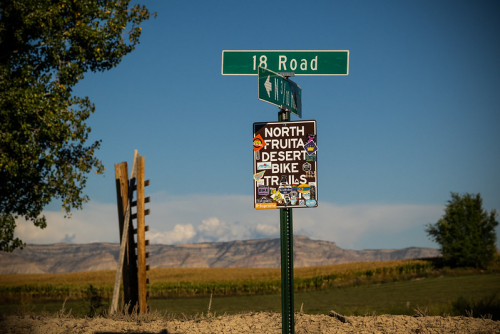
As I combed through the list of top-rated beginner trails, I found trail after trail to be like Whippletree. A true beginner trail should have an easy approach, smooth and flowing terrain, with optional features to challenge the rider. Also, it should have minimal climbing and not really extend beyond 5 miles. These trails I’ve identified have those attributes and more. They are part of trail networks with a high ratio of beginner and intermediate terrain, so beginner riders aren’t stuck riding the same trail over and over again. It doesn’t come as a surprise that Fruita tops the list for beginner mountain bike trails. The 18 Road area is full of short beginner-friendly trails that are perfect for learning and progression. Just across the interstate is Kokopelli Loops which has an iconic beginner ride of it’s own.
Kessel Run
Fruita, 18 Road
2 miles
437 ft of descent
The Kessel Run is a smooth, flowing trail with a few optional technical sections! It’s great for kids too since it is only 2 miles in length and all downhill. This trail is directional, making it easy for beginners to navigate without the worry of oncoming traffic. There are optional tech features along the trail for riders looking to challenge themselves. Once riders have built up confidence on Kessel Run, they can head over to PBR for a fun and easy intermediate trail to challenge themselves!
Rustlers Loop
Fruita, Kokopelli Loops
3.5 miles
289 ft of climb and descent
Rustlers Loop can be found on the other side of I-70 from 18 Road at the Kokopelli Loops area. Along the trail, riders will find educational signs with information on riding techniques and etiquette. It is suggested to ride in a clockwise direction via the local trail organization. Rustlers Loop is one of the few beginner trails in Colorado that can be ridden as a loop without involving any intermediate trails. Riders can experience the beautiful red rocks and interesting geology similar to Moab, without the Whole Enchilada gnarliness!
Beginners unfortunately get the short end of the stick when it comes to trails built for them. Fruita and Kokopelli Loops are two of the best options we have in the state when it comes to beginner trails. They set up the riders for success and provide plenty of options for progression through optional trail features and a plethora of surrounding intermediate terrain. So, what do you think? Are there better options for beginners in Colorado? Let us know in the comments!
You would be hard-pressed to enter a bike shop or Reddit thread and not hear conversations about rotating weight. Rotating weight is the weight of any part of your bike that rotates, such as your wheels, tires, cranks, and cassette. It’s said that reducing rotating weight is equivalent to 2x non-rotating weight, such as your frame and fork. The reason is that rotating weight has to be accelerated and decelerated every time you pedal, which takes more energy than non-rotating weight.
However, there is some debate about whether rotating weight is that important. Some studies have shown that reducing rotating weight can lead to significant performance improvements, while others have shown no difference.
So, what is the truth? Here is a look at the evidence:
The Takeaway
When you look at the physics within the context of cycling, rotating weight makes no measurable difference at all according to Jean Paul Ballard from Swissside. This was based on their testing of two wheelsets that had a difference in weight of 400 grams. Shedding weight does help in terms of efficiency, but rotating weight vs static weight is the same! So yes, putting a premium on rotating weight in cycling is BS!
Mountain bike grip diameter is an important consideration for riders of all hand sizes. While it’s generally assumed that riders with bigger hands should choose wider grips, there are a number of factors that can influence grip diameter preference, including riding style, terrain, and personal comfort.
Grip diameter options
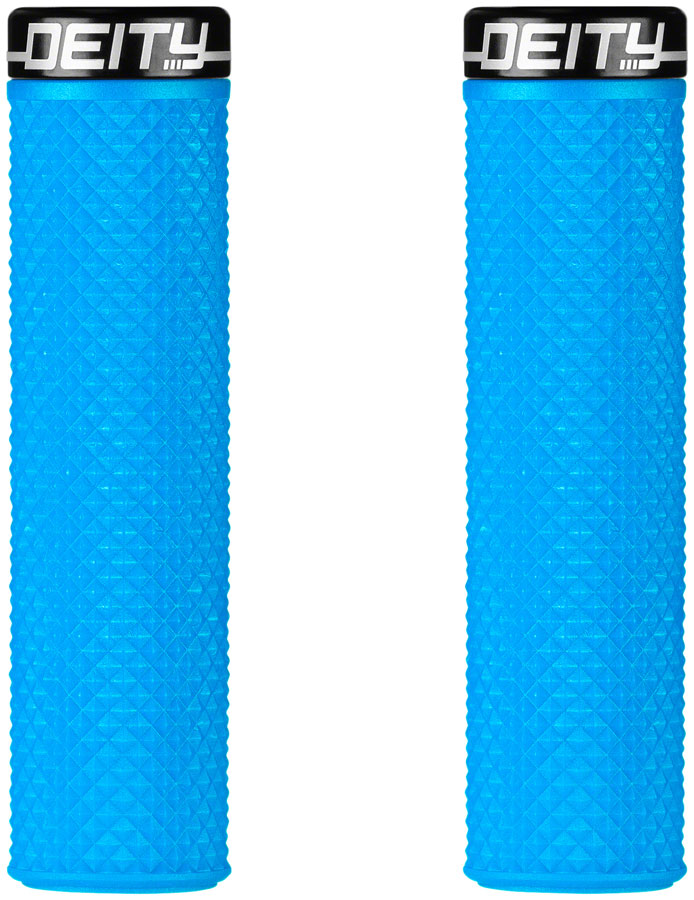
Mountain bike grips typically come in a range of diameters, from around 29mm to 34mm. Some popular grips, like the Ergon GD1 Evo Slim and the Deity Supracush, fall on the opposite ends of this spectrum.
Choosing the right grip diameter
To choose the right grip diameter, it’s important to consider your riding style, terrain, and personal comfort. Riders who do a lot of technical riding or ride in rough terrain may benefit from wider grips, which can provide more support and control. Riders who have smaller hands may prefer narrower grips for a more comfortable fit.
The benefits of wider grips
Wider grips can offer a number of benefits, including:
Increased support and control: Wider grips can help to distribute body weight more evenly across the handlebars, which can lead to increased support and control.
Reduced hand fatigue: Wider grips can also help to reduce hand fatigue, especially on long rides or rides over rough terrain.
Increased comfort: Some riders find that wider grips are more comfortable, especially if they have larger hands.
Why you might choose wider grips, even if you have small hands
There are a number of reasons why you might choose wider grips, even if you have small hands! For example, if you do a lot of technical riding or ride in rough terrain, wider grips can provide more support and control. Additionally, some riders find that wider grips are more comfortable, even if they have smaller hands.
If you’re not sure what grip diameter is right for you, it’s a good idea to try out a few different pairs before you buy them. Most bike shops have a variety of grips in stock that you can try out. You may also want to consider renting a mountain bike with different grip diameters to see what you prefer.
Conclusion
Mountain bike grip diameter is an important consideration for riders of all hand sizes. While it’s generally assumed that riders with bigger hands should choose wider grips, there are a number of factors that can influence grip diameter preference, including riding style, terrain, and personal comfort.
If you’re not sure what grip diameter is right for you, it’s a good idea to try out a few different pairs before you buy them. You may also want to consider renting a mountain bike with different grip diameters to see what you prefer.
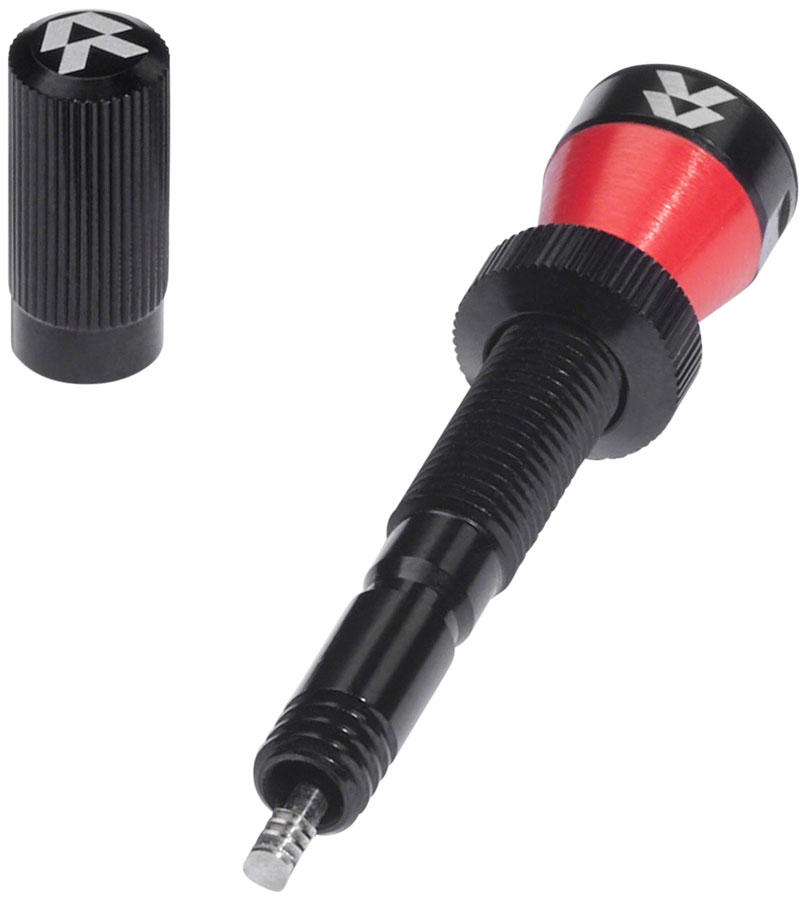
Tubeless valve stems are an important part of any tubeless tire system. They allow you to inflate and deflate your tires, and they also help to keep sealant from clogging the valve stem and preventing air from flowing into the tire. They also offer a stylish way to add some personal flare and style to your ride.
If you’re looking for the best tubeless valve stems, there are a few things to keep in mind:
Material: Look for tubeless valve stems made from durable materials, like brass or aluminum. These materials are strong and resistant to corrosion, which is important for tubeless tires, which can be exposed to a lot of moisture and dirt.
Length: Tubeless valve stems come in different lengths. Choose a length that is appropriate for your rim depth. You want the valve stem to be long enough to protrude through the rim and allow you to easily inflate and deflate your tire, but not so long that it sticks out too far and is at risk of being damaged.
Airflow: The best tubeless valve stems have a good airflow. This allows you to inflate your tires quickly and easily, and it also helps to prevent sealant from clogging the valve stem.
Here are a few of the best tubeless valve stems on the market:
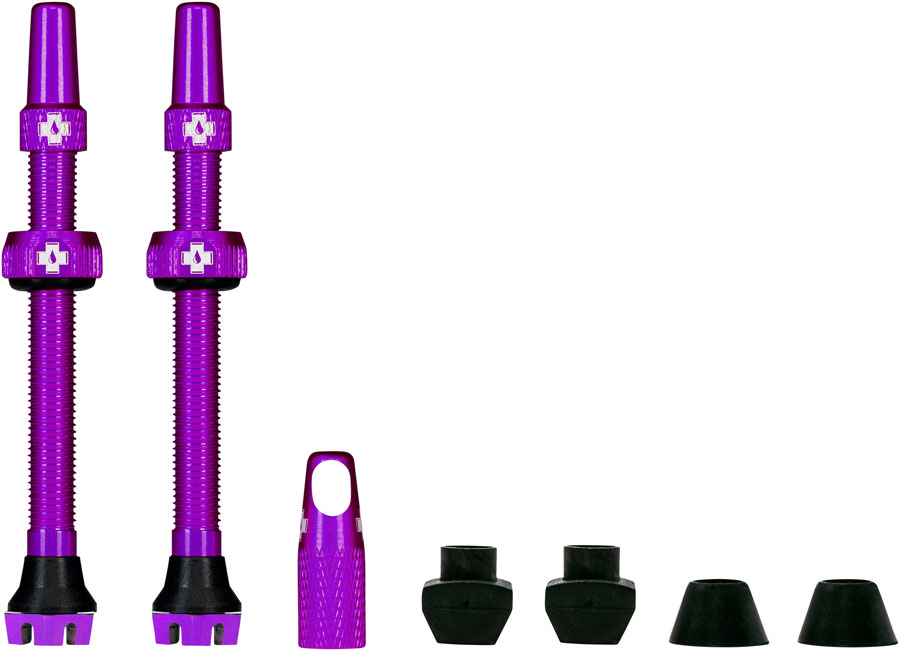
Muc-Off V2 Tubeless Valves: These valves are made from high-quality aluminum and have a machined airflow system that helps to prevent sealant from clogging the valve stem. These valves are designed specifically to work with tire inserts like Cush Core and Tannus and include a special valve cap that doubles as a valve core removal tool. They also come in a variety of colors to match your bike!
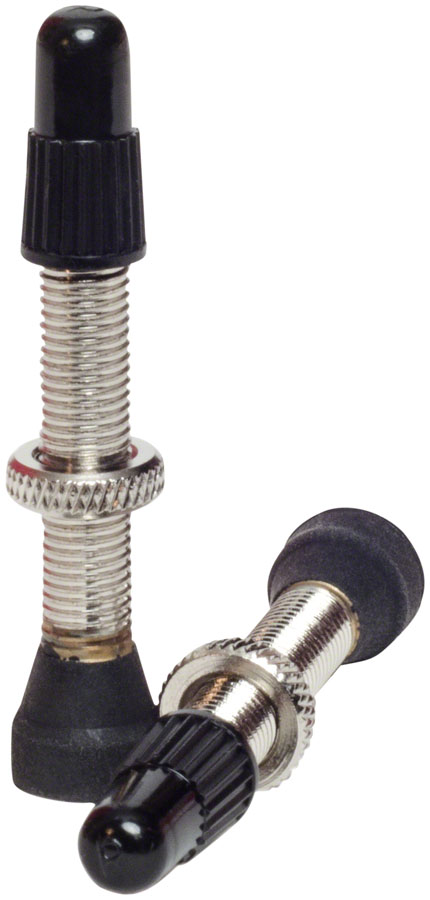
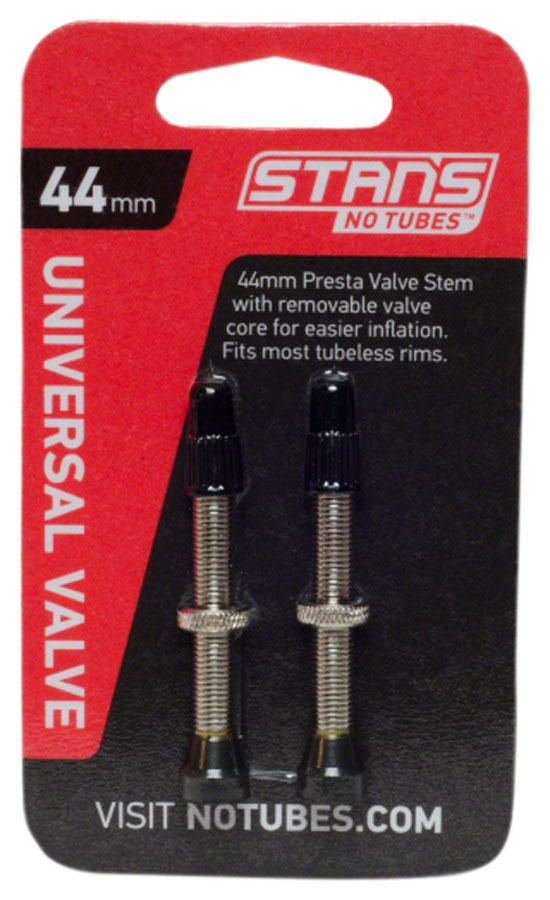
Stan’s NoTubes Brass Valve Stems: These valves are made from durable brass and have a removable valve core for easy sealant injection. They are also compatible with a variety of tubeless rims. Stans also offers a lightweight alloy version for a little extra coin.
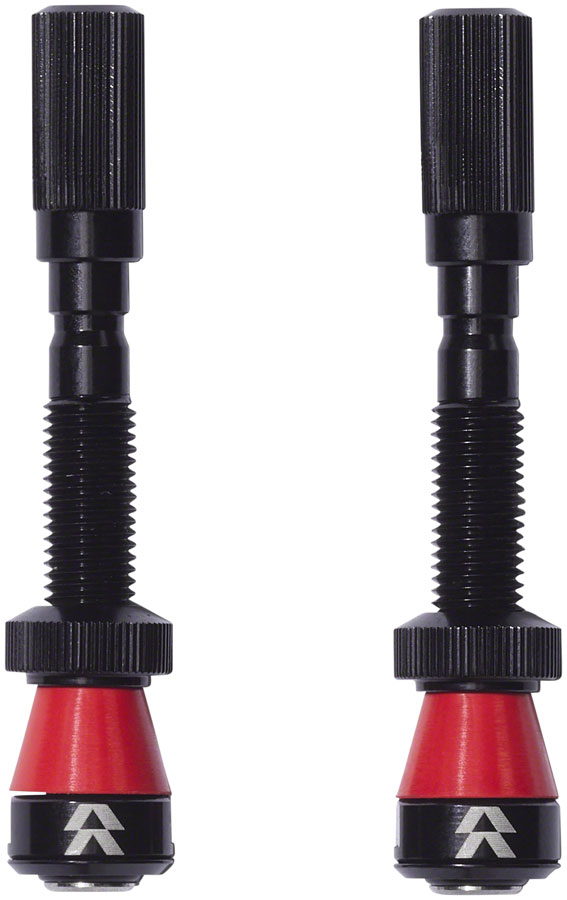
CushCore Tubeless Presta Air Valve Set: These valves are designed for use with CushCore tire inserts. They have a wider valve stem than traditional tubeless valves to accommodate the tire insert. The air passageway is T-shaped, rather than a simple through-hole, which prevents the insert from obstructing air flow through the valve.
Reserve Fillmore Tubeless Valves: These valves are unique in that they do not have a traditional valve core. Instead, they have a plug that seals the valve stem from the inside of the tire. This design helps to prevent sealant from clogging the valve stem and makes it easier to inflate tubeless tires.
No matter which tubeless valve stems you choose, make sure that they are compatible with your rims and tires. You should also inspect your valve stems regularly for signs of wear and tear, and replace them as needed.
If you have any questions about tubeless valve stems, or if you need help choosing the right ones for your bike, please don’t hesitate to ask. We’re always happy to help!
Preparing for a biking adventure, especially one as exhilarating as Trans Madeira, requires careful consideration of gear and packing essentials. From the choice of a bike bag to managing clothing, shoes, and other crucial items, the right decisions can enhance the entire experience. In this guide, we’ll walk you through key elements to pack efficiently and smartly for a seamless biking adventure!
Official Trans Madeira Pack List
Packing Advice
Keep your packing light and simple.
Get everything inside a large travel bag so that transportation is easier for you and for our team.
Instead of big hard case roller bags, sometimes it’s better to use a good waterproof duffle bag where you can squeeze it all in.
Avoid bringing electronics you won’t use such as laptops.
Separate race kits for each day in individual bags (jersey, shorts, socks…) so that you don’t lose time in the morning color matching!
Bring enough riding gear for five days of racing – you really don’t want to clean dirty clothing during the week… or smell bad!
Riding Gear
6 or 7 riding jerseys
3 or 4 riding shorts
At least 2 base layers
1 (good!) rain jacket
1 or 2 pairs of riding shoes
2 or 3 pairs of gloves
Mandatory protection gear is a helmet (we highly recommend wearing a full-face) and kneepads. We advise the use of gloves, goggles, or sunglasses.
Some riders prefer going lightweight and just using a hip-pack; others prefer going ‘full-enduro’ with a backpack; some don’t take anything – it’s really up to you. Based on our experience it’s important for you to have ways to carry water, multi-tool, rain jacket, layers…
Other Stuff
Sleeping bag
Pillow
Earplugs (for better night sleep)
Flip flops and towel (shower and to go for a swim)
Cycling padded shorts (no kidding…)
Post-race casual warm clothing
Multi-tool and specific spare parts for your bike (derailleur hanger is a must!)
Headlight (for bike camps and adventure day)
Sunscreen
Water bottle
Chain lube
Powerbank (we have power stations but they can get busy!)
If you follow this list you should be pretty dialed! For some additional notes about what to bring keep reading!
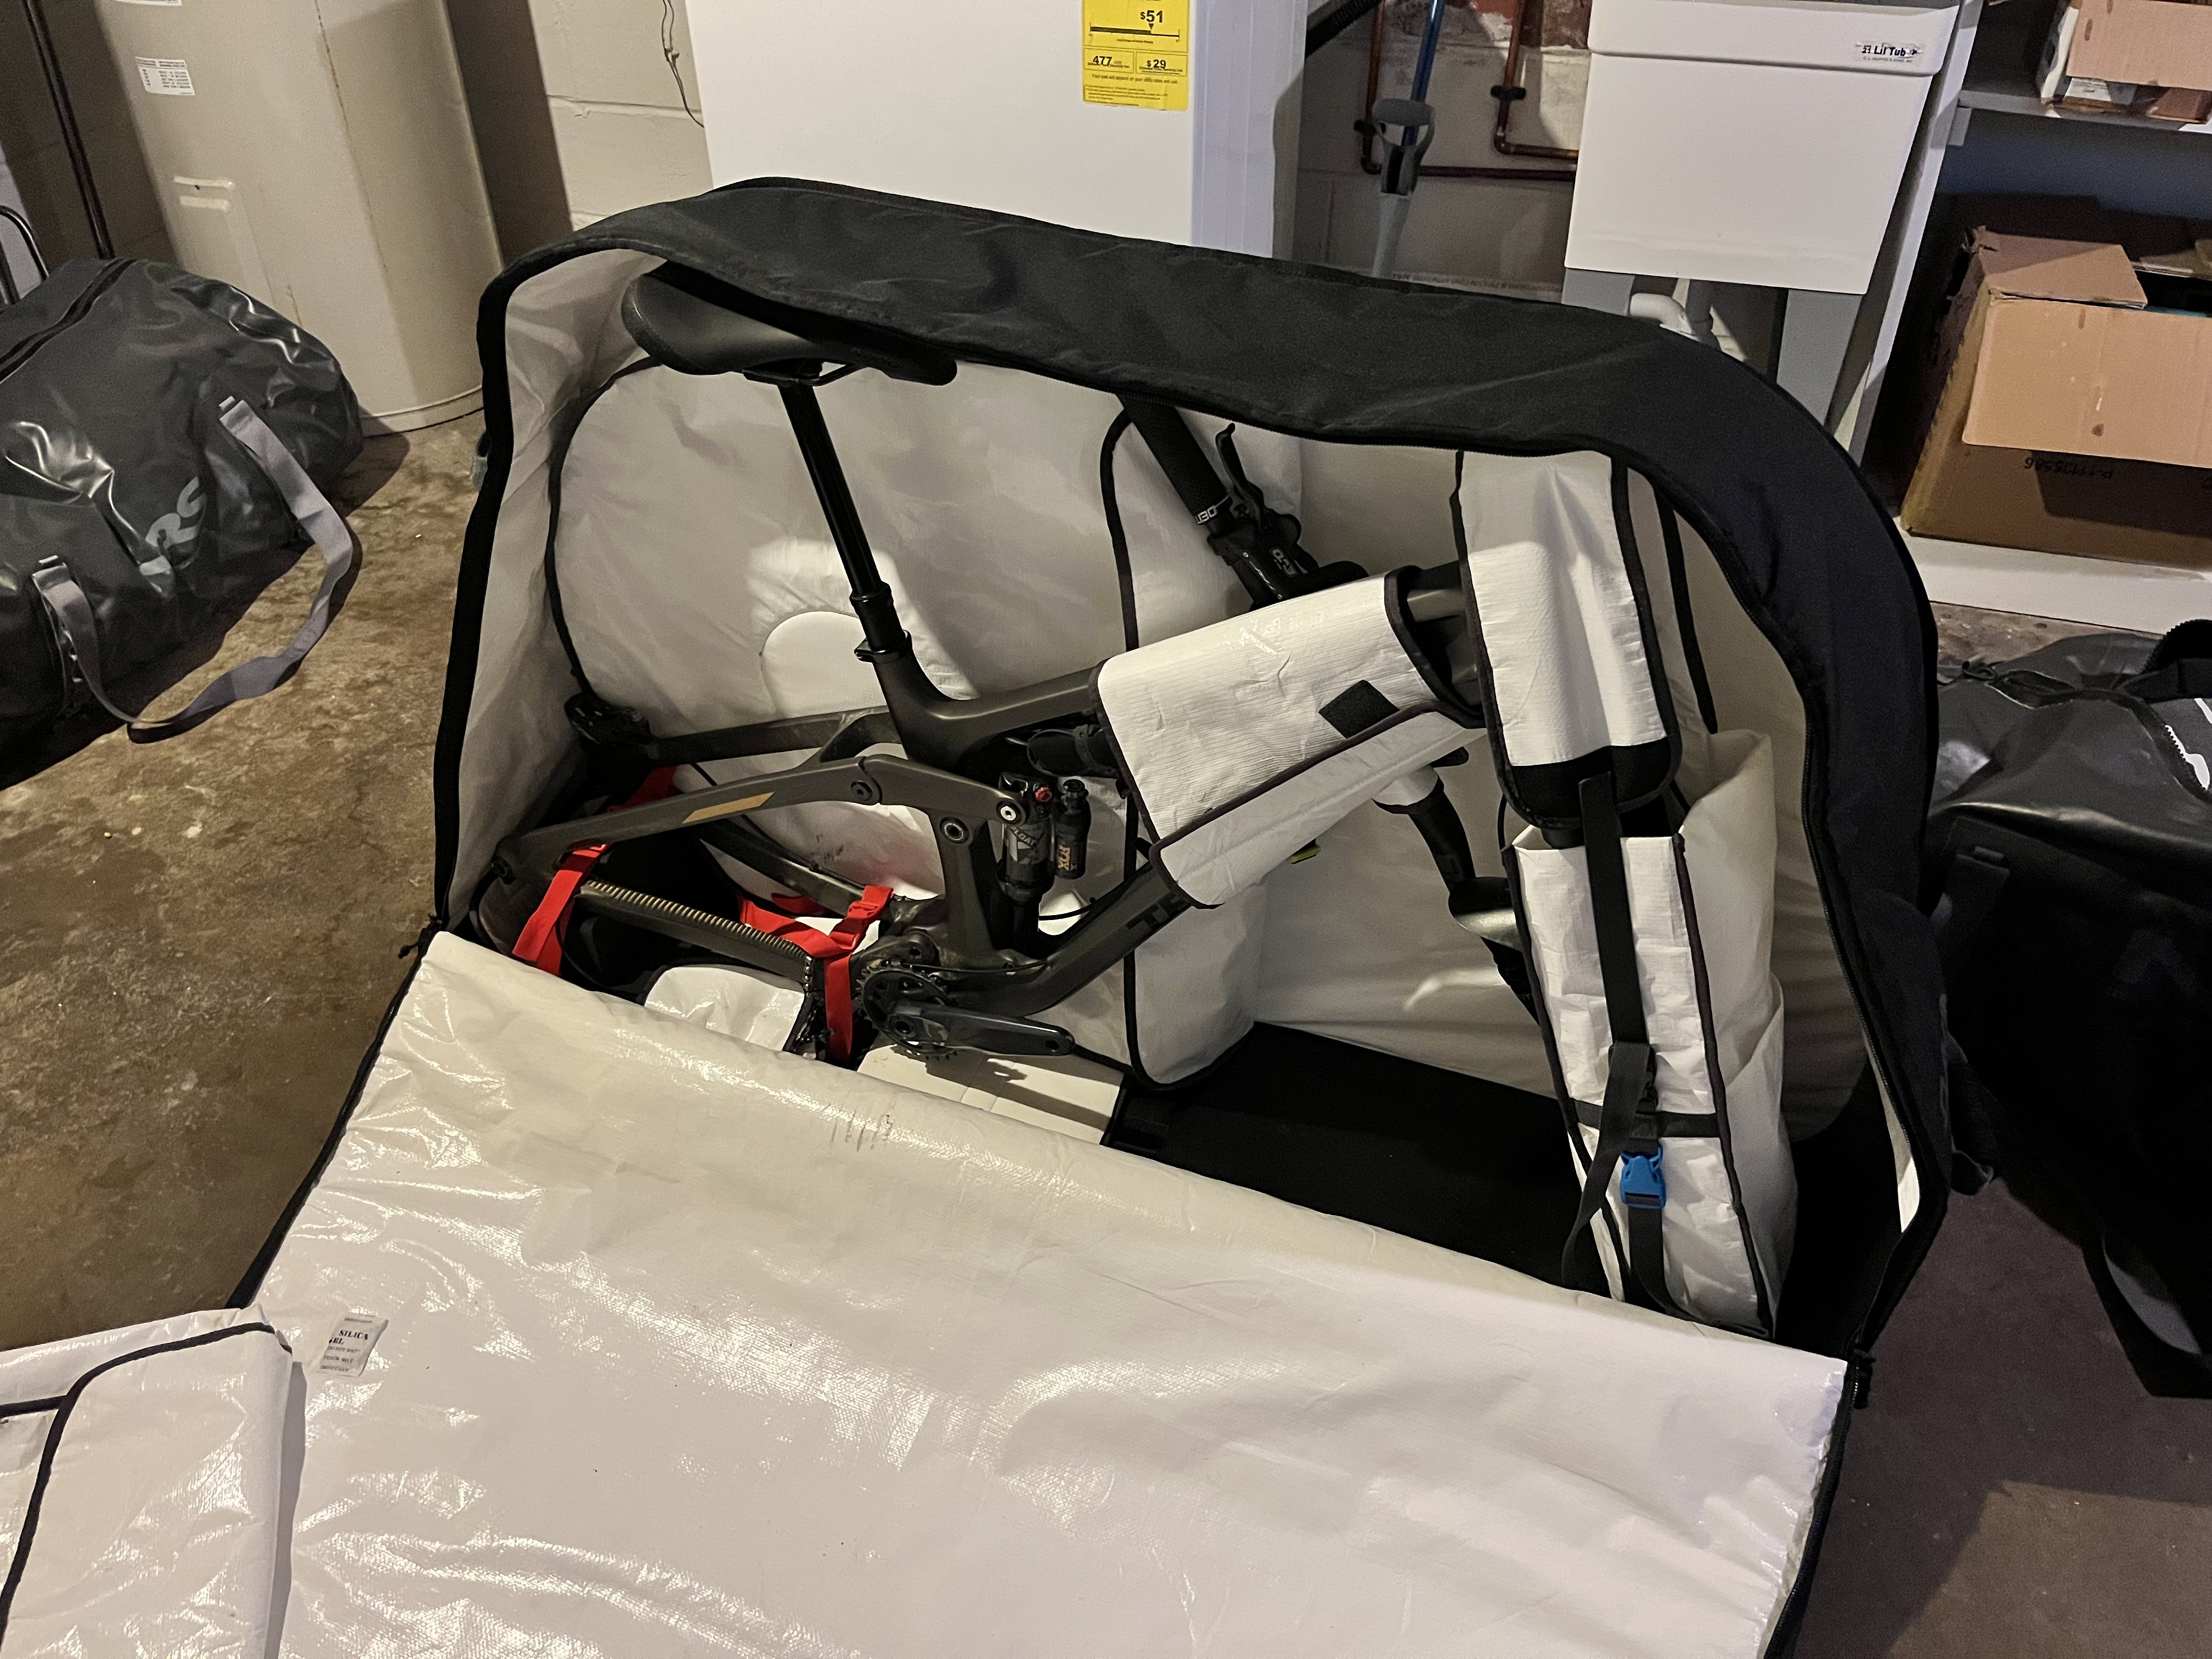
Bike Bag
Initially, I was planning on just getting a bike box from a shop, but I am so glad that I had a bike bag. It made packing my bike, so much easier, more secure, and probably helped keep my bag underweight. If you don’t have a bike bag, I highly recommend either buying one or trying to borrow someone from a friend. I used the Dakine Bike Roller Bag which worked great! It was easy to use and kept my bike free of damage during the journey to and from Madeira!
AirTags In Your Luggage
I highly recommend putting an AirTag or similar tracking device in your bike bag and duffel bag. My bike bag didn’t show up in Madeira because I had a 45-minute layover in Lisbon. Having the AirTag in the bag was a big help. I was able to track the bag’s progress without having to call the airline for status updates. Half the people in our group had lost/missing bags, so there is a decent chance that your bag will get lost in the shuffle too. There was one participant whose bag bike bag never made it to Madeira and he rode a rental bike all week long.
Riding Kits
I seriously recommend packing a riding kit for every day. This means 5 to 6 pairs of shorts/pants, 5 to 6 jerseys/shirts, and 5 to 6 pairs of socks. The reason is there is no way to dry or clean your clothes. Putting on a fresh pair of clothes in the morning was essential. If you’re like me and don’t have 6 pairs of riding shorts, I recommend buying some used ones on Facebook Marketplace or eBay!
Riding Shoes
I ended up bringing two pairs of shoes due to advice from other riders, but I would advise against it, and here’s why. When you leave your wet shoes in your bag all day, they are going to start to smell pretty rank and like mildew. When I went to put on my shoes on day three I decided not to because they smelled so bad. I would just stick with one pair of shoes for this reason.
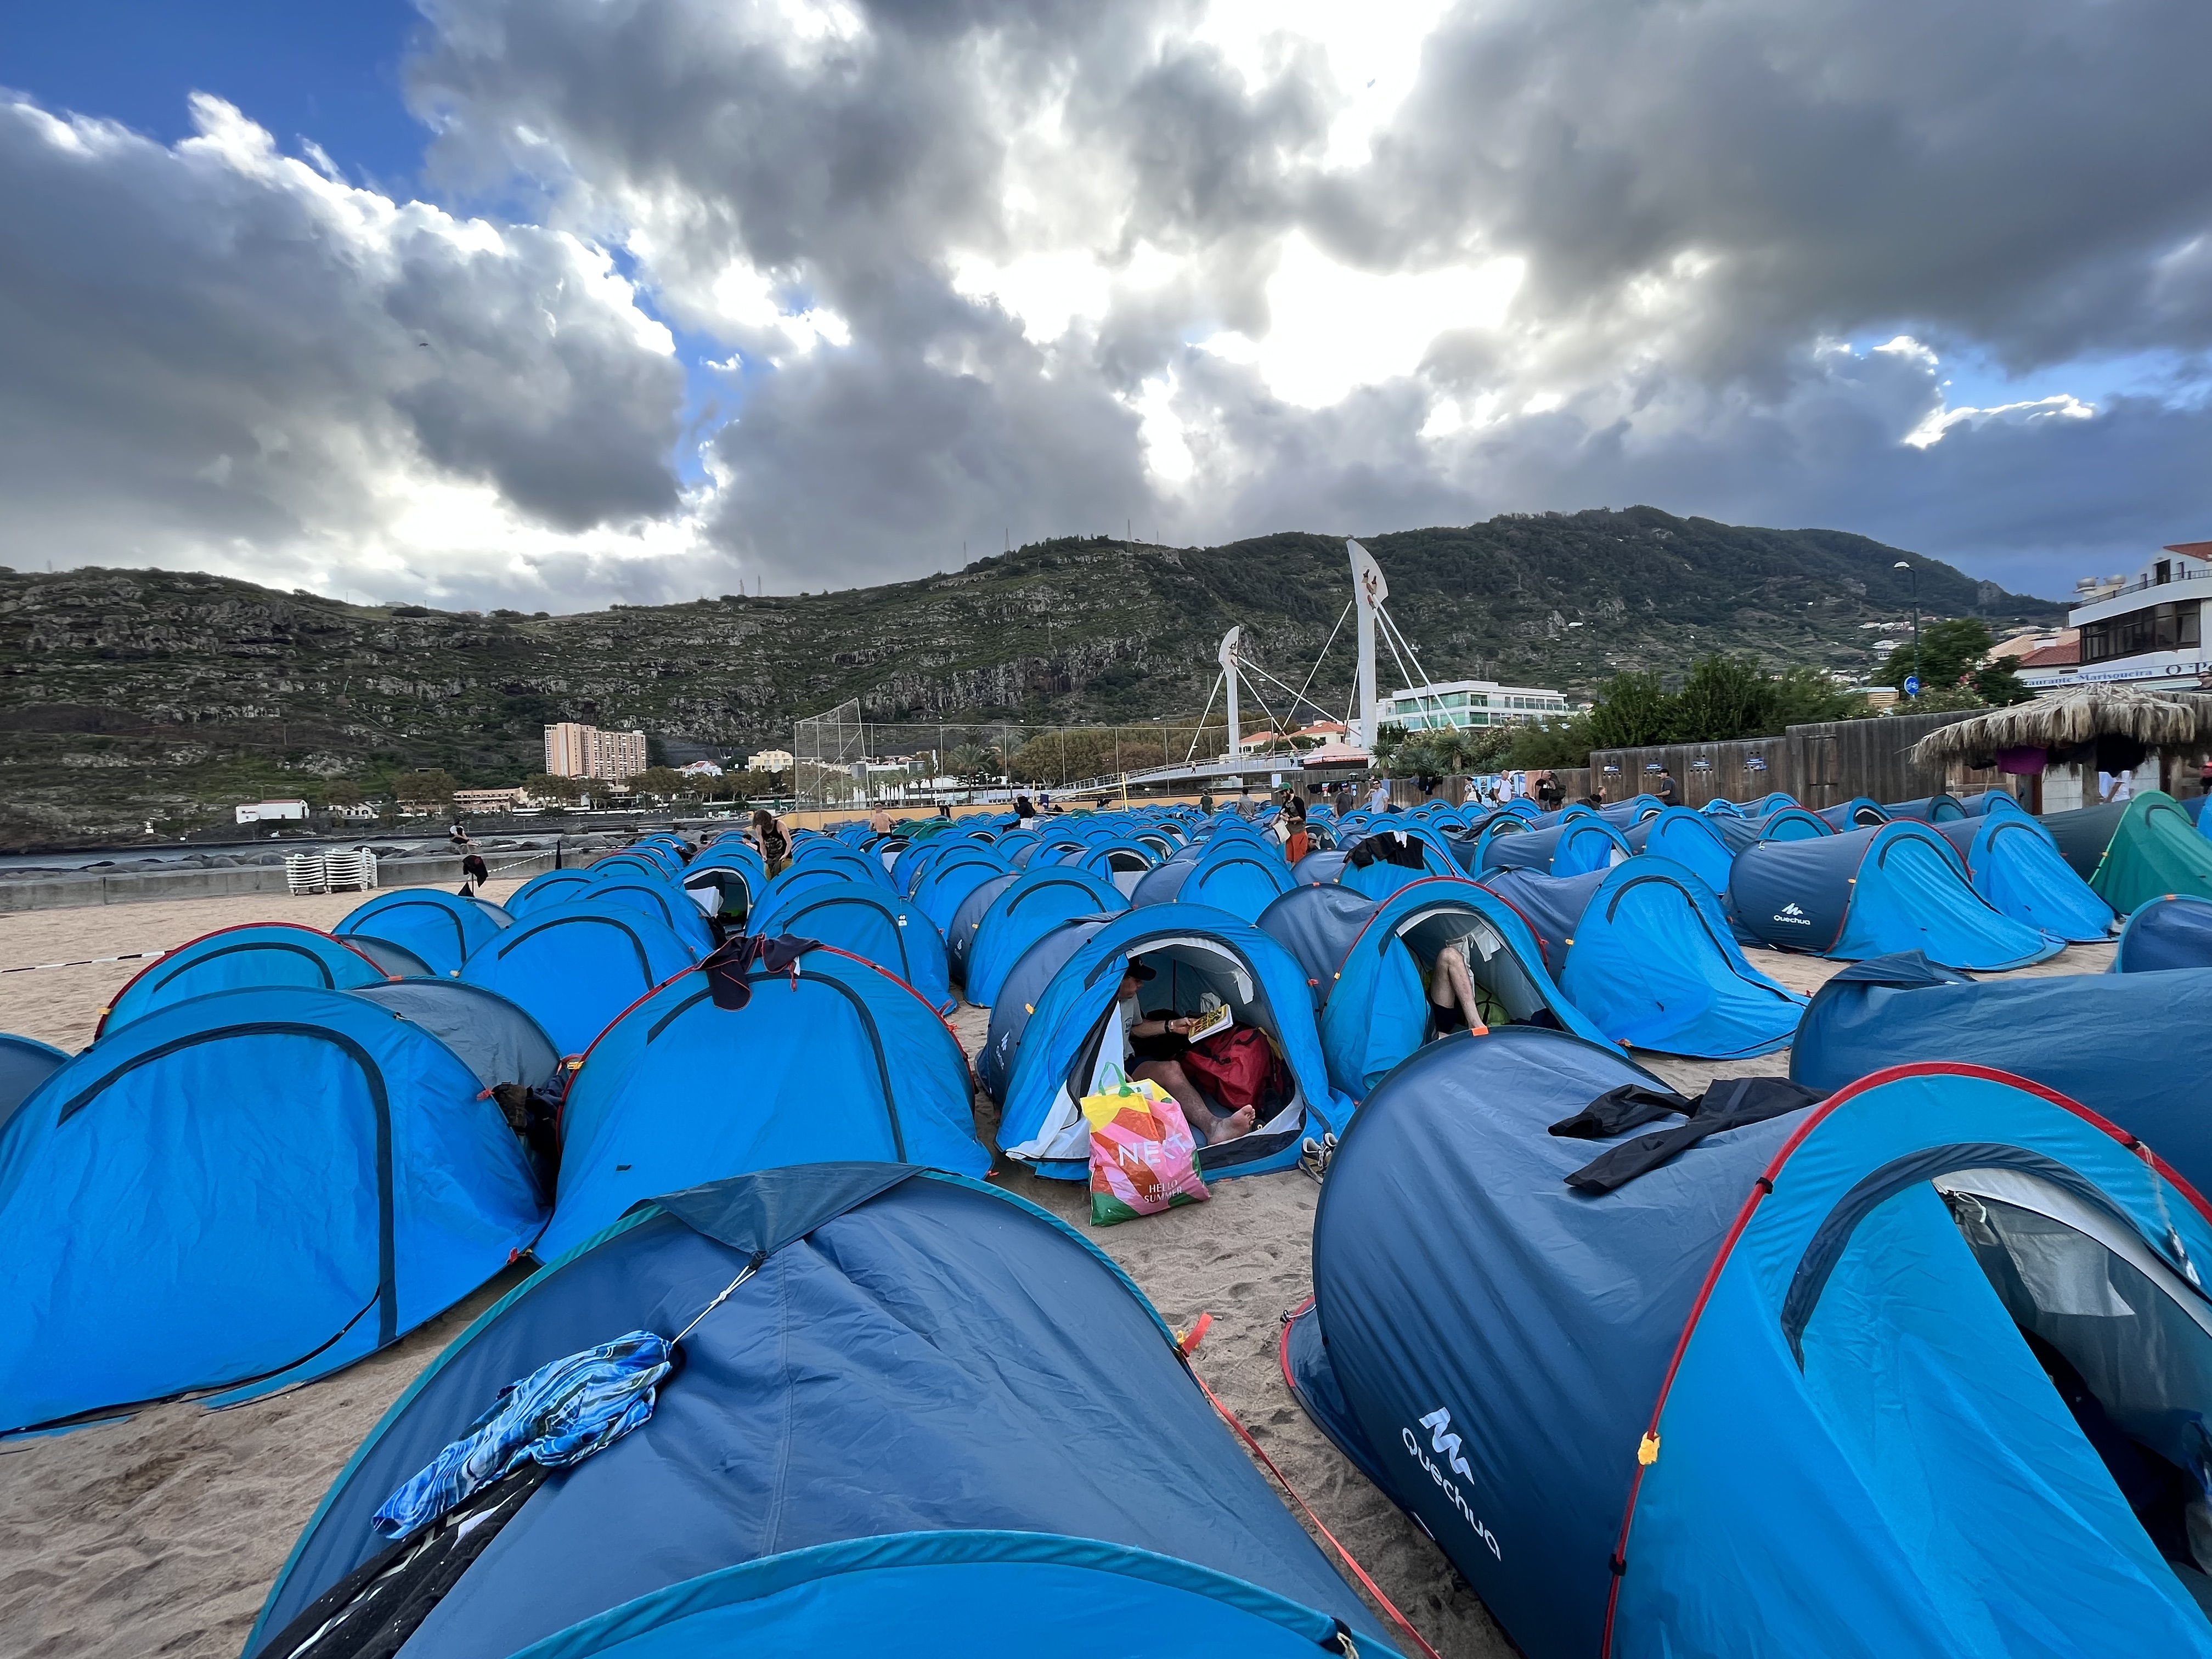
Sleeping Gear
Trans Madeira provides you with a tent and sleeping pad but you need to bring your own sleeping bag/sheets. I opted for a rumple blanket and a non-fitted sheet which ended up being really nice to have. I’d recommend just getting a cheap one off Amazon, and tossing it at the end of the race because mine was pretty disgusting by the end of the week with blood and dirt stains all over the place. If you are a light sleeper, bring some earplugs!
Smaller Bags For Organizing
Another tip I have is to have a couple of those big, vacuum seal, plastic travel bags. You can use one for your clean, non-riding clothes, one for dirty laundry, and another to keep your riding kits, which I recommend packing into individual bags.
Waterproof Duffel
For my duffel bag, I used an NRS Dry duffel, which was perfect. Most riders put their duffel bag in their tent at night, but since mine was waterproof, I just left mine outside of the tent, which was super nice, because the tents are a little bit tight one important note is that you don’t have access to your bike bag during the event. You want to make sure that your duffel bag can fit everything you bring. We heard stories about people, who packed a bunch of stuff in their bike bag for the flight, but didn’t have enough space in their duffel when they needed to consolidate all of their belongings!
Backpack vs. fanny pack vs. nothing
Deciding which of these to bring is a challenge. In my opinion, you can get away with bringing a fanny pack or nothing on most days except the big adventure day on day three you cannot count on being able to fill up your water bottle between stages, but you can fill up your water at the lunch spot every day , so keep this in mind when deciding how much water to bring each day. Occasionally, the staff would have a water jug between stages, but it was very hit or miss on the big adventure day. I would highly recommend bringing a backpack. You’ll need it to be able to bring enough water, but it also makes putting the bike over your shoulders a little more comfortable.
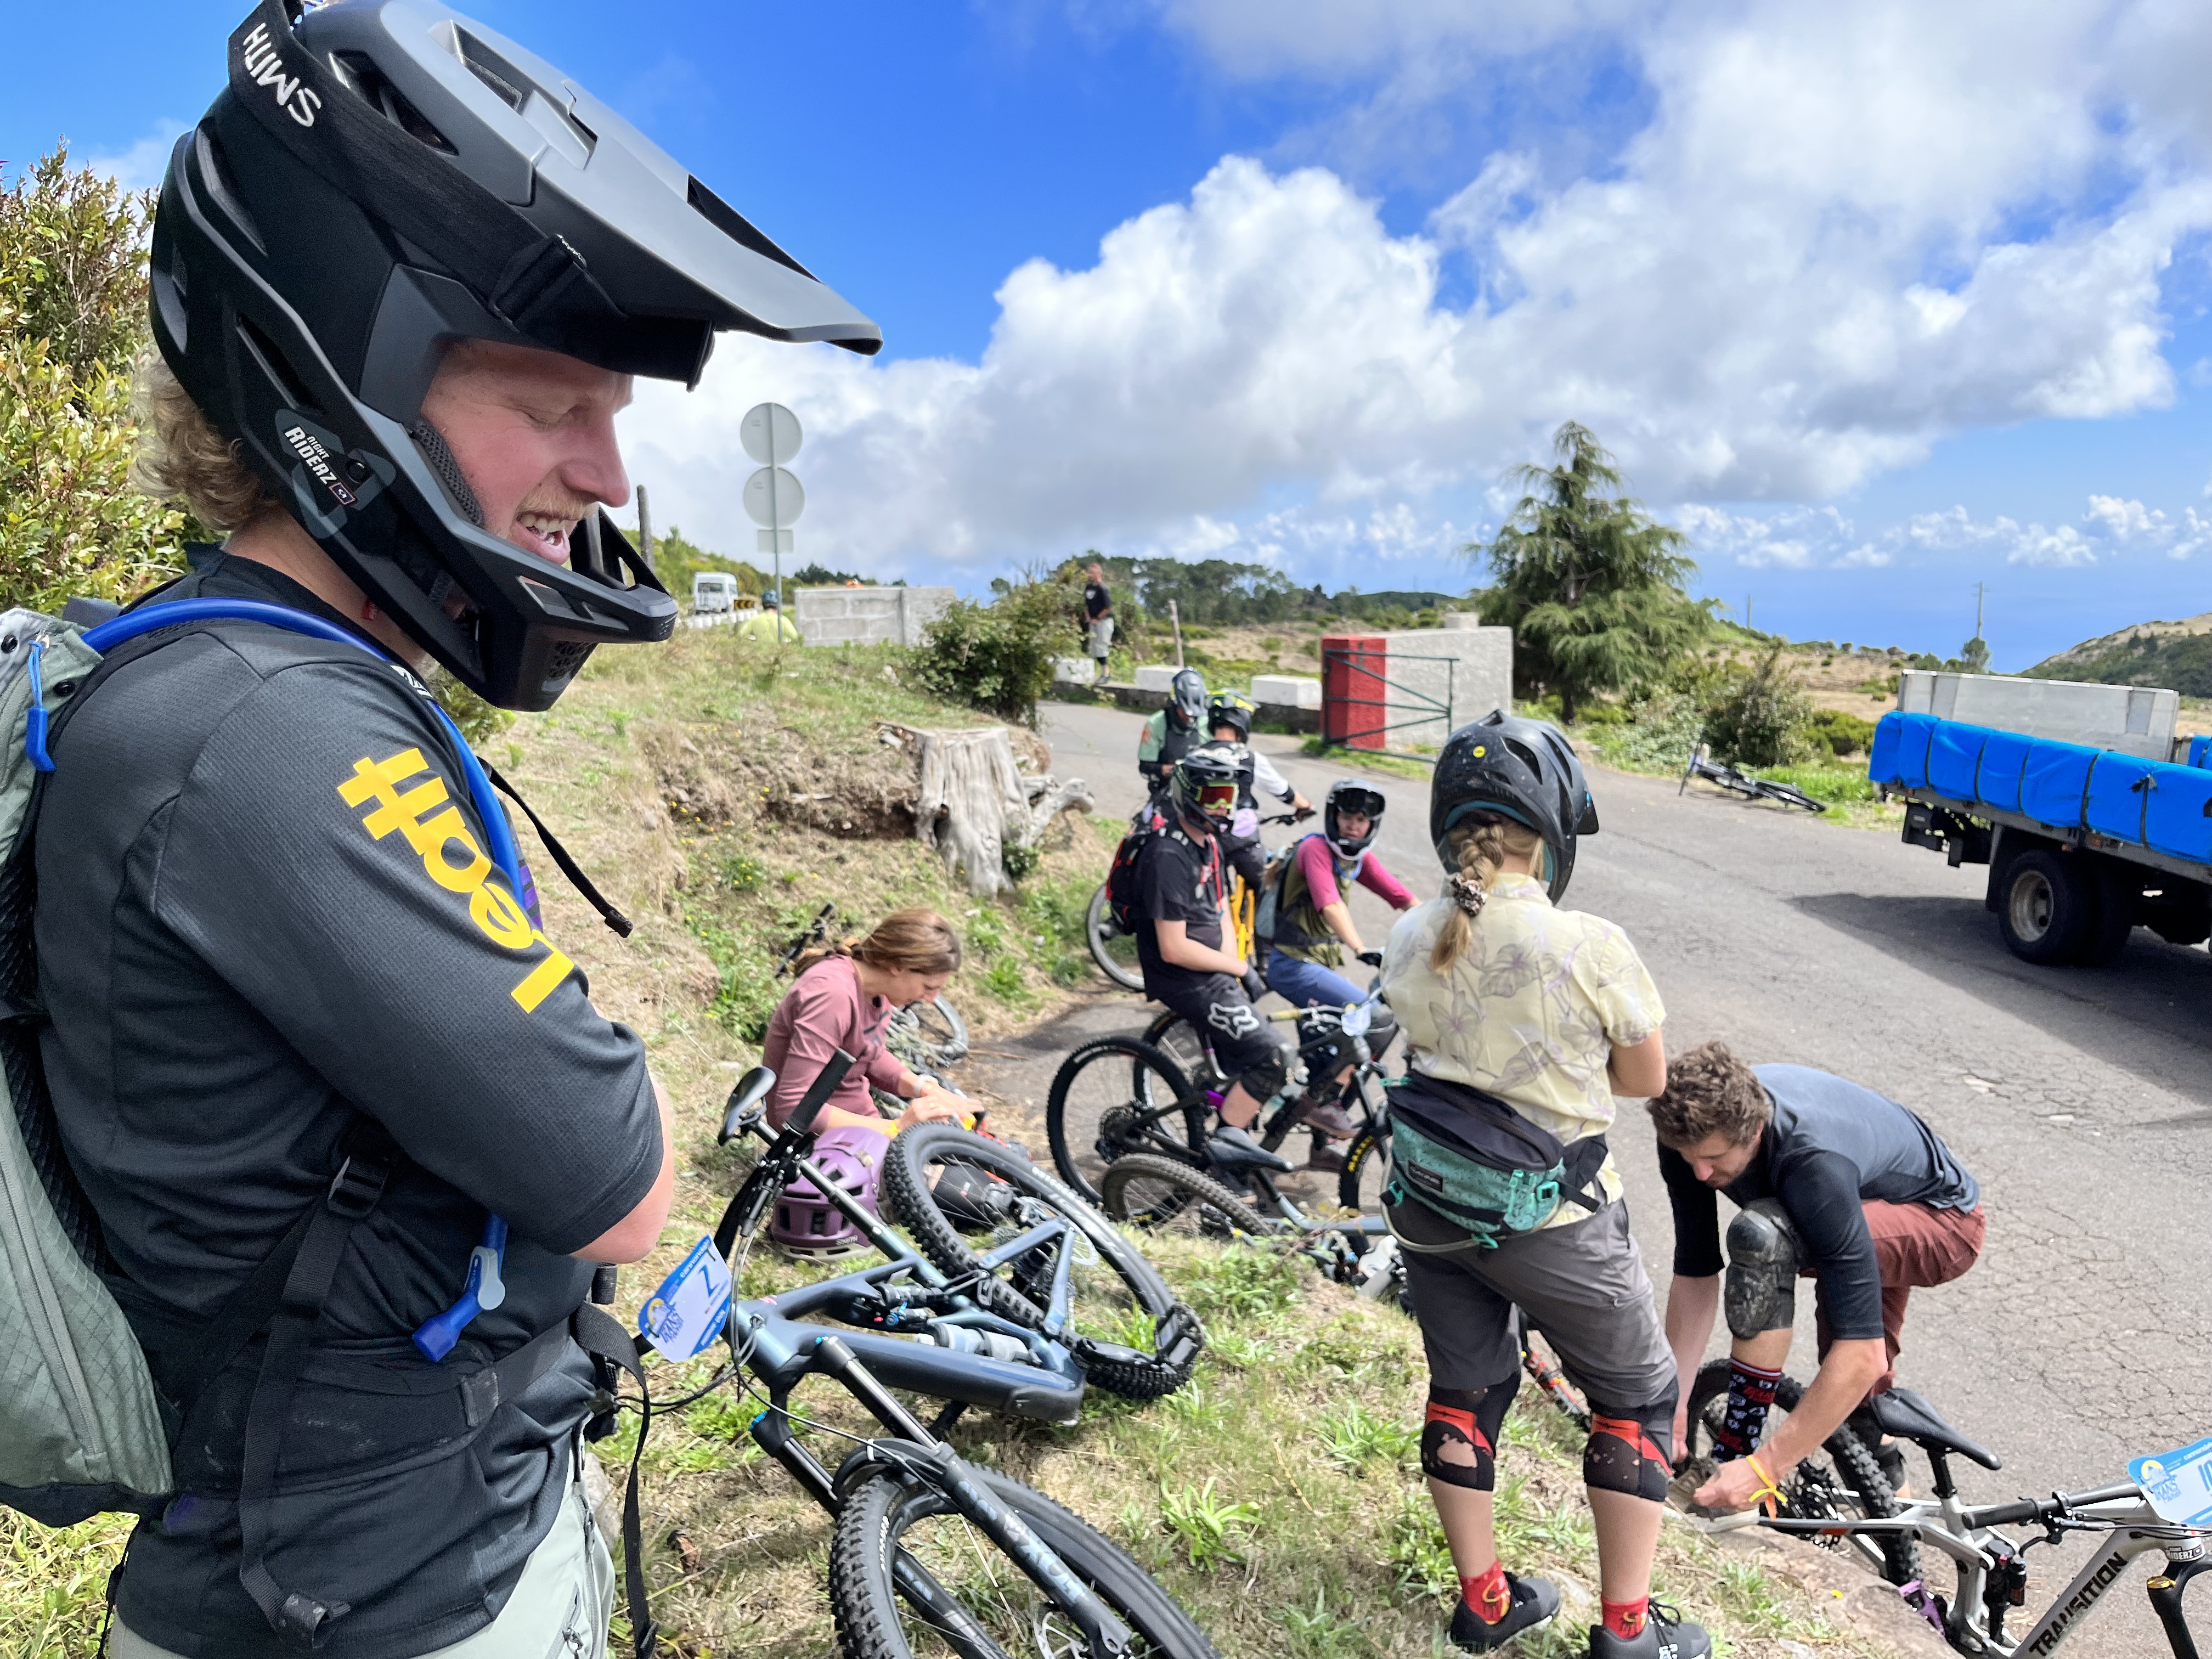
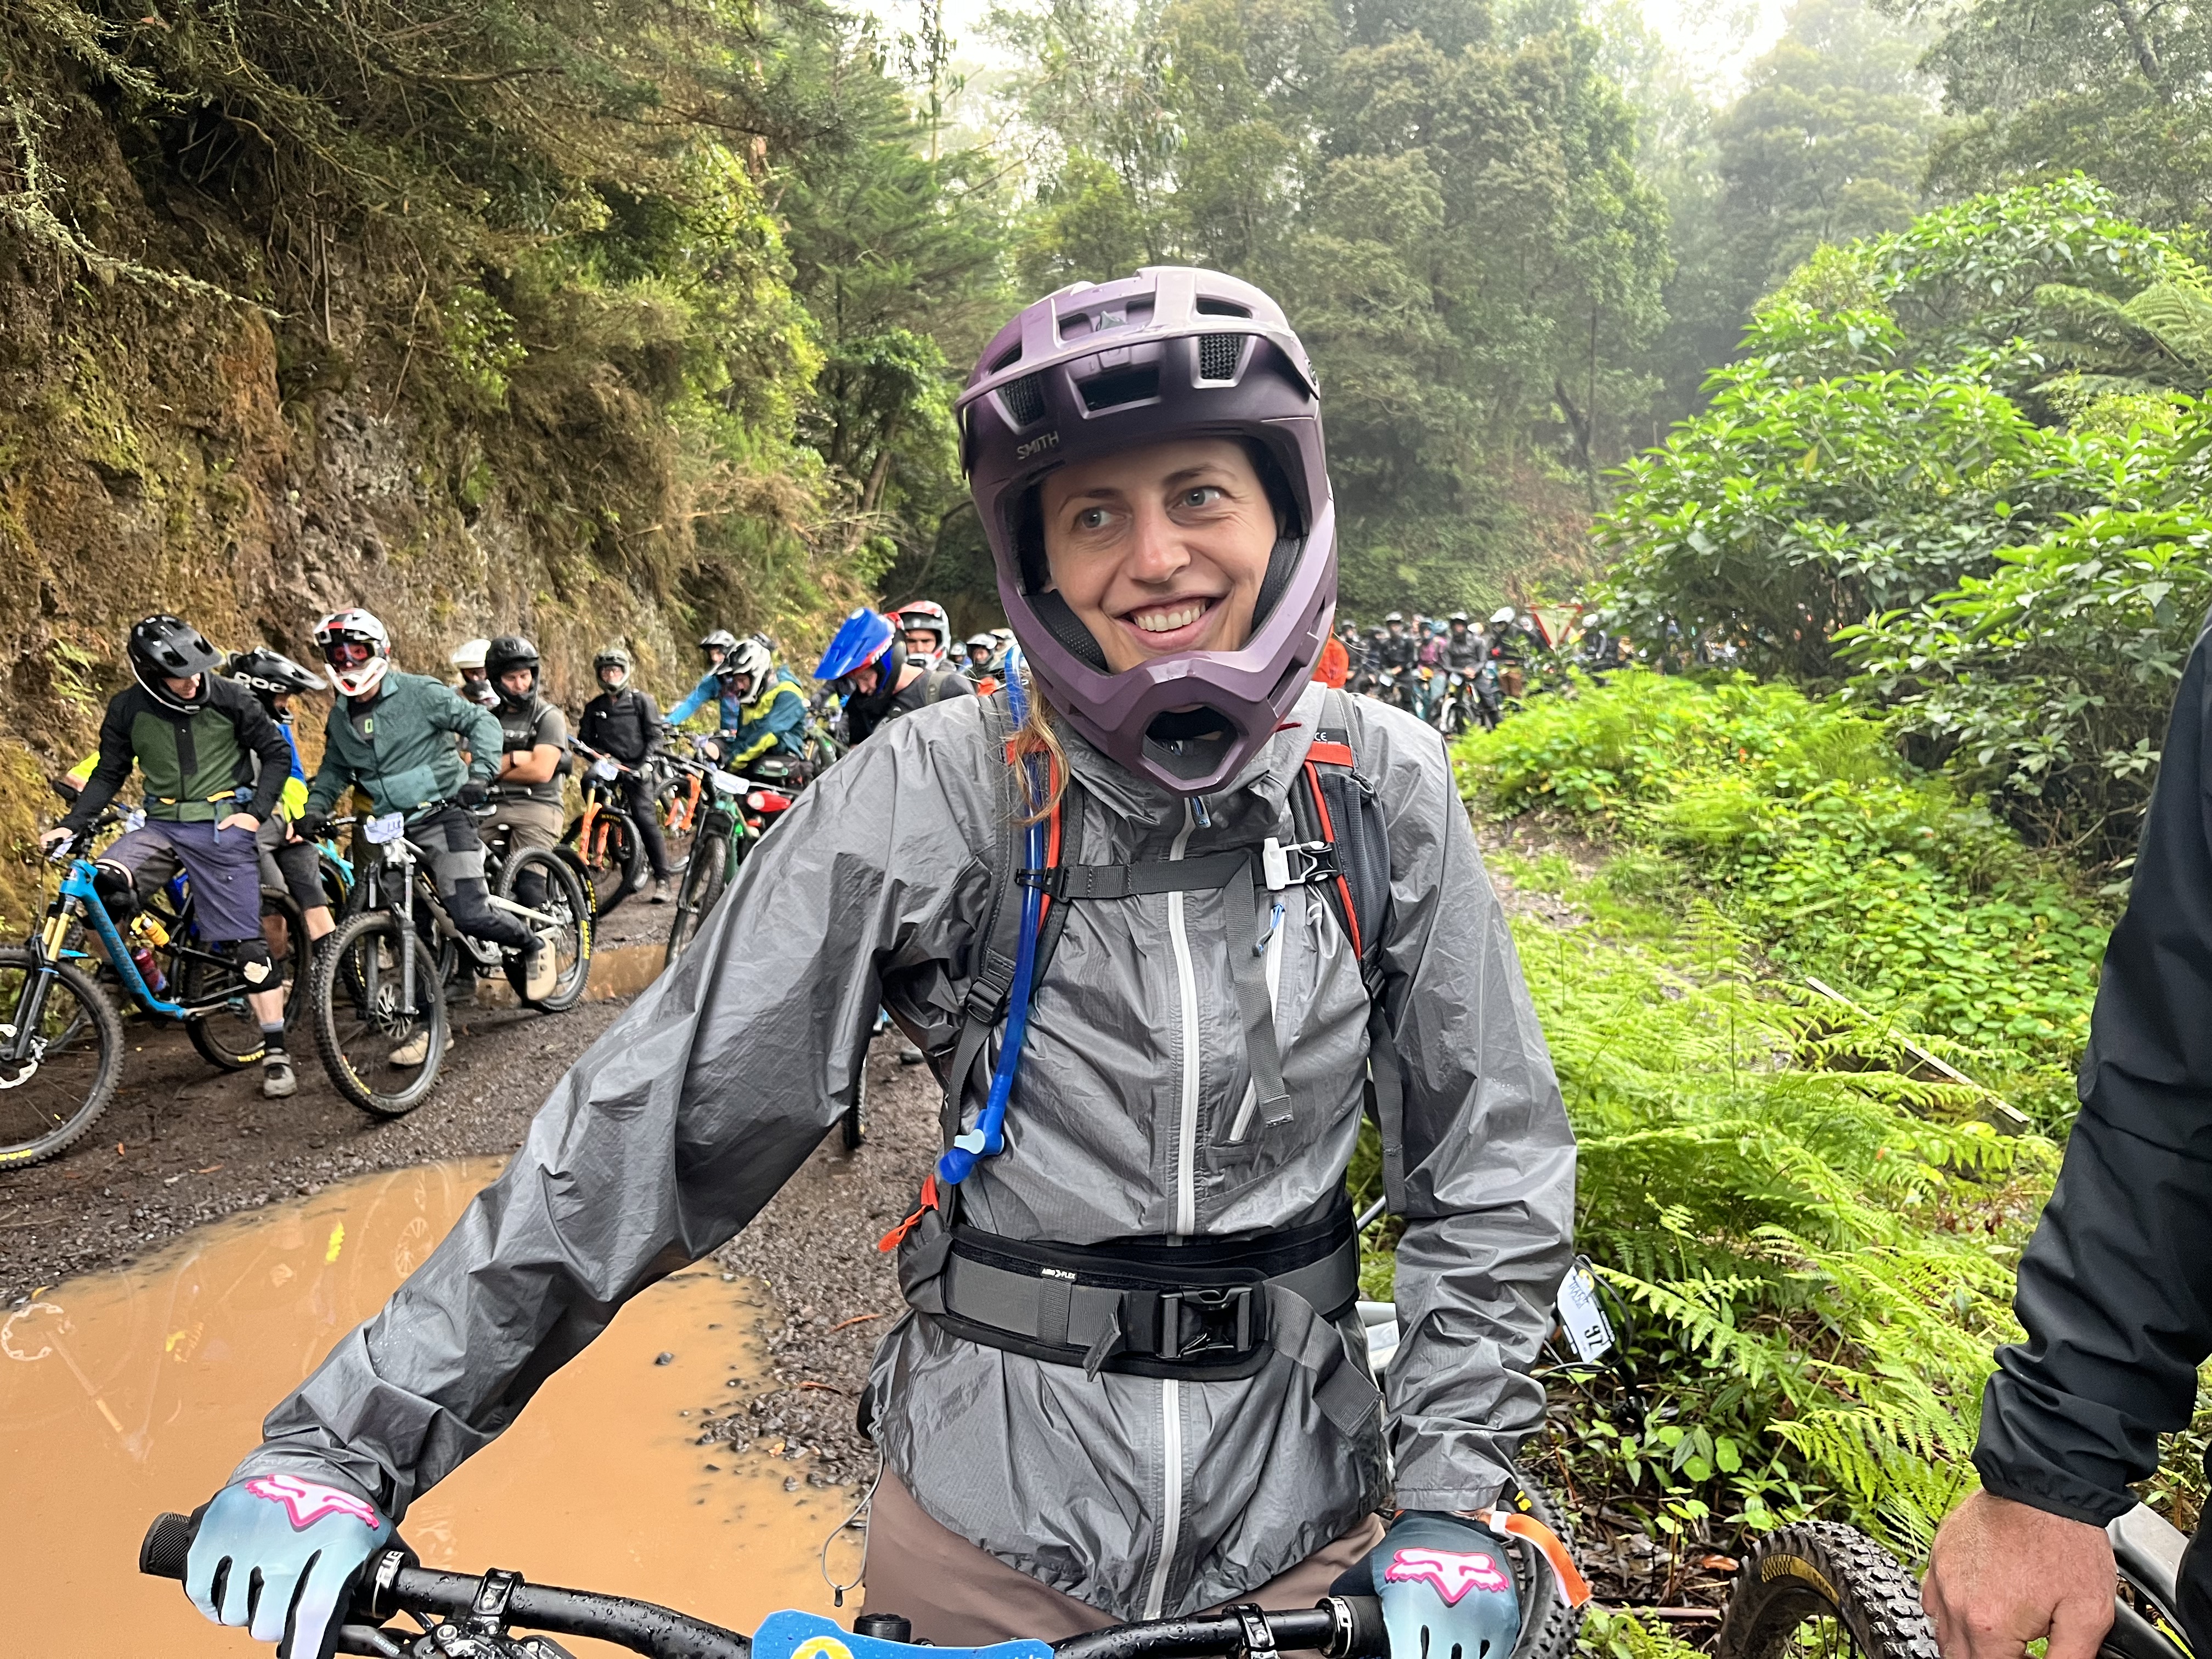
Full-face vs. half-shell
You’ll see riders are wearing mostly wearing full-face helmets with about 30% wearing half-shells. I took a bunch of crashes and was very happy to wear my full-face helmet. I would highly recommend wearing a full face over a shell.
Tools and Replacement Parts
Having a decent tool set on you goes a long way. It will help when it comes to building up your bike on arrival and breaking it down when you leave. I brought a full hex set, shock pump, rags, and lube. For replacement parts, I brought an extra derailleur hanger, chain, tire, and sealant. I didn’t end up needing to bring the lube and rags because the mechanics provided them. I would bring a torque wrench for assembling your bike!
Electronics
Bring a power bank and a converter to keep your stuff up all week! I also recommend getting a SIM card at the airport, which was helpful for wanting to get online, text, etc. It was 25 euros for a 10 g SIM card.
Packing for a biking event like Trans Madeira demands attention to detail and an understanding of what makes for a comfortable, hassle-free journey. From the reliable bike bag to the practicality of waterproof duffels, the gear you choose can help you enjoy the adventure to it’s fullest potential!
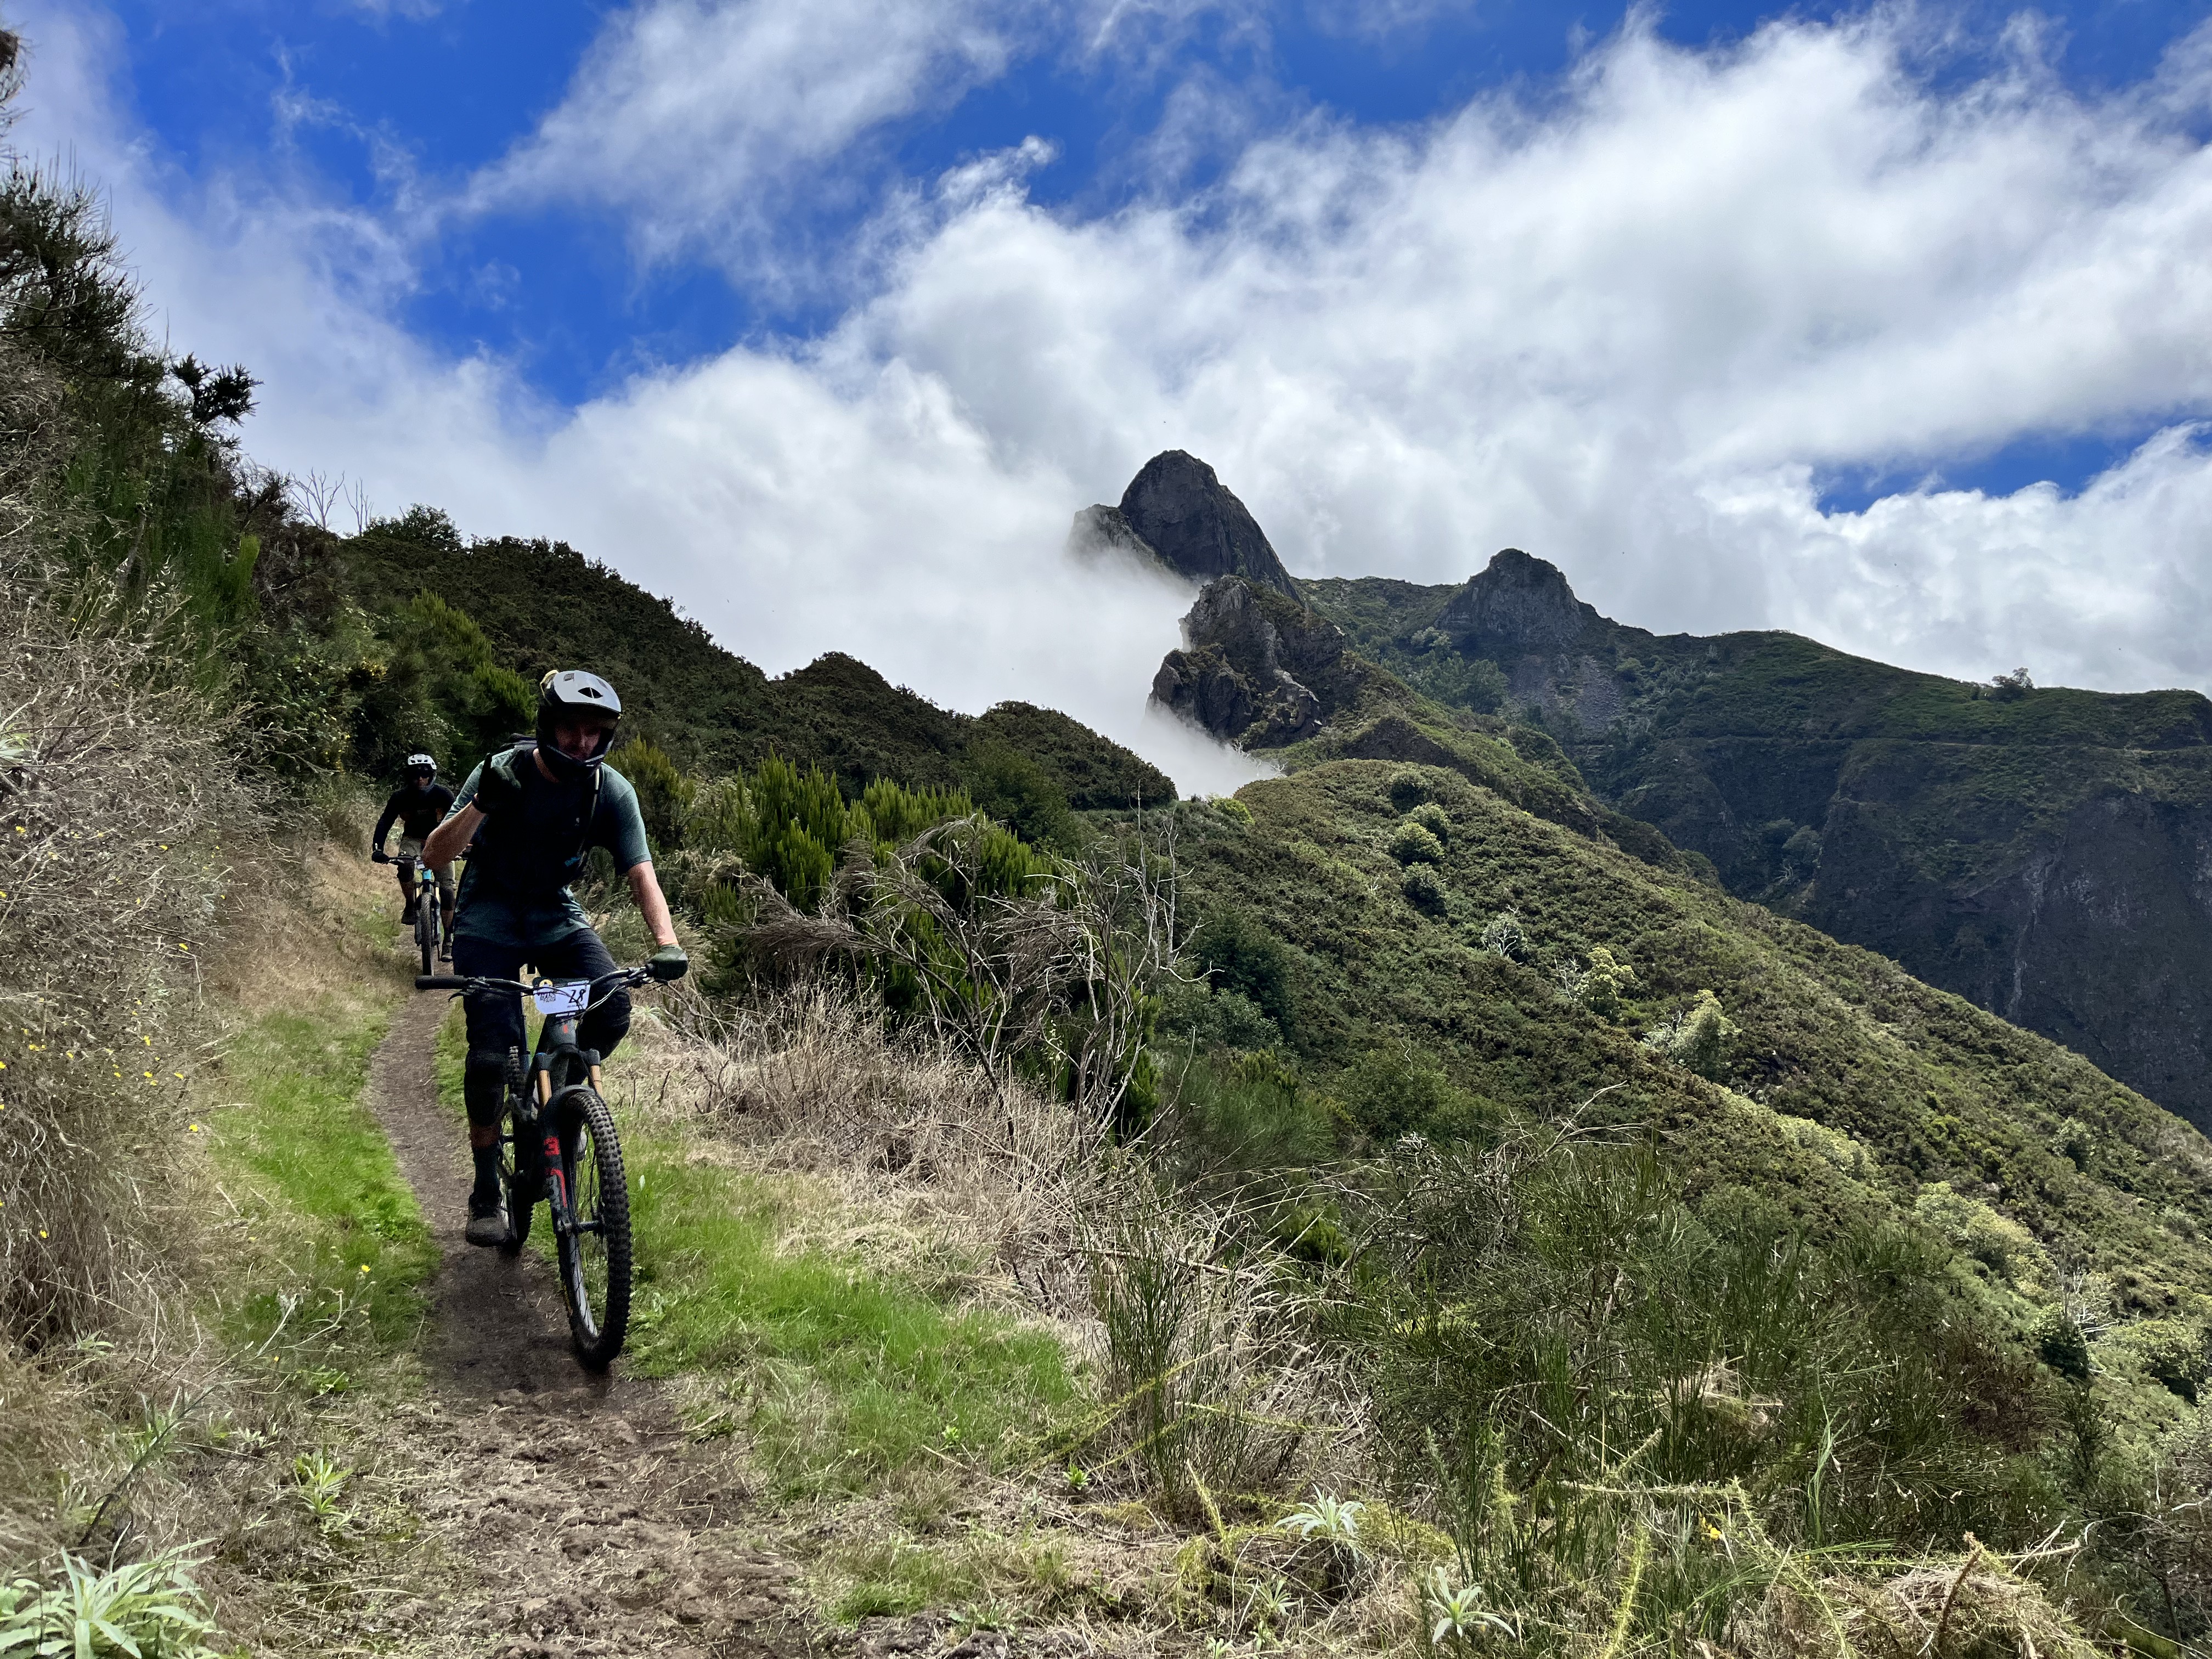
The Trans Madeira is a highly anticipated five-day Enduro Mountain Bike race that takes place on the stunning island of Madeira, located off the coast of Portugal. As an avid mountain biker, I had the incredible opportunity to participate in the ninth edition of this rowdy event, which took place in September 2023. With a sense of excitement and anticipation, 140 riders from 27 different nations around the world gathered on the picturesque island to embark on this thrilling adventure.
Accompanied by eight of my friends from the United States, we formed a tight-knit group ready to experience the challenging trails that awaited us with eyes wide open. Our primary goal for this event was not to secure a spot on the podium or to strive for stage victories but rather to immerse ourselves in the unique experience of exploring the island’s diverse terrain on our mountain bikes.
From the moment we arrived, we knew we were in for a treat. Madeira’s natural beauty captivated our senses as we were surrounded by lush landscapes, rugged mountains, and breathtaking ocean views. Each day, we eagerly tackled a new set of trails meticulously crafted to test our skills, endurance, and mental fortitude. The routes were carefully designed to showcase the island’s diverse topography, from steep descents that challenged our reflexes to technical climbs that pushed our limits.
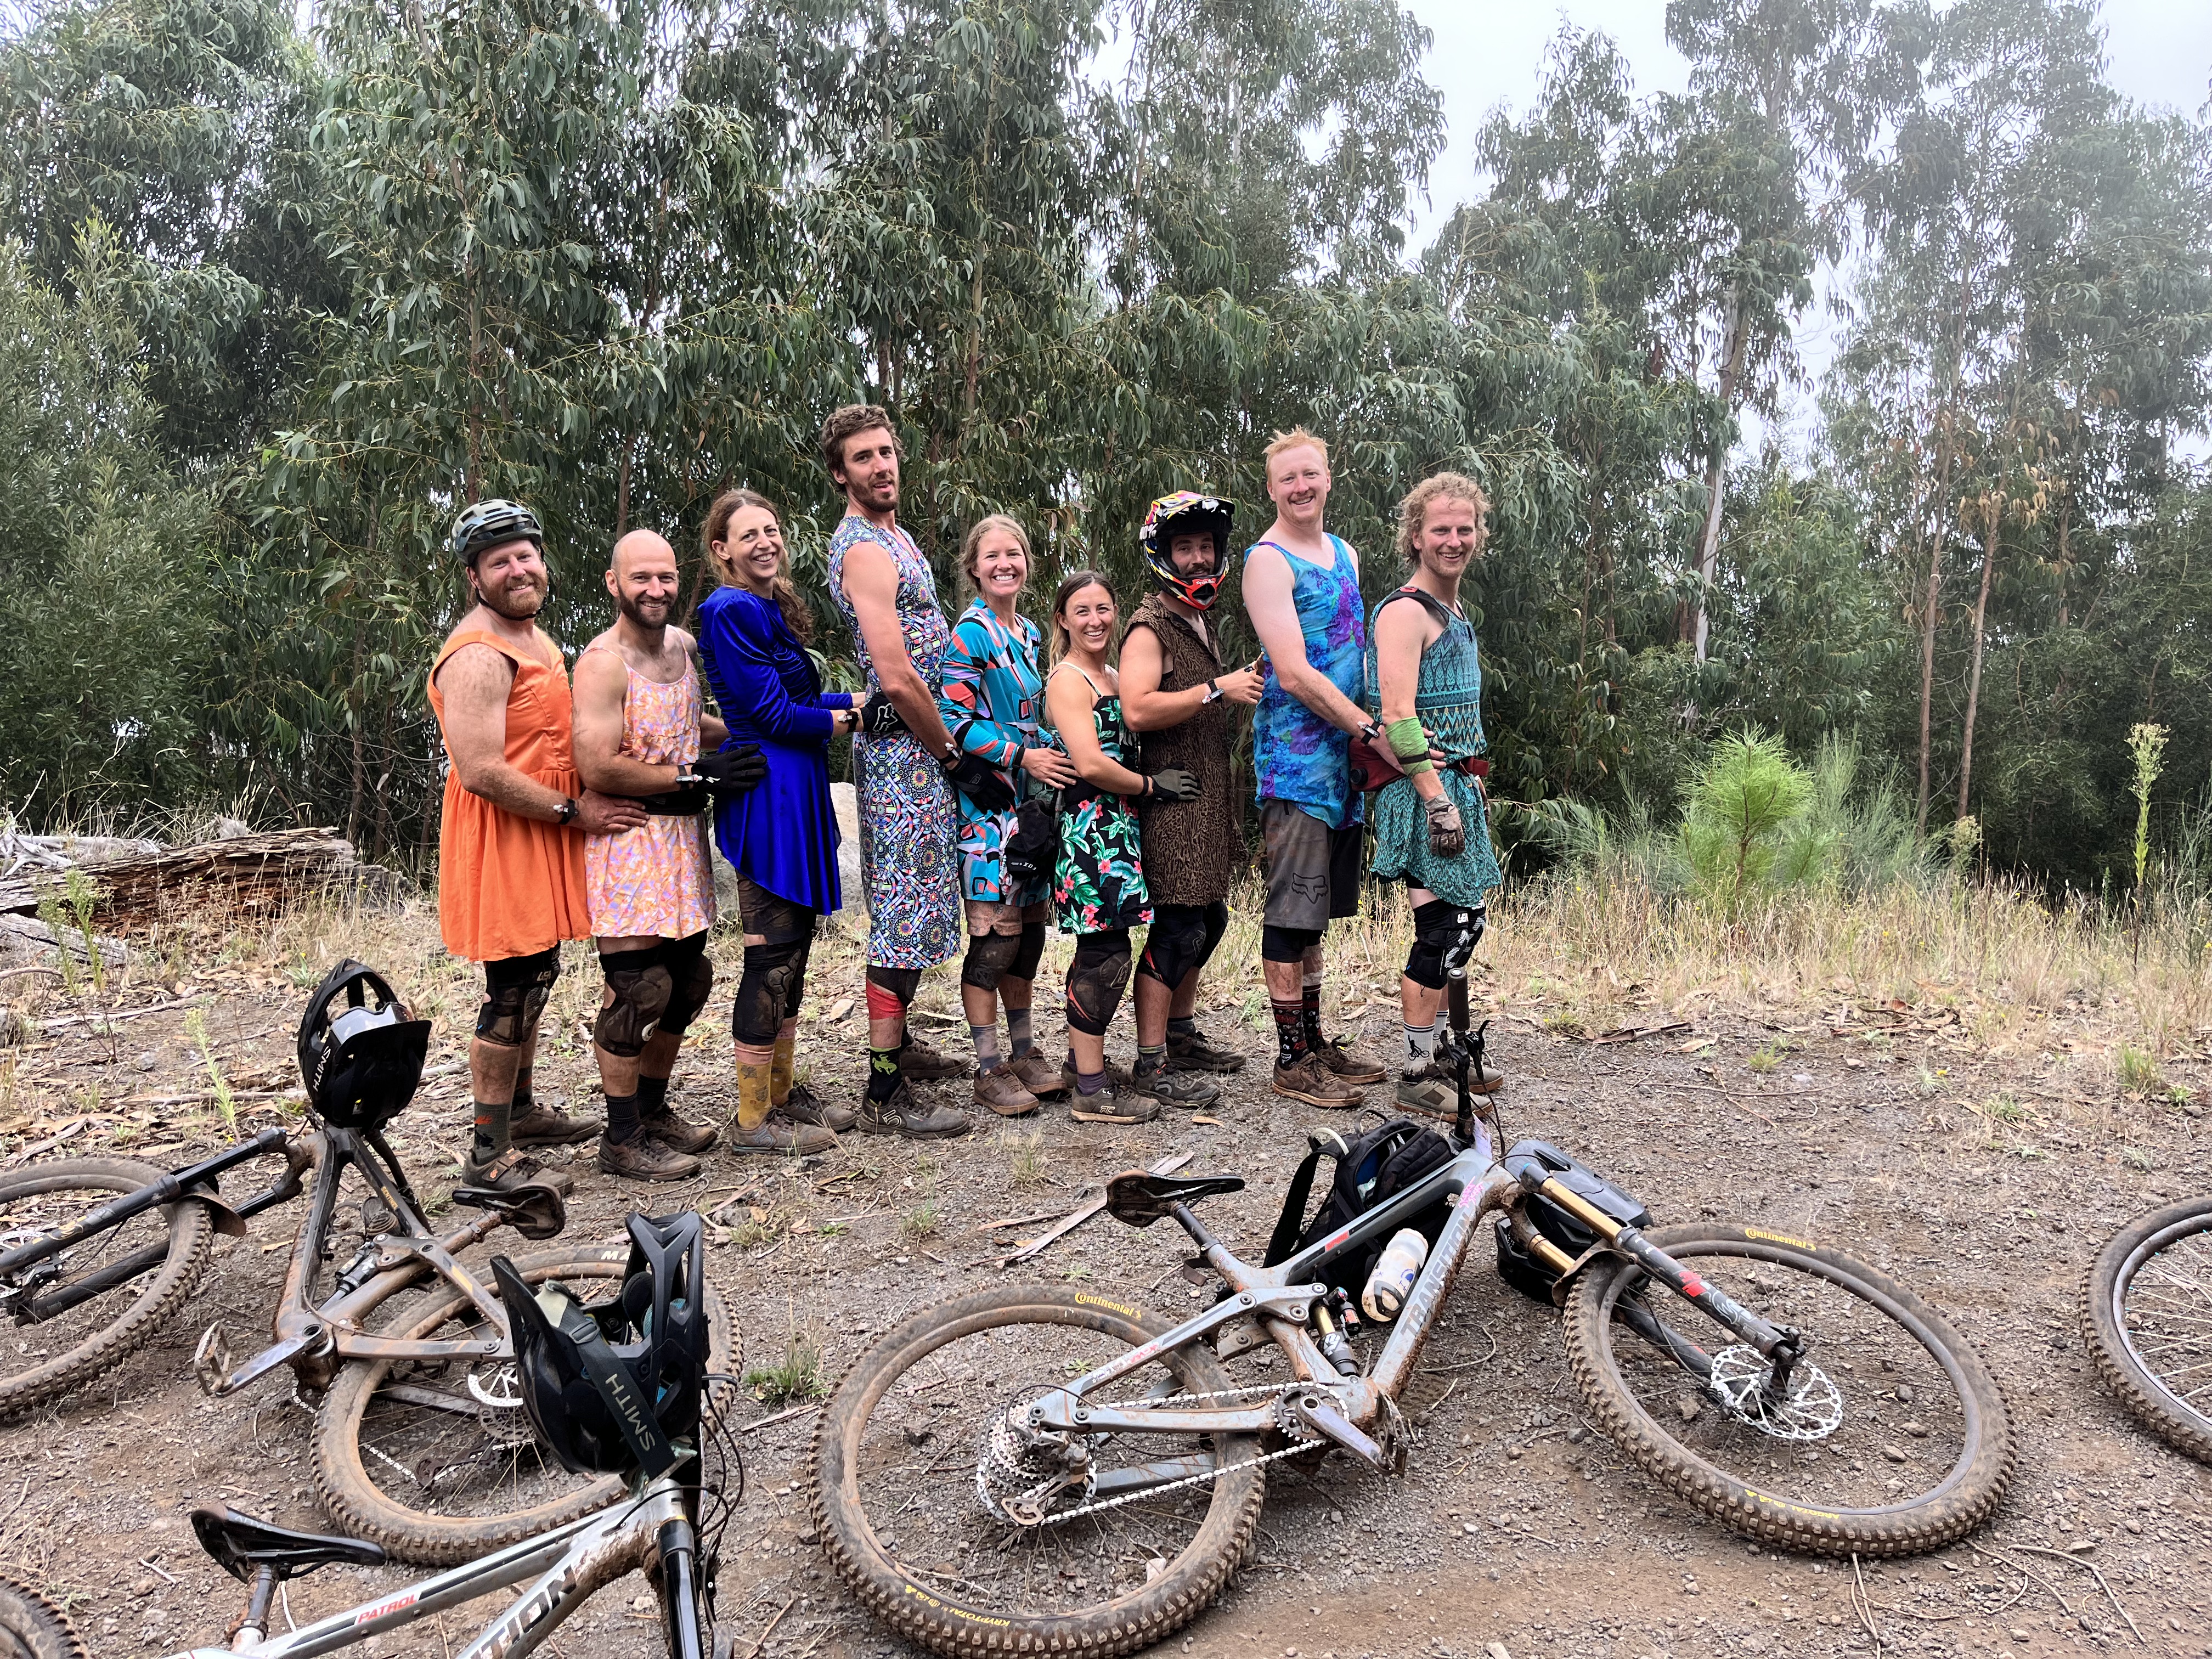
The camaraderie among the participants was palpable throughout the entire event. Even though it was a race, there was a strong sense of community and mutual support among the riders. We cheered each other on, shared tips and techniques, and celebrated each other’s achievements. It was a testament to the inclusive nature of the mountain biking community and the shared love for this adrenaline-fueled sport.
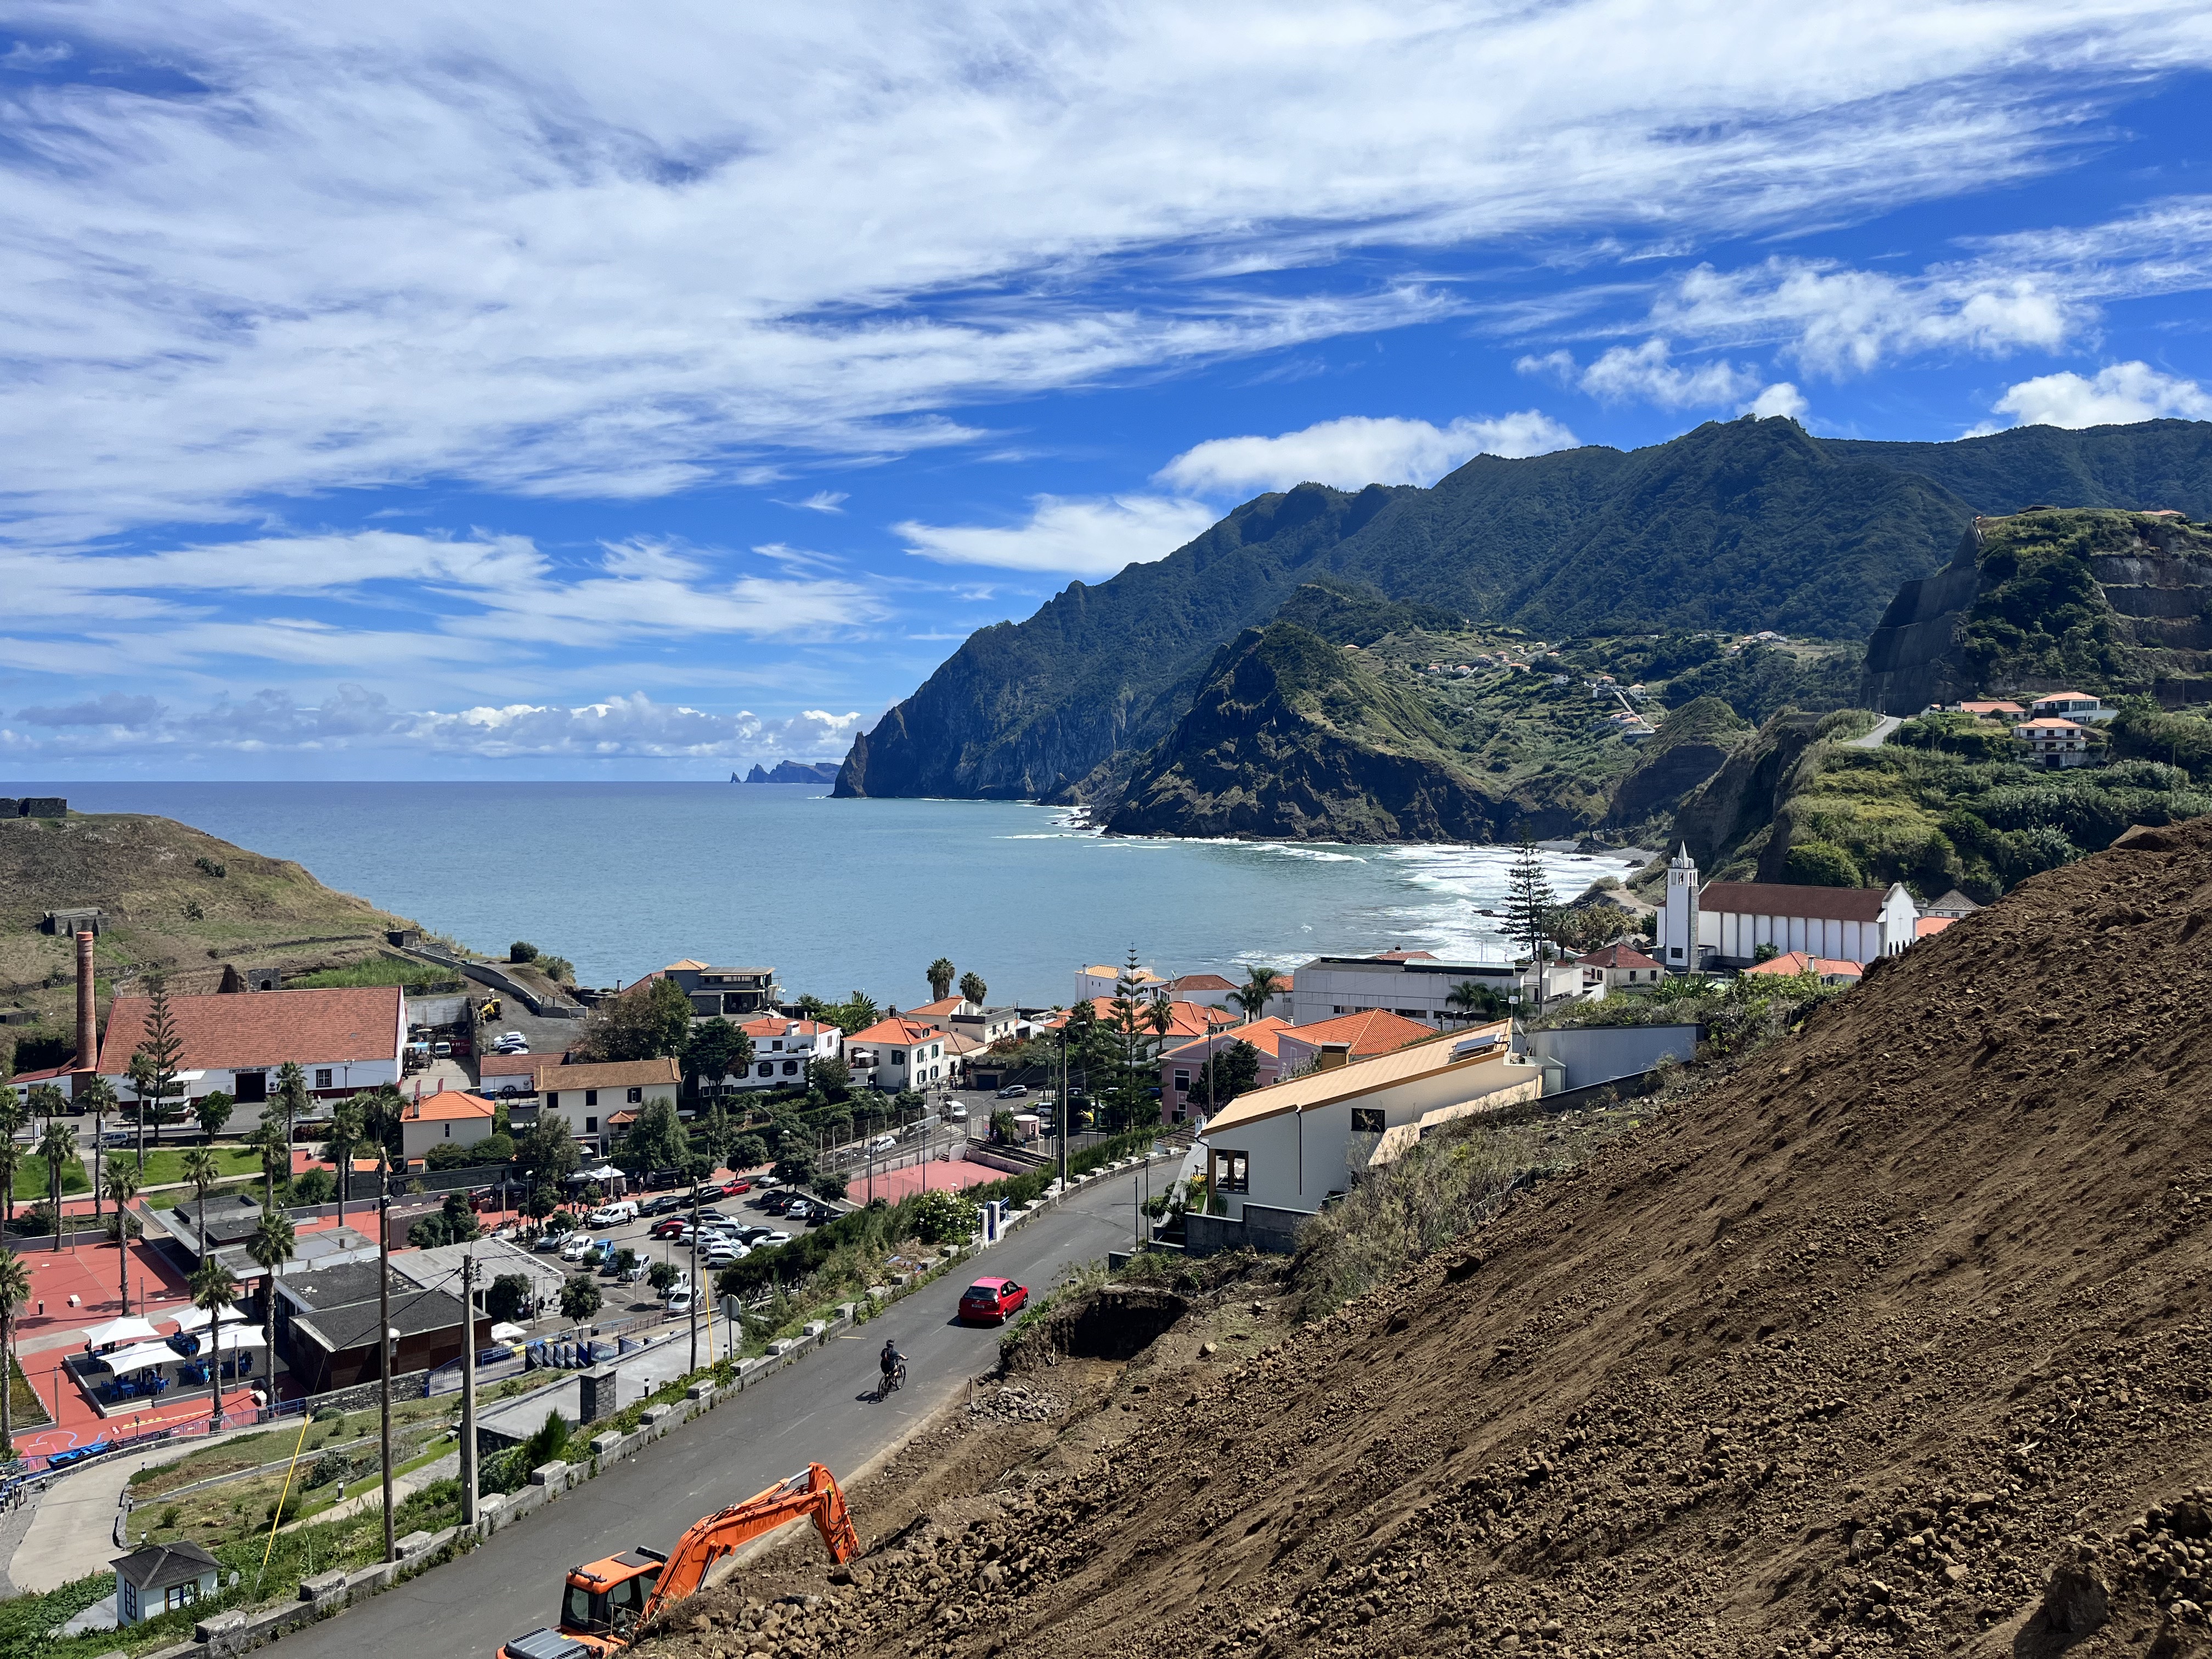
Beyond the physical demands of the race, the Trans Madeira provided the ideal opportunity to truly experience the culture, flavors, and hospitality of Madeira. In the evenings, we indulged in the island’s delectable cuisine, savoring local delicacies and traditional dishes while exchanging stories and bonding over our shared passion for mountain biking. We also had the chance to explore the charming towns and immerse ourselves in the island’s rich history, taking in the vibrant colors and vibrant architecture that adorned the ancient streets.
As the fifth and final day of the Trans Madeira approached, a bittersweet feeling washed over our group. While we were physically exhausted, emotionally we were invigorated by the memories we had created and the challenges we had overcome. Crossing the finish line brought with it a mix of both relief and a hint of sadness that this incredible adventure had come to an end.
Participating in the Trans Madeira was an experience of a lifetime, one that allowed us to push our limits, forge lasting friendships, and fully immerse ourselves in the natural beauty of Madeira. It served as a reminder of the power of sport to connect people from different corners of the globe and create unforgettable moments. I will forever cherish the memories made during those five unforgettable days on the mountain biking trails of Madeira.
When it comes to finding the perfect flat mountain bike pedal, nothing beats a generous platform that offers ample grip to keep you secure on the trails. The perfect flat pedal offers a balance of grip, weight, durability, materials, and even style. Whether you are researching options for an upgrade or you were sidelined by the fact that your $3000 new bike didn’t come with pedals, we have you covered! These are four of our favorite flate pedal options of 2023!
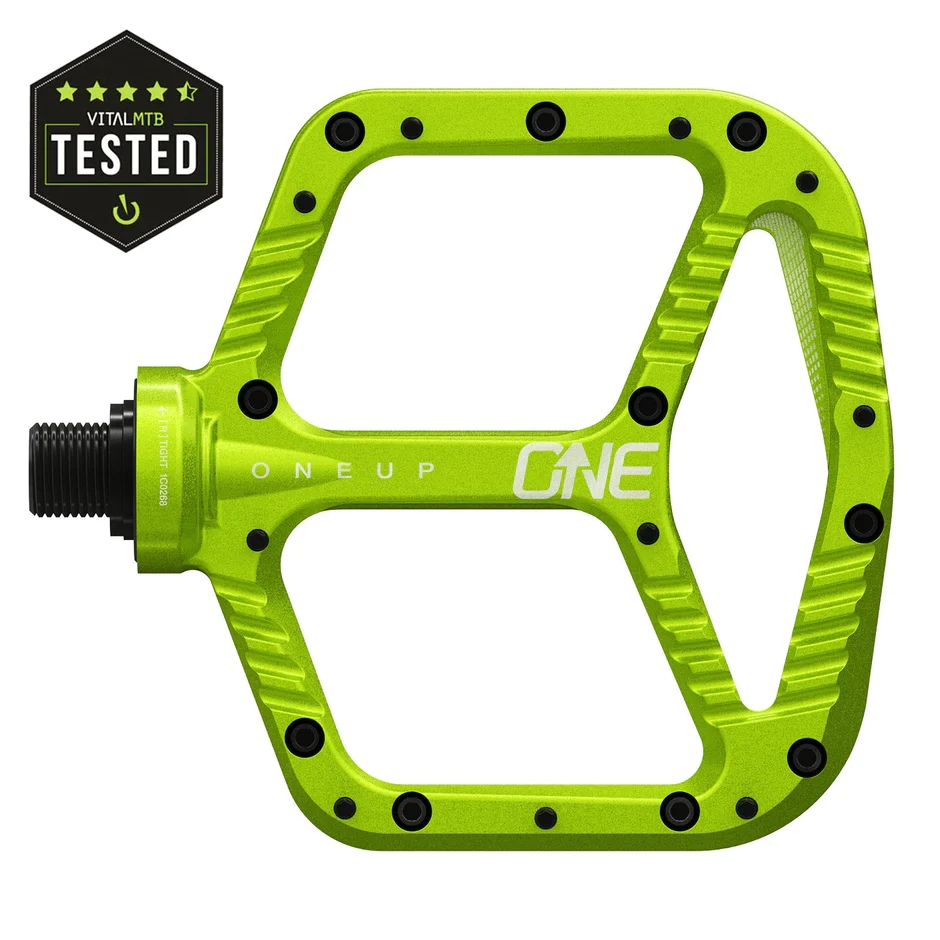
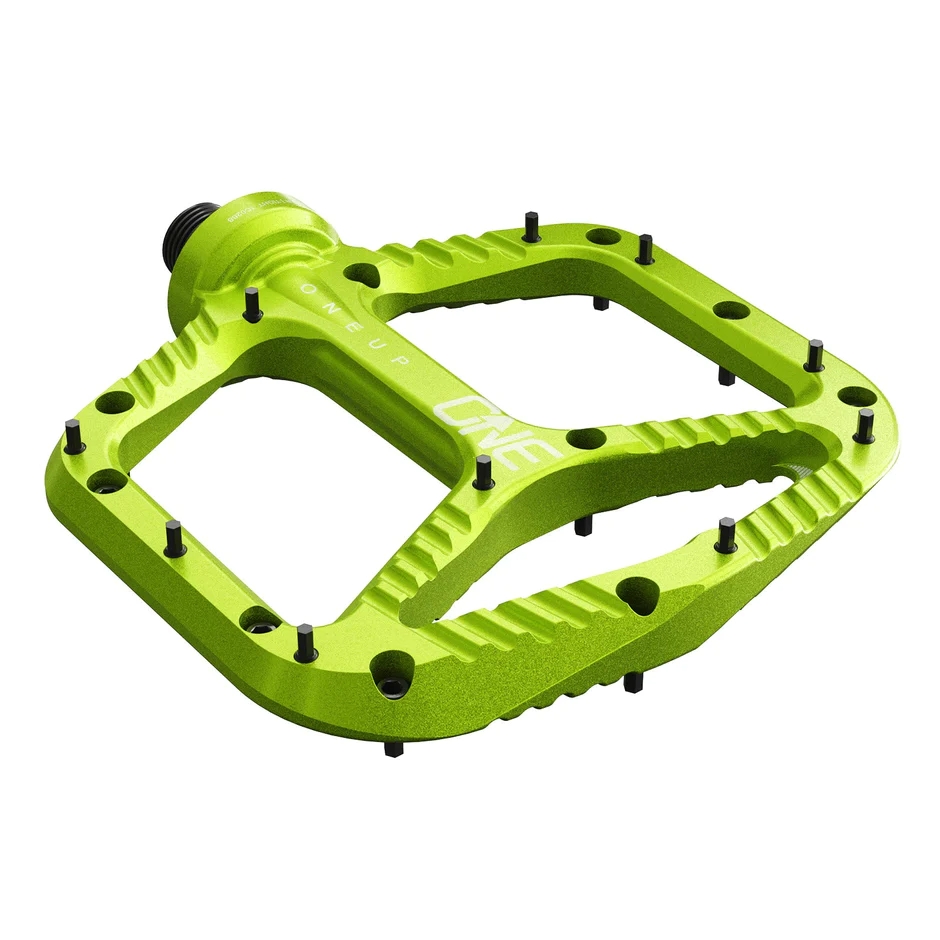
OneUp Aluminum Pedal: The Sleek Performer
Price: $144
Weight: 386 grams
Pins Per Side: 10
Footprint Size: 115 x 105 mm
Maximum Height: 12 mm
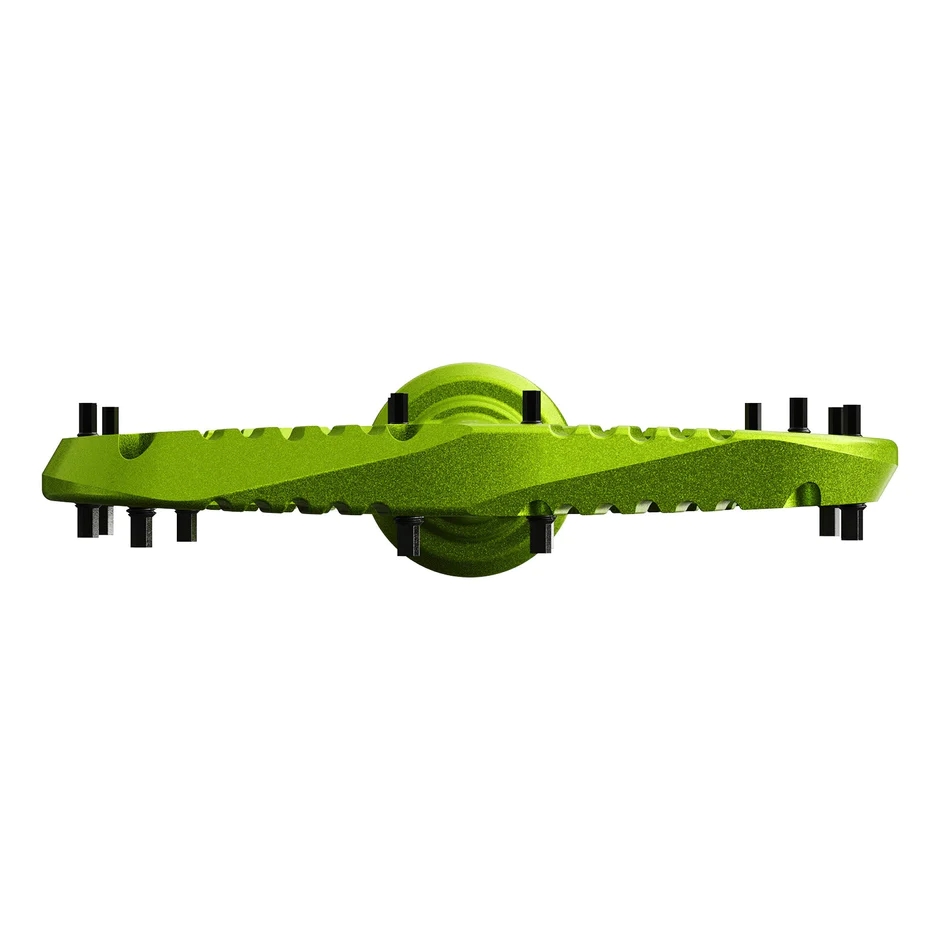
The OneUp Aluminum Pedal stands out as an exceptional flat mountain bike pedal in 2023. Its wide platform ensures superior grip, while the slim profile minimizes pedal strikes and lowers your seat just a tad. Notably, the design deviates from the norm, featuring a unique spindle and bearing setup. The large outer bearing and thin spindle contribute to an impressively thin body, although some riders have reported minor squeaking, easily remedied with a touch of WD-40 or light oil. Overall this is our favorite flat pedal for 2023.
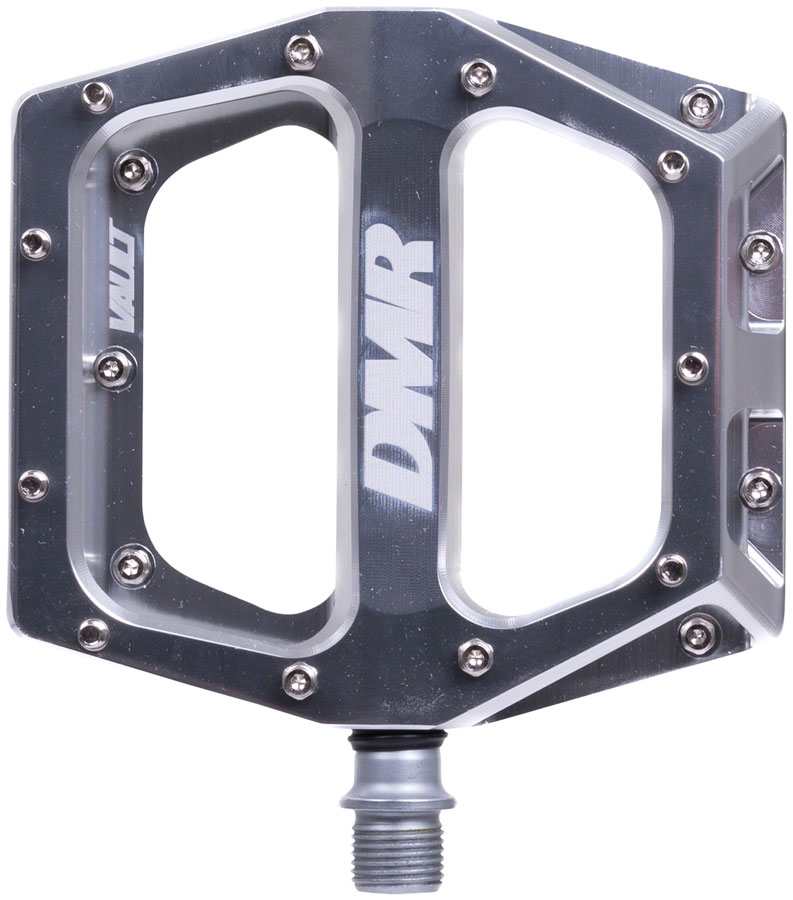
DMR Vault: Durability Meets Simplicity
Price: $164
Weight: 430 grams
Pins Per Side: 11
Footprint Size: 105 x 105 mm
Maximum Height: 19 mm
A time-tested favorite, the DMR Vault pedal is known for its durability and straightforward design. Riders appreciate its angled ends, aiding in rock deflection. While it maintains a classic mountain bike pedal look and feel, the array of vibrant colors available allows for a personalized touch. Though not the widest pedal, the DMR Vault appeals to riders seeking reliability and style.
RaceFace Chester: Performance and Affordability
Price: $59
Weight: 360 grams
Pins Per Side: 8
Footprint Size: 110 x 101 mm
Maximum Height: 18.4 mm
For those seeking performance without breaking the bank, the RaceFace Chester pedal is a standout choice. Priced affordably at just $59 per set, it strikes an excellent balance between weight and value. While the composite body may lack the durability of aluminum, it compensates with reduced weight and superior rock deflection. Additionally, the variety of color options adds a splash of personality to your ride.
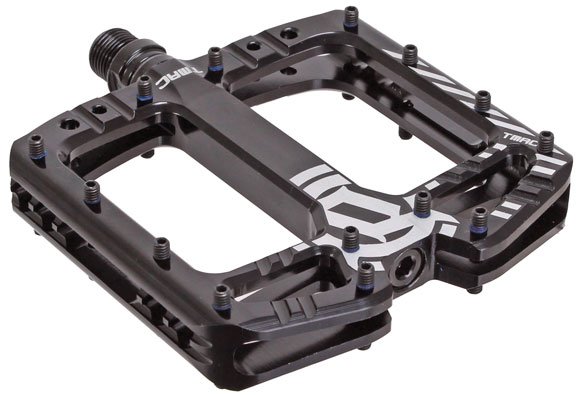
Deity TMAC: The Freerider’s Delight
Price: $179
Weight: 409 grams
Pins Per Side: 14
Footprint Size: 110 x 105 mm
Maximum Height: 19 mm
The Deity TMAC is the Tyler McCaul signature pedal. A favorite among the freeride community, the Deity TMAC pedal caters to downhill and enduro riders who want a burly pedal. Its substantial platform and deep concave surface ensure a secure and locked-in feel. Riders focused on grip and ample platform size will find the TMAC an excellent fit for their needs.
Selecting the perfect flat mountain bike pedal depends on your priorities—be it budget-friendliness, maximum grip, durability, or a sleek design.
I have used the OneUp Components Aluminum Pedals on my own bike for the past year and I have been very impressed with them. The wide platform provides plenty of grip and the thin body helps to reduce pedal strikes. The pedals are also very durable and have held up well to the abuse that I have put them through.
With these top pedal options for 2023, you’re bound to find one that suits your riding style and preferences. Happy trails!
Are you an avid cyclist looking to transport your bikes conveniently and securely? With an array of bike rack options available on the market, it can be overwhelming trying to choose the best one for your needs. After all, these racks do cost a pretty penny! So it’s important to find a rack that you will be happy with and is durable enough to last you decades. In this guide, we’ll delve into the world of tray racks, comparing them with other bike rack varieties, and helping you decide whether a tray rack is the right choice for you.
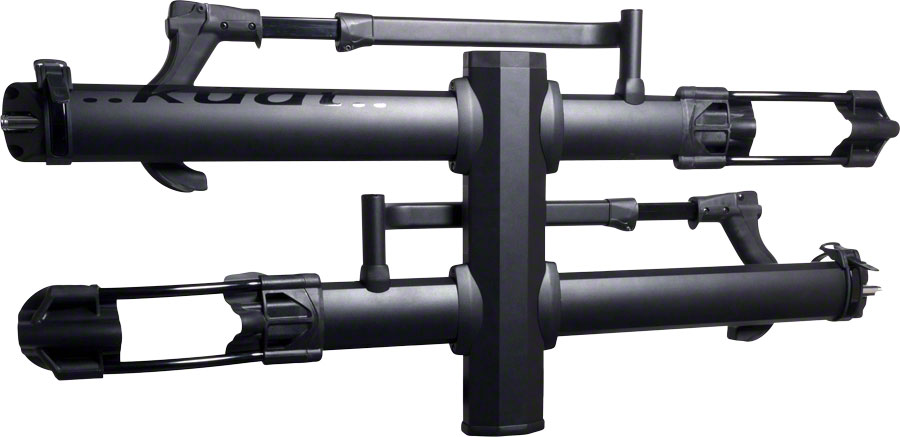
The Tray Rack Advantage:
1. Superior Bike Protection: Tray racks, also known as platform racks, stand out for their ability to cradle your bikes securely without contacting the frame. Unlike traditional hanging racks that suspend bikes by the top tube, tray racks support bikes from the wheels. This eliminates the risk of scratches, dents, or damage caused by contact between frames.
2. Reduced Wear and Tear: With a tray rack, you can say goodbye to the hassle of removing wheels before mounting your bike. By supporting bikes at the wheels, tray racks prevent stress on delicate components like derailleur hangers and brake calipers, ultimately extending the lifespan of your bike.
3. Ease of Use: Loading and unloading bikes on a tray rack is a breeze. The platform design offers ample space between bikes, making it easier to maneuver them onto the rack. Most tray racks also feature a tilt-down mechanism, allowing easy access to your vehicle’s trunk or hatch without the need to remove the bikes.
4. Versatility: Tray racks can accommodate various bike styles, from mountain bikes to road bikes, and even fat tire bikes. Some models even offer options for e-bikes, which can be heavier and bulkier than traditional bicycles.
Considering Other Rack Options:
1. Hanging Racks: Hanging racks are a budget-friendly option but come with the disadvantage of potential frame contact and limited compatibility with certain bike styles. These racks can also obstruct rear visibility and may require extra effort to load and secure the bikes.
2. Roof Racks: Roof racks offer versatility but come with challenges like increased wind resistance, reduced vehicle clearance in low spaces, and the need to lift bikes overhead for loading. Roof racks can also negatively affect your vehicle’s fuel efficiency. Plus you run the chance of driving your bikes into a garage…
3. Strap-On Trunk Racks: Strap-on trunk racks are cost-effective and easy to install, but they often require constant adjustment and can put pressure on your vehicle’s paint. Bikes mounted on these racks are more exposed to road debris and weather conditions.
4. Hitch-Mounted Hanging Racks: Hitch-mounted hanging racks offer a compromise between hanging and tray racks. While they are easier to load and provide better bike protection than traditional hanging racks, they still have limitations in terms of bike compatibility and potential frame contact.
Making Your Decision:
While tray racks typically come with a higher upfront cost, they offer exceptional bike protection, ease of use, and versatility that can outweigh the initial investment. If you value preserving your bike’s condition, reducing wear and tear, and simplifying the loading process, a tray rack is undoubtedly a worthy consideration.
At BikeParts.com, we offer a wide selection of tray racks from reputable brands that prioritize bike safety and ease of use. Explore our range of options and discover the perfect tray rack to elevate your biking adventures while keeping your bikes in top-notch condition. Remember, the right rack can make a world of difference in how you transport and enjoy your bike!
The Fox 36 is a great fork for a wide range of riders, but it is especially well-suited for trail riders who like to hit jumps and drops. The fork is capable of handling the abuse of technical terrain, and it offers a good balance of stiffness and comfort. It’s not as lightweight as some of the other options on the market, but it is still relatively light and it offers good performance.
Ultimately, the best way to determine if the Fox 36 is right for you is to consider your riding style and budget. If you are an aggressive trail rider looking for a high-performance fork, the Fox 36 is a great option.
Here are some of the features of the Fox 36 that make it a good choice for trail riders:
It has a long travel, which provides good bottom-out resistance and allows you to ride over rough terrain.
It has a stiff chassis, which provides good tracking and control.
It has a wide range of adjustments, so you can fine-tune the fork to your specific needs.
The Fox 36 fork comes in three different versions: the Rhythm, Performance Elite, and Factory.
Fox 36 Rhythm
The Fox 36 Rhythm is the most affordable version of the lineup. It’s a great option for entry-level riders who are looking for a reliable and capable fork. The Rhythm fork features the Grip damper, which offers basic rebound and compression adjustments.
Fox 36 Performance Elite
The Fox 36 Performance Elite is a step up from the Rhythm fork. It features the Grip 2 damper, which offers more precise damping adjustments. The Performance Elite fork is also made with slightly higher-quality materials than the Rhythm fork. The materials and adjustable mean improved sensitivity and smoother performance.
Fox 36 Factory
The Fox 36 Factory is the top-of-the-line version featuring the classic Kashima coating. It features the Grip 2 or FIT 4 Damper damper and is Crafted with premium materials and technology for ultimate responsiveness and durability. The Factory fork is also the lightest version of the lineup.
Choosing the Right Fox 36 Fork
The best way to choose the right Fox 36 fork for you is to consider your riding style and budget. If you’re an entry-level rider who’s looking for a reliable and affordable fork, the Rhythm is a great option. If you’re an intermediate rider who wants more precise damping adjustments, the Performance Elite is a good choice. And if you’re a serious rider who demands the best possible performance, the Factory fork is the way to go.
Conclusion
The Fox 36 fork is a great option for a wide range of riders. Whether you’re an entry-level rider or a seasoned pro, a Fox 36 fork is right for you. By understanding the different versions and damper options available, you can choose the perfect fork to take your mountain biking to the next level.
Here are some additional tips for choosing the right level:
Consider your riding style. If you ride mostly smooth trails, you can get away with a less expensive fork. But if you ride a lot of technical trails or jumps, you’ll need a fork that can handle the abuse.
Think about your budget. The Fox 36 forks range in price from around $500 to $1,000. Decide how much you’re willing to spend and choose a fork that fits your budget.
Talk to other riders. Ask your friends, family, or your local bike shop for recommendations. They can help you narrow down your options and find the right fork for you!
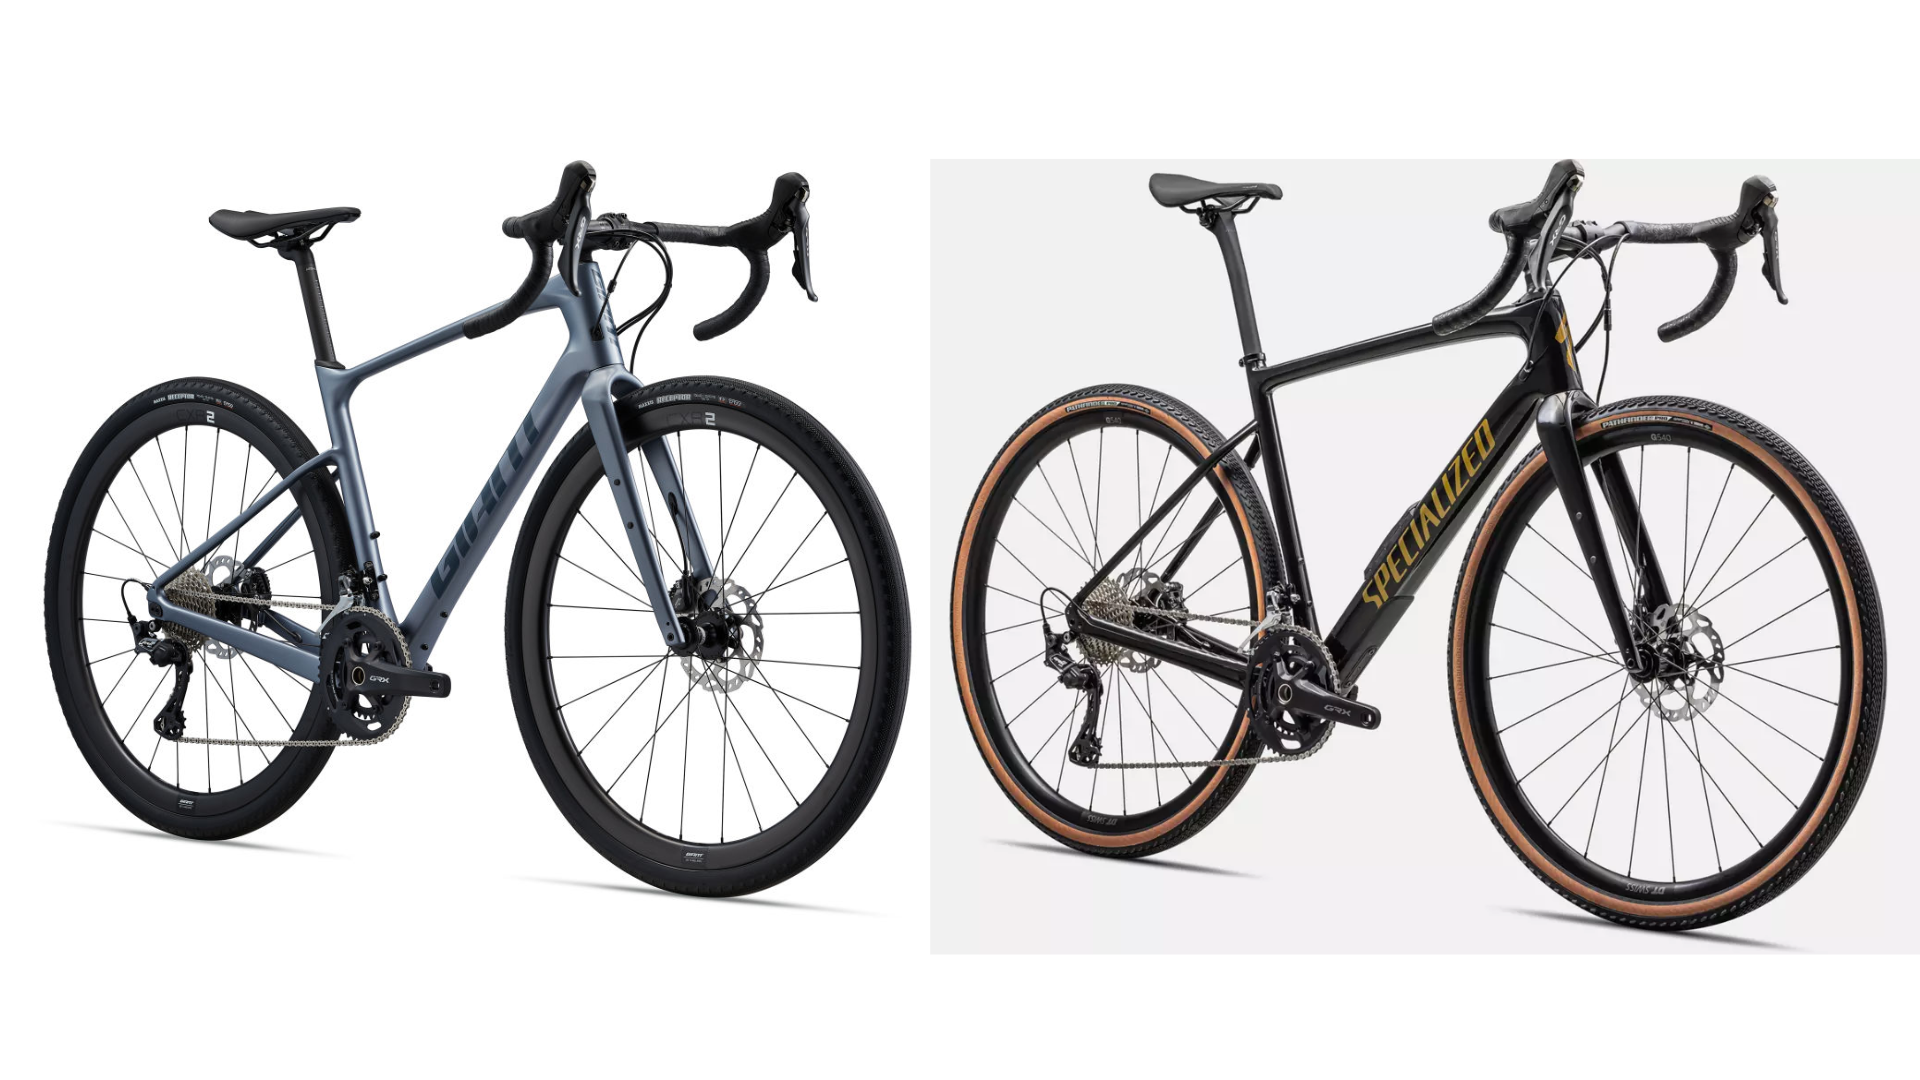
The Specialized Diverge Comp Carbon and the Giant Revolt Advanced 0 are two of the most popular gravel bikes on the market. Both bikes offer a great mix of performance, comfort, and versatility, making them ideal for a wide range of riders and riding conditions.
As you can see, the two bikes are very evenly matched. The Diverge has a slightly heavier frame and wheels, while the Revolt has a slightly higher tire clearance and more aggresive geometry. The Diverge also has the Future Shock 2.0 suspension system, which can help to smooth out rough terrain.
Key Differences
Frame storage:
The Specialized Diverge Comp Carbon has a SWAT door on the downtube that can be used to store small items, such as a tube or multi-tool.
Components:
The Specialized Diverge Comp Carbon comes with a higher-quality component set than the Giant Revolt Advanced 0. For example, the Diverge Comp Carbon comes with a Shimano Ultegra cassette, while the Revolt Advanced 0 comes with a Shimano CS-HG800 cassette. The main difference between the two cassettes is the material used for the cogs. The Shimano CS-HG800 cassette uses steel cogs, while the Shimano Ultegra cassette uses titanium cogs. Titanium cogs are lighter than steel cogs, which can give you a slight performance advantage.
Geometry:
The Specialized Diverge Comp Carbon has a slightly more relaxed geometry than the Giant Revolt Advanced 0. This means that the Diverge Comp Carbon is more comfortable to ride over long distances. The revolt has a more aggresive geometry which leans more towards the racing side of gravel.
Which bike should you choose?
The best bike for you will depend on your individual needs and preferences. If you are looking for a lightweight and fast gravel bike, the Giant Revolt Advanced 0 is a great option. If you are looking for a bike with a bit more tire clearance and comfort, the Specialized Diverge Comp Carbon is a good choice.
If you are still not sure which bike is right for you, I recommend taking both bikes for a test ride! This will give you a chance to experience the different features and ride qualities of each bike and decide which one is the best fit for you.
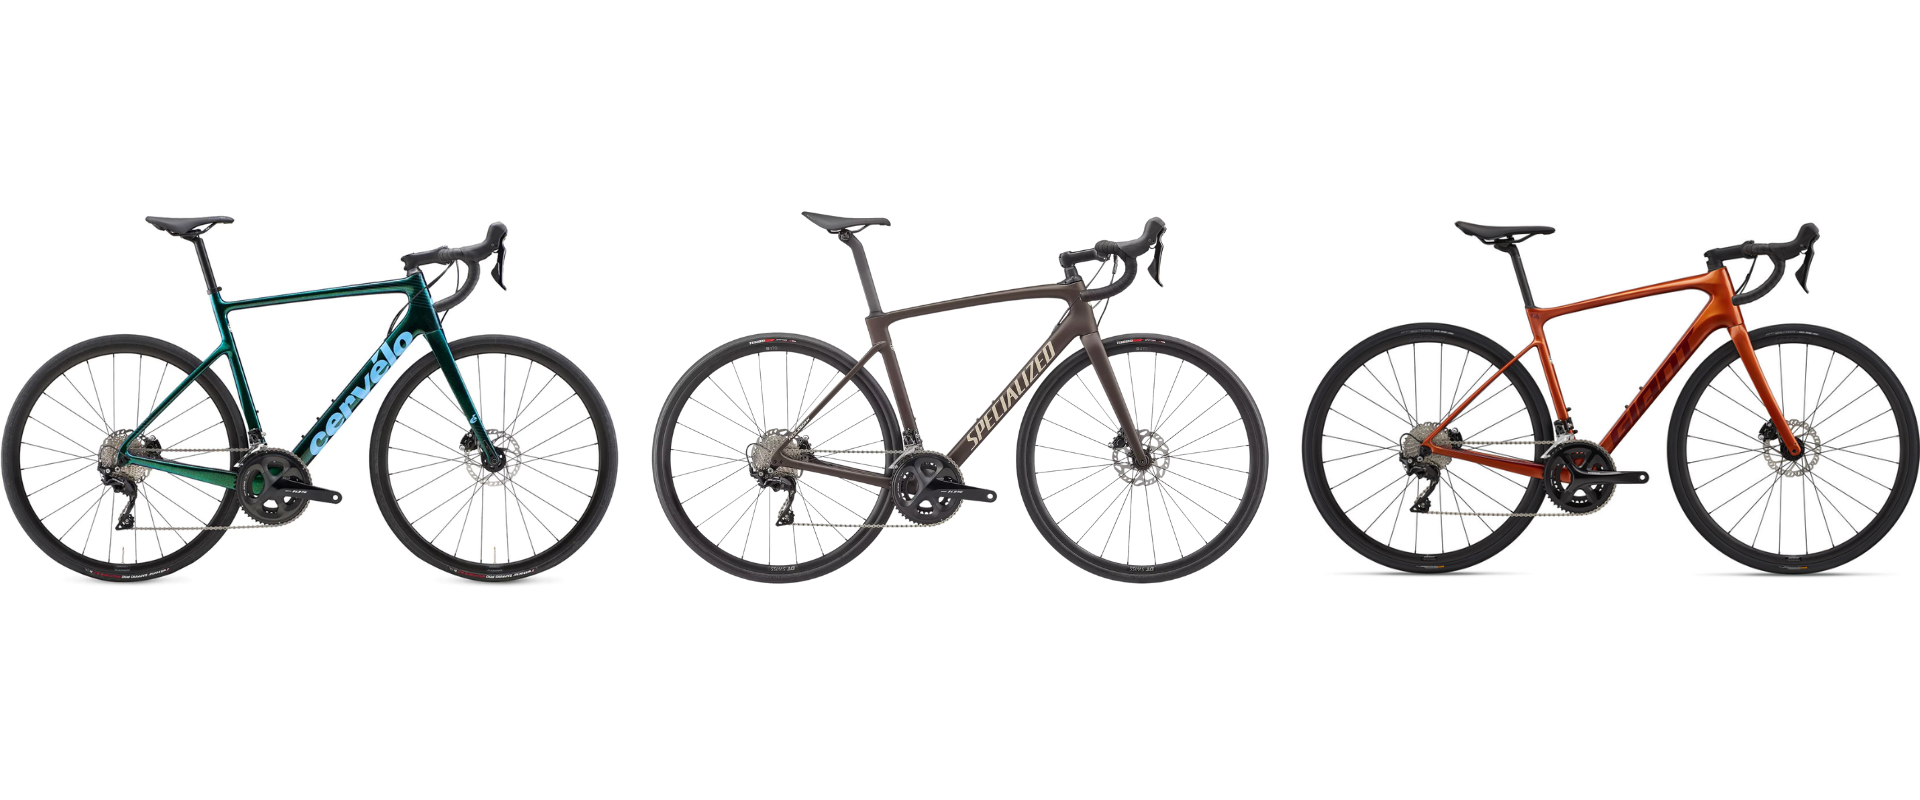
For riders who’ve clocked in some serious pedal time and know their bikes inside out, the world of endurance road bikes offers a balance between performance and comfort. In this in-depth comparison, we’re pitting three contenders against each other: the Cervelo Caledonia 105, Specialized Roubaix Sport, and Giant Defy Advanced 2. Let’s dissect the nuances and identify where each bike truly shines.
Cervelo Caledonia 105
The Cervelo Caledonia 105 is a versatile machine that gracefully blurs the line between road and gravel. Its standout features include:
Tire Clearance Edge: With a max tire clearance of 34mm, the Caledonia is primed for diverse terrains. If you’re keen on exploring gravel paths and roads less traveled, its tire clearance offers the flexibility you need.
Balanced Geometry: The Caledonia boasts a geometry that’s performance-oriented yet comfortable. This makes it an excellent choice for those who want speed without compromising on long-distance comfort. The Caledonia has a slightly longer reach than the Roubaix and the Defy by about 1-2 mm and has the shortest stack of the group.
Carbon Craftsmanship: Constructed from lightweight carbon fiber, the frame promises an agile yet responsive ride, making uphill climbs and speedy sprints equally enjoyable.
Specialized Roubaix Sport
The Specialized Roubaix Sport champions a technological approach to endurance cycling. Here’s where it holds the edge:
Suspension Innovation:The Future Shock suspension system is the Roubaix Sport’s ace in the hole. With 20mm of travel, it delivers an edge on rough terrains, ensuring a smoother and more controlled ride.
Frame Engineering: The perfect balance of aerodynamics, light overall weight via a FACT 10r carbon construction, compliance, and Rider-First Engineering. To go along with the new frame, they also developed a totally-new S-Works Pavé seatpost.
Comfort-Centric Geometry: If long hours in the saddle are your calling, the Roubaix Sport’s endurance geometry with an upright riding position becomes your edge, reducing fatigue on extensive rides. The Roubaix can fit up to 33mm tires.
Giant Defy Advanced 2
The Giant Defy Advanced 2 embodies endurance-focused engineering. Here’s where it forges its own path:
Max Tire Clearance: With a tire clearance of up to 35mm, the Defy Advanced 2 truly stands out in its ability to tackle various terrains. Wider tires translate to better traction and control, giving you an edge on varying surfaces. Of the group, Defy has the widest tire compliance.
Integrated Comfort System: The Defy Advanced 2’s D-Fuse seatpost and handlebar system deliver enhanced comfort. If comfort ranks high on your list, this is where the Defy Advanced 2 gains an upper hand.
Endurance Geometry: Designed to prioritize comfort for longer journeys, the Defy Advanced 2’s geometry offers an edge for riders who value hours in the saddle over aggressive speed.
As you evaluate these contenders, remember that each bike has its unique strengths, tailored for different riding styles and preferences. The Cervelo Caledonia 105 shines with its versatility and tire clearance, the Specialized Roubaix Sport introduces suspension and frame innovations, and the Giant Defy Advanced 2 excels in tire clearance and an integrated comfort system.
Factor in your preferred terrains, riding ambitions, and the features that resonate with you most. Ultimately, it’s about finding the bike that aligns perfectly with your cycling aspirations and fits! Happy cycling, and may your rides be as remarkable as the choices you make!
Cycling is more than just a recreational activity; it’s a great way to stay fit and maintain a healthy lifestyle. Whether you enjoy leisurely rides through scenic landscapes or intense riding sessions, the benefits to your body and mind are abundant. One of the key factors that grab the interest of many fitness enthusiasts is the number of calories burned while cycling. Let’s delve into the science behind calorie burn during cycling and explore how this enjoyable activity can help you shed those unwanted pounds
The Science of Calorie Burn
The number of calories burned during any physical activity depends on several factors, including weight, intensity, duration, and individual metabolism. Cycling is considered a moderate-to-vigorous aerobic activity, making it an efficient calorie-burning exercise.
When you cycle, your leg muscles continuously power the bike and propel you forward. The effort involved in pedaling, coupled with the resistance from the terrain or a stationary bike’s settings, determines the intensity of the exercise. As you increase your cycling speed or tackle more challenging routes, your body will require more energy, leading to higher calorie expenditure.
Calorie Burn Rate
According to a study done by Harvard, a 155-pound person cycling at a moderate pace of about 12-14 miles per hour can expect to burn approximately 260-350 calories in 30 minutes. For those weighing 185 pounds, the calorie burn increases to around 310-420 calories during the same duration.
The calorie burn rate can significantly vary based on factors like body composition and fitness level. Additionally, stationary bikes with adjustable resistance settings or outdoor cycling routes with varying terrains can affect the intensity and, consequently, the number of calories burned.
Benefits of Cycling
Apart from being an excellent calorie-burning activity, cycling boasts an array of health benefits that make it a popular exercise choice for people of all ages. Some of the key advantages include:
Cardiovascular Health: Regular cycling helps improve cardiovascular health by strengthening the heart and increasing blood circulation. This reduces the risk of heart disease, stroke, and hypertension.
Muscle Tone: Cycling predominantly targets the muscles in the lower body, including the calves, thighs, and glutes, promoting muscle strength and tone.
Joint-Friendly: Unlike high-impact exercises, cycling is gentle on the joints, making it an ideal choice for individuals with joint issues or those who prefer low-impact workouts.
Stress Reduction: Engaging in cycling outdoors can have positive effects on mental health by reducing stress, anxiety, and depression.
Weight Management: As we’ve discussed, cycling helps burn calories, making it an effective tool for weight management and weight loss.
Cycling is not only a fun and enjoyable activity, but it also offers numerous physical and mental health benefits. The number of calories burned during cycling sessions makes it an excellent choice for those looking to shed pounds or maintain a healthy weight. Moreover, cycling is a versatile exercise that can be tailored to suit individual preferences and fitness levels.
Whether you prefer cycling solo through picturesque trails or joining a group for a community ride, remember to always prioritize safety by wearing proper protective gear and obeying traffic rules. So, hop on your bike and start pedaling your way to a fitter and healthier you! Happy cycling!
Are you an avid cyclist seeking to explore new horizons on your trusty steed? Traveling with your bike opens up a world of thrilling possibilities, allowing you to embark on exciting cycling adventures in distant lands. However, navigating air travel with a bike can be a daunting task without proper preparation. Fear not! In this blog post, we will guide you through the best way to pack your bike for a flight, essential tools to bring along, travel tips, airline baggage fees, prohibited items, and other valuable tips to make your cycling vacation an unforgettable experience.
Packing Your Bike for a Flight
To ensure your bike arrives safely and ready for action at your destination, proper packing is crucial.
Disassembly: Remove the pedals, saddle, and handlebars. Deflate the tires partially but not entirely, as changes in cabin pressure may cause damage.
Protection: Use padding to safeguard delicate parts. Secure the frame and fork with protective covers or pipe insulation.
Packaging: Place your bike in a sturdy bike box or invest in a purpose-built bike travel case. Utilize foam or bubble wrap to secure loose parts.
Labeling: Attach a clear identification label to your bike case, including your name, contact details, and flight information.
Essential Tools to Bring Along:
Multi-tool: Carry a compact, bike-specific multi-tool to handle minor repairs and adjustments.
Tire Repair Kit: Pack a puncture repair kit and spare inner tubes to address any unforeseen flats.
Pump: A portable pump that fits your bike’s valve type is essential for inflating tires post-flight.
Lubricants and Cleaning Supplies: Keep your bike in top condition by bringing small amounts of chain lubricant and cleaning supplies.
Travel Tips for Traveling with a Bike
Research Airline Policies: Familiarize yourself with the specific rules and regulations of the airline you’re flying with regarding bike transportation. Each airline may have different guidelines and fees.
Reserve Early: Many airlines have limited space for bike transportation, so make sure to reserve your spot in advance.
Protect Vulnerable Components: Remove the derailleur hanger and store it separately to prevent damage during transport. It’s worth purchasing an extra one too!
Secure Loose Items: Tape or zip-tie loose parts, such as pedals, to the frame to prevent them from getting lost in transit.
Cheapest Airline Baggage Fees for Bikes
The following are some budget-friendly airlines with reasonable bike baggage fees (as of July 2023). However, it’s crucial to check for updates and additional charges directly with the airline before booking your trip:
JetBlue: Bag Cost +$100 fee each way (If the bicycle and container are less than 50 pounds and 62 linear inches (length + width + height) there will be no bike fee.
Standard checked bag fees apply up to 50 lbs / 23 kgs and 126 in / 320 cm (length + width + height) and standard overweight fee applies from 51 lbs / 23 kgs to 70 lbs / 32 kgs.
Please note that airline policies can change, so it’s vital to verify the most up-to-date information directly with the airline.
Prohibited Items and Other Tips
While the majority of your bike-related items can be transported, there are a few restrictions to keep in mind:
CO2 cartridges: Airlines prohibit carrying CO2 cartridges in checked baggage due to their compressed gas content. You can usually purchase these at your destination instead.
Batteries: Check the airline’s guidelines for lithium-ion batteries used in electronic devices, as they may have specific restrictions.
Additional tips:
Pack essential clothing, helmet, and shoes in your main luggage.
Remove any accessories like lights, GPS devices, and bells from your bike before packing.
Consider adding extra padding to the bike bag/box for added protection.
Arrive at the airport with ample time to check-in and allow for any unforeseen delays.
Venturing on a vacation with your bike via air travel opens up a world of incredible cycling destinations. By properly packing your bike, bringing essential tools, understanding airline policies, and adhering to the regulations, you can embark on an unforgettable two-wheeled adventure. Remember to plan ahead, stay organized, and enjoy the freedom of exploring new places with your trusty bicycle by your side. Bon voyage and happy cycling!
Are you thinking about getting a bike with electronic shifting? Join the club! The bike industry throws a new technological innovation at us every once in a while. I’m going to go out on a limb and say that electronic shifting is that “thing”. Usually, these innovations are offered only at the highest price points to start. As the technology matures, it trickles down to more affordable options. We have seen this happen relatively quickly with electronic shifting, with many mid-range bikes coming stock with an electronic drivetrain. Whether you are thinking about upgrading your drivetrain or getting a new bike, let’s talk about whether or not electronic shifting makes sense for you.
Performance and Precision
Electronic shifting systems, like Shimano Di2 or SRAM eTap/AXS, offer incredible shifting precision and accuracy. The electronic components ensure consistent and smooth gear changes, even under challenging conditions. Electronic shifting can provide an edge over mechanical if you prioritize precise and reliable shifting, especially in demanding situations like racing or fast-paced group rides.
Ease of Shifting
Electronic shifting requires less effort compared to mechanical shifting. With the push of a button, the front and rear derailleurs effortlessly move to the desired gear. This can be particularly beneficial for riders with limited hand strength or those who prefer effortless and precise shifting.
Customization and Programmability
Electronic shifting systems often provide customizable options, allowing you to fine-tune the shifting behavior to your liking. You can adjust shifting speed, multi-shift settings, and even customize button functions. This level of customization can enhance your overall riding experience and adapt the shifting to your specific needs and preferences.
Maintenance and Durability
Electronic shifting systems generally require less maintenance than mechanical systems. They are less prone to cable stretch, require fewer adjustments, and often provide self-trimming functionality to maintain optimal shifting performance. However, electronic components may require occasional software updates, battery maintenance, and charging, which should be considered when evaluating the overall maintenance requirements.
Cost
Electronic shifting systems are typically more expensive than mechanical systems. The initial investment for electronic components, such as shifters, derailleurs, and batteries, is higher. Additionally, potential maintenance and battery replacement costs should be taken into account. If budget constraints are a significant factor, mechanical shifting may be a more cost-effective option.
Compatibility and Interchangeability
Electronic shifting systems are not universally compatible across different brands and group sets. Therefore, if you plan to upgrade or mix components in the future, it’s essential to ensure compatibility or consider the potential limitations of electronic shifting systems.
Personal Preference
Ultimately, your personal preference plays a crucial role. Some riders enjoy the tactile feedback and mechanical connection of traditional shifting systems, appreciating the mechanical “feel” of shifting. Others embrace the technological advancements and benefits of electronic shifting. Consider trying out both systems if possible to determine which one resonates with your riding style and preferences.
Electronic shifting offers precise, effortless, and customizable shifting performance, making it an attractive choice for many riders, especially those seeking optimal performance or enhanced comfort. However, it’s important to weigh the cost, maintenance, and personal preference factors before deciding. Ultimately, both mechanical and electronic shifting systems can provide a satisfying riding experience, so choose the option that aligns with your priorities and enhances your enjoyment on the bike.
When it comes to road cycling, choosing the right pedal system is crucial for optimizing your performance, comfort, and efficiency. Shimano, Look, Time, and Speedplay are among the most popular brands offering road bike pedal systems, each with its own unique features and benefits. Let’s compare these four prominent pedal systems to help you make an informed decision based on your riding style, preferences, and needs.
Shimano Pedals
Shimano is renowned for its high-quality cycling components, and their road pedal systems are no exception. The two main Shimano pedal systems for road cycling are:
Shimano SPD-SL: Designed with a three-bolt cleat interface, Shimano SPD-SL pedals provide excellent stability, wide platform support, and efficient power transfer. They offer various models to suit different budgets and riding preferences. Shimano pedals are known for their durability, ease of maintenance, and solid build quality.
Look Pedals
Look pedals have a rich heritage in the cycling world and are widely used by professional riders. Key features of Look pedals include:
Look Keo: Look Keo pedals feature a three-bolt cleat system and are recognized for their lightweight design, broad platform area, and efficient power transfer. They offer a range of models with varying levels of tension adjustment, float options, and composite or carbon body constructions. Look pedals are renowned for their reliability and smooth engagement/disengagement.
Time Pedals
Time pedals have a loyal following, especially among endurance cyclists and those seeking comfort. Notable features of Time pedals include:
Time Xpresso: Time Xpresso pedals utilize a two-bolt cleat system, known for their ease of use and low stack height. They provide a large pedal platform, secure cleat engagement, and multiple tension settings. Time pedals are favored for their adjustable float, lightweight construction, and user-friendly design.
Speedplay Pedals
Speedplay pedals offer a distinct design and functionality compared to other pedal systems. Their notable features include:
Speedplay Zero: Speedplay Zero pedals utilize a unique four-bolt cleat system and a dual-sided entry design. They offer a low stack height, adjustable float, and minimal weight. Speedplay pedals are highly regarded for their high-performance characteristics, customizable float and release tension, and aerodynamic advantages.
Factors to Consider
Cleat Compatibility: Ensure that the chosen pedal system is compatible with your cycling shoes’ cleats to achieve a proper fit and optimal performance.
Float and Tension Adjustability: Consider your preference for float (degree of rotational movement) and tension adjustment (release force) to find a system that suits your riding style and comfort needs.
Weight and Construction: Weight-conscious riders may prefer lighter pedal systems, while those seeking durability may prioritize robust constructions.
Maintenance: Some pedal systems are easier to maintain than others, with accessible bearings and rebuild kits available for servicing.
Price: Set a budget based on your requirements and the level of performance you desire, considering that higher-priced options often offer advanced features and lighter weights.
Selecting the ideal road bike pedal system among Shimano, Look, Time, and Speedplay depends on your preferences, riding style, and budget. Consider factors such as cleat compatibility, float and tension adjustability, weight and construction, maintenance requirements, and your desired price range. Remember to also try out different pedal systems if possible and seek advice from experienced cyclists or bike shop professionals. The right pedal system will ultimately enhance your riding experience by providing secure foot retention, efficient power transfer, and comfort throughout your road cycling adventures.


 Posted by Peak Cycles - BikeParts.com